Digital design is a lot more fun to learn when you have tools like Shadowify. A lot of people like this add-on for Photoshop because it makes pictures look better and is simple to use. With this tool, artists learn how to make shadows look real. That was a long time ago when you had to learn a lot about how light, shadow and depth work together to make computer art come to life. Things are very different now because of Shadowify, though. People now have a lot of options because it has sped up a process that used to take hours of careful work and only needs a few focused clicks. It is hoped that this change will make the design process better so that artists can concentrate on being creative and not on the specifics of shadow manipulation.
Shadowify changes how people think about and use design tools, so it’s important for more than just what it does. It’s not often that you can find something free that isn’t bad because many good sites have big paywalls. Shadowify doesn’t agree with this point of view because they think that great design tools should be available to everyone, from beginners to graphic designers who want to get better at what they do. The idea of “democratizing design” makes designers more willing to try new things and come up with new ideas. You can make your projects look more real by adding Shadowify to your toolbox. You can also join a movement that values creativity and ease of use. Shadowify is more than just a drawing tool. It’s also a way to use a tool that helps everyone understand and enjoy art more.
Overview of Shadowify
What does Shadowify do? Users of Adobe Photoshop can now add shadows to their work in a whole new way thanks to a brand-new tool. Adding Shadowify is hard but easy. It lets you make shadows that look real and can be changed with a few clicks. It can be hard to figure out how to quickly and easily add shadows to images, text, and pictures that make them look more real and give them more depth. That issue is fixed by this tool.
It was because artists couldn’t be creative with Photoshop’s shadow tools that the idea for Shadowify was born. When old techniques were used, shadows often looked fake or didn’t have the depth of real shadows. That’s why the people who made Shadowify wanted to make a tool that would let people make shadows with more freedom, control, and truth. Someone made a tool that not only simplified the process but also made the end result better.
Since it first came out, Shadowify has gone through a number of changes. These changes have made the app stronger, given it more features, and made it easier to use. This change process is over as of Shadowify V.1.0.1, the most recent version. You can change the noise level in small steps, save and load settings, and move the camera around to get the best view. Of these, these are some of the more advanced ones. Artists can make effects that are just right with these tools, so they don’t have to change things by hand, which takes time.
The best thing about Shadowify is how easy it is to use. Any artist can improve the look of their work by adding high-quality shadows that they can get for free. Shadowify has all the tools you need to make beautiful things, whether you’re a professional working on a tough project or an amateur who wants to give their work more depth.
From my own experience, I know how important it is to have the right tools on hand. When I worked on a project, I had to add real shadows to some product shots so that they looked more alive. The default options in Photoshop were giving me trouble, so I used Shadowify. It was like day and night. The process was surprisingly easy to understand, and I got the look I wanted in a lot less time.
Shadowify not only made my work look better, but it also made me feel better about how well I designed it. New ideas can be very strong in the world of digital design, as shown by Shadowify. Because it fixes a common graphic design problem in a simple way, it has become a useful tool for anyone who wants to give their work more depth and reality. And Shadowify keeps getting better. I can’t wait to see how it will change the ways people around the world can be creative.
Key Features of Shadowify

Thanks to its many powerful features, Shadowify has completely changed how artists make shadows in Photoshop. Each feature was made with the user in mind, so making realistic effects is not only possible, but also easy to do and quick. The main things that make Shadowify an important tool for digital artists and designers are going to be talked about next.
Natural Shadow Creation
The most important thing about Shadowify is that it can make shadows that look like real shadows in terms of their complexity and depth. This is made possible by sophisticated algorithms that take into account the subtleties of light and color. This lets users give their designs more depth in a way that feels real. There is a clear difference: shadows made with Shadowify blend in perfectly with their surroundings, making the picture better without drawing too much attention to themselves.
Stepwise Blur Functionality
The stepwise blur tool is one of the best things about Shadowify. This lets artists gradually change how blurry their shadows are, giving them the power to make a smooth change from sharp to soft shadows. This level of accuracy is necessary to make a scene seem real because it matches how shadows naturally spread out in the real world. Stepwise blur makes sure that your shadows look realistic at any size, whether you’re working on a close-up of a single object or a wide landscape.
360° Angle Control
Being able to change the position of shadows in all 360 degrees is huge. With this feature, designers can precisely change the direction of shadows so that they line up perfectly with the light source in their designs. Shadowify’s angle control makes it easy to sync your shadows for a smooth, realistic effect, no matter where the light is coming from (above, to the side, or somewhere in between).
Customizable Drop Shadows
Shadowify elevates drop shadows by offering extensive customization options. Users can adjust the size, distance, spread, and opacity of their shadows, allowing for a level of detail and precision that was previously hard to achieve. This flexibility is invaluable for projects that require a specific look or feel, as it enables designers to tailor their shadows to match the unique characteristics of their designs.
Flat and Realistic Shadows
Shadowify makes it easy to get both flat and lifelike shadows. The tool works with a lot of different design styles, from simple styles that like flat shadows to more complicated ones that need shadows that look like real life. Because it can do so many things, Shadowify is useful for any job, no matter what the style is.
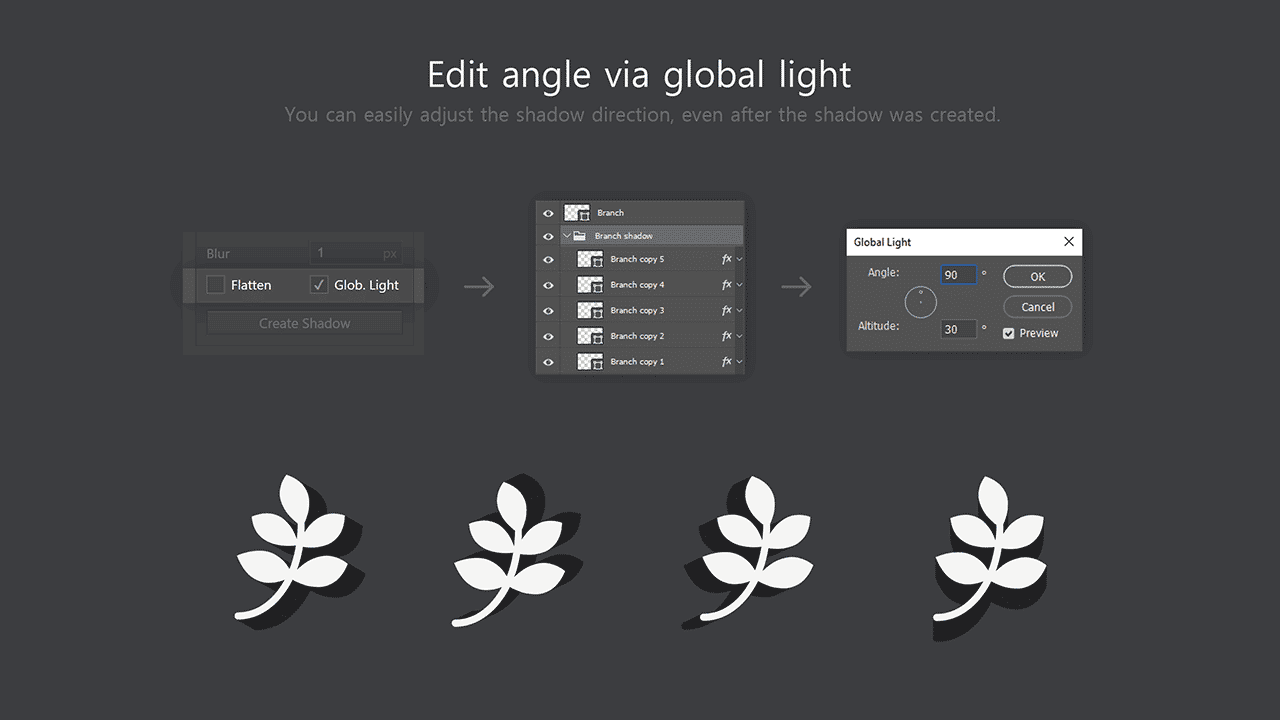
Editable via Global Light
Because Shadowify works with Photoshop’s global light tool, shadows that were made with it can be changed while still taking into account the scene’s overall lighting. This keeps your design looking natural and balanced because changes you make to the world light source will automatically show up in the shadows.
Gaussian & Motion Blur Controls
There are many blur settings in Shadowify, such as Gaussian blur and motion blur, that artists can use to make their shadows look just right. You can get any effect you want with these tools, from a soft haze to a lively sense of movement. Motion blur is useful for projects that need to make things look like they are moving or going fast. It also gives your designs a lively edge. For all of these reasons, Shadowify is an important tool for anyone who wants to make their works look like they have real shadows. It gives artists all the tools they need to bring their ideas to life because it can make natural shadows, keep them in line, and be changed to fit their needs. Shadowify has turned what used to be a scary job into a fun and artistic part of the design process.
Benefits of Using Shadowify in Graphic Design
By adding depth and reality through shadows, Shadowify can turn simple designs into stunning works of art. A well-placed shadow can make a huge difference—it brings things to life by giving them weight and meaning in their surroundings. I remember working on a project where the flat design didn’t feel alive until I added shadows with Shadowify. Suddenly, the whole layout felt alive and interesting to look at.
Saving Time with One-Click Shadow Creation
Shadowify’s ability to make shadows with just one click is a game-changer for artists who are short on time. With Shadowify, you don’t have to go through a bunch of steps to get a good shadow effect. This saves time that can be used for inspiration and improvement. This efficiency saved my life many times, and it let me finish projects on time without lowering the standard.
Increasing Design Options through Customizable Settings
Shadowify has a lot of settings that can be changed, so artists can try out a lot of different shadow effects that can be changed to fit any project. The blur, thickness, and angle can be changed in these settings to help artists get the best shadow look. This freedom has been very important to my work because it has let me go down artistic roads I didn’t think were possible before. For sure, Shadowify is more than just a tool; it’s an extension of the designer’s mind that helps them make better designs. Its past and current version show how useful it is to graphic designers, making it an important tool for making work that looks great and grabs people’s attention.
Pros & Cons of Shadowify
Alright, let’s dive into the ring and have a friendly match between Shadowify’s strengths and, well, let’s call them ‘areas for improvement.’ 🥊
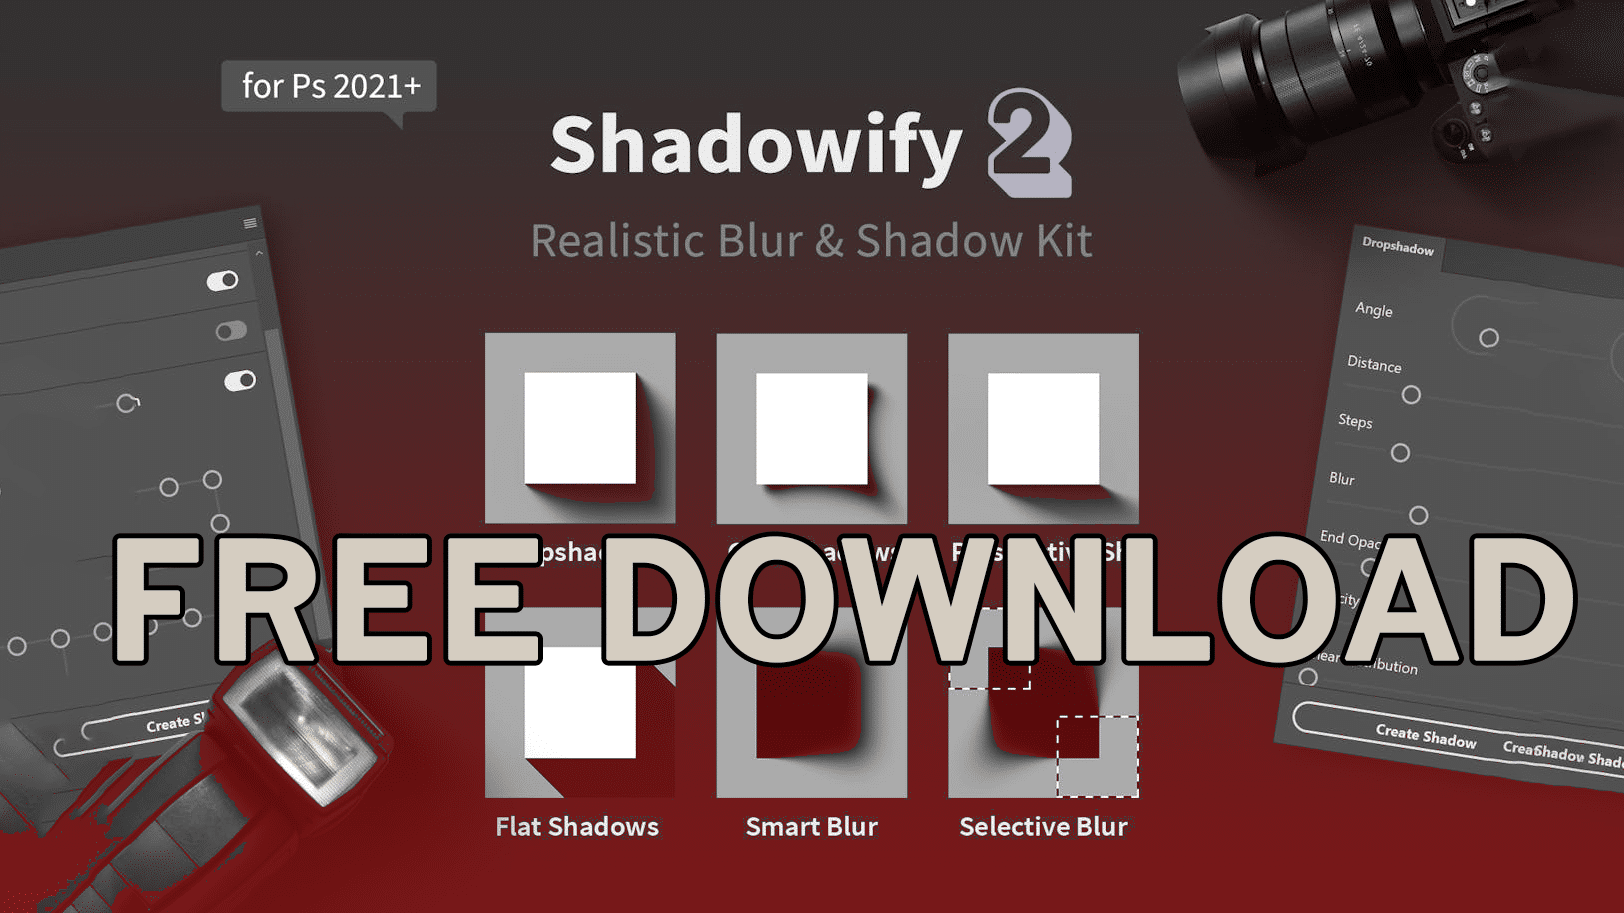
Pros of Shadowify:
- Realistic Shadows: Shadowify’s claim to fame is delivering shadows that look like they belong in the real world. No more ‘cut-and-paste’ shadows that stick out like a sore thumb.
- User-Friendly: It’s so user-friendly that even your grandma could probably master it. Easy sliders, clear buttons, and presets make your life simpler than a slice of pie.
- Save Your Favorites: Ever wished you could bookmark your favorite shadow settings? With Shadowify, you can! It’s like having a ‘Favorites’ list for your shadows.
- Versatility: Whether you’re into soft, dreamy shadows or sharp, edgy ones, Shadowify caters to your style. It’s the chameleon of shadow-making.
Cons of Shadowify:
- Photoshop Required: Okay, this isn’t really a con, but you do need Photoshop to use Shadowify. So, if you’re not in the Photoshop club, this one’s not for you.
- Not a Standalone App: You can’t use Shadowify as a separate application; it’s like a trusty sidekick for Photoshop.
- Learning Curve: While it’s super user-friendly, there might still be a tiny learning curve, especially if you’re new to Photoshop.
- Not for 3D Shadows: If you’re looking to create complex 3D shadows, you might need to explore other options.
That’s all there is to it, folks! Shadowify has some great features that make it a design wonder, but it also has some weird issues. You should use the tool that fits your needs and makes you feel good. And in case you’ve been waiting, “Free Download Shadowify” is almost here! Read on to find out how to use the shadow magic.
Minimum Computer Requirements:
| Requirement Type | Specification |
|---|---|
| Operating System | Windows 7, 8, 10 (64-bit) / macOS 10.12 (Sierra) and later |
| Photoshop Version | Adobe Photoshop CC 2015.5 and later |
| RAM | Minimum 4 GB (8 GB recommended) |
| Disk Space | At least 100 MB of free space for installation |
| Display | 1280×800 resolution with 16-bit color |
| Internet | Required for initial software activation and updates |
| Additional | Mouse or compatible pointing device |
How To Install Shadowify
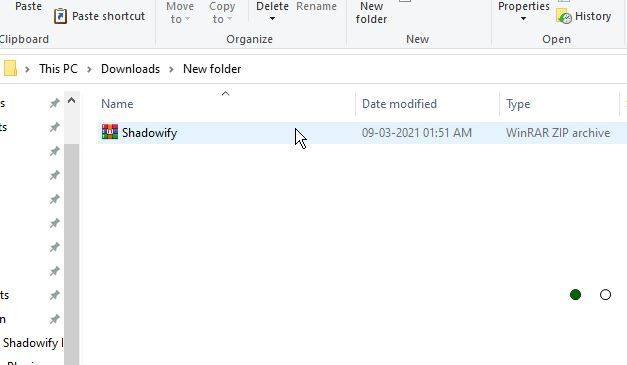
- Step 1: First things first, after you’ve downloaded the zip file, unzip it like you’re unwrapping a birthday present.
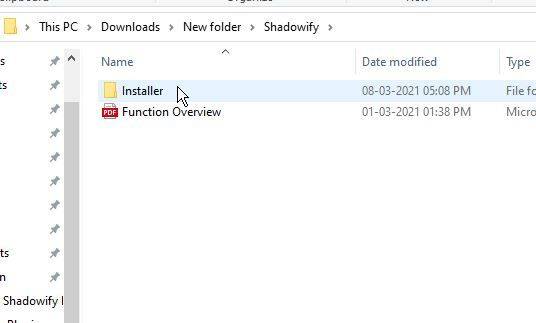
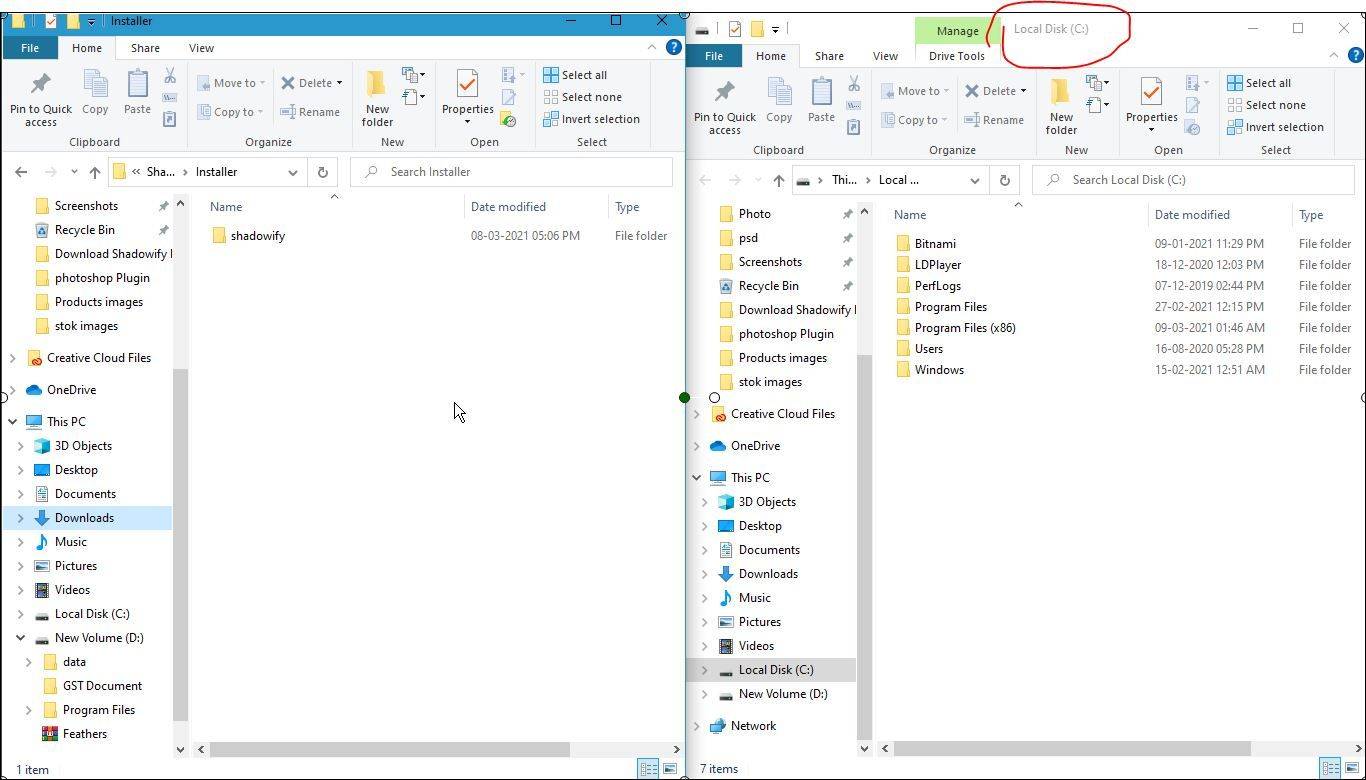
- Step 2: Inside, you’ll find a folder called ‘installer’ and some juicy info about the extension. Go ahead and open the ‘installer’ folder.
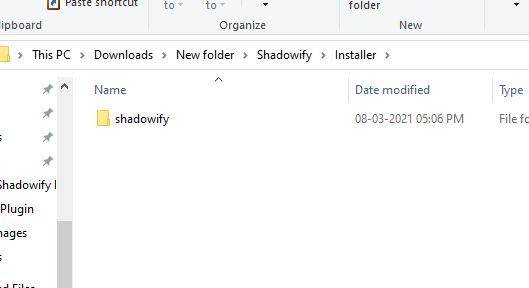
- Step 3: Behold, the mystical Shadowify folder! Simply copy it. Yes, it’s like picking up a treasure chest.
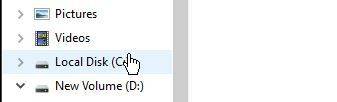
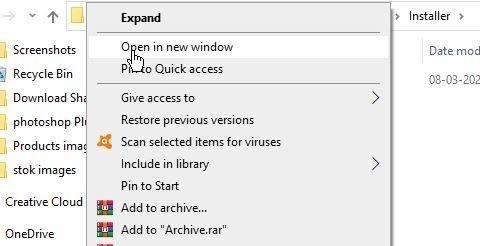
- Step 4: Now, right-click on your trusty ‘Local Disk’ and open it in a new window. It’s like peeking into a secret tunnel.
- Step 5: Have both the windows side by side, just like Batman and Robin, ready to save the day.
- Step 6: Click once on the address bar for ‘Local Disk’. It’s like putting a spotlight on the path ahead.
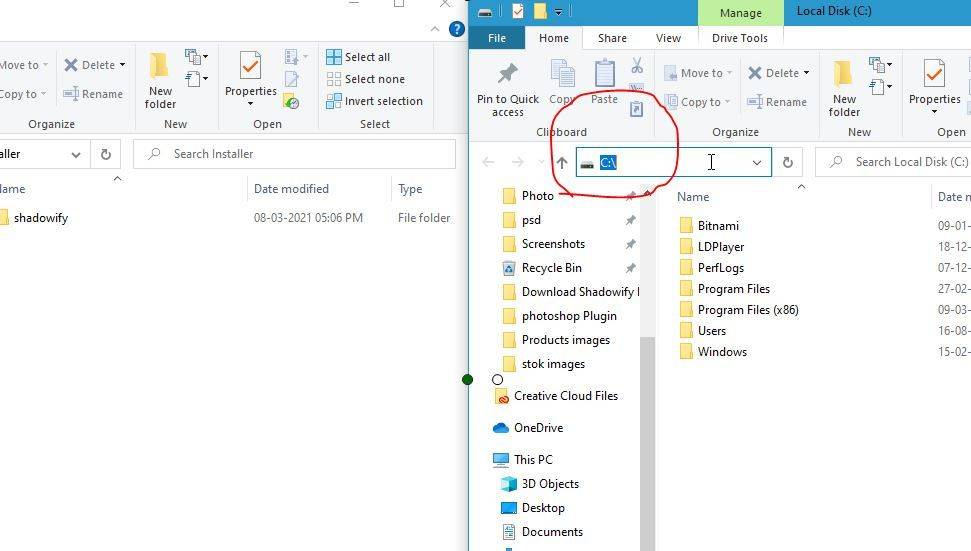
- Step 7: Now, here comes the magic spell: Copy this address –
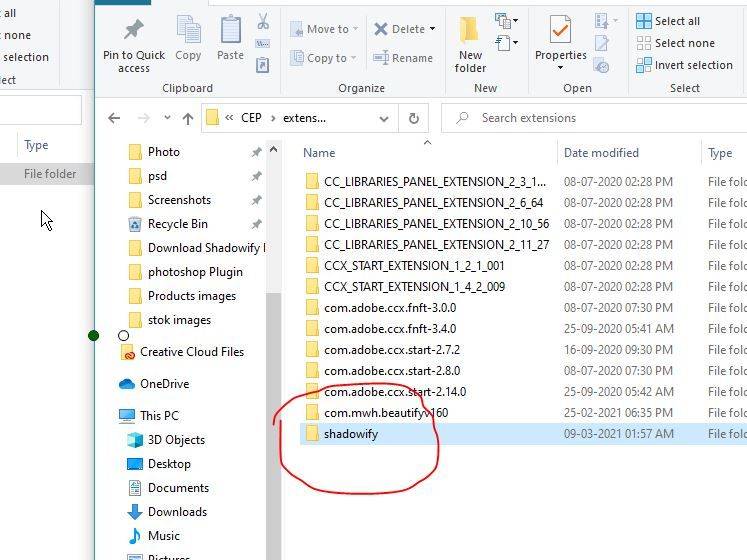
C:Program Files (x86)Common FilesAdobeCEPextensions– and paste it right there in the address bar. Then hit ‘Enter’. - Step 8: You’ve now entered the treasure chamber! Paste the Shadowify folder you copied earlier in this enchanted place.

- Step 9: If you’ve successfully hidden the treasure, you’re on the right track! But if Photoshop is already open, close it and give it a moment to catch its breath.
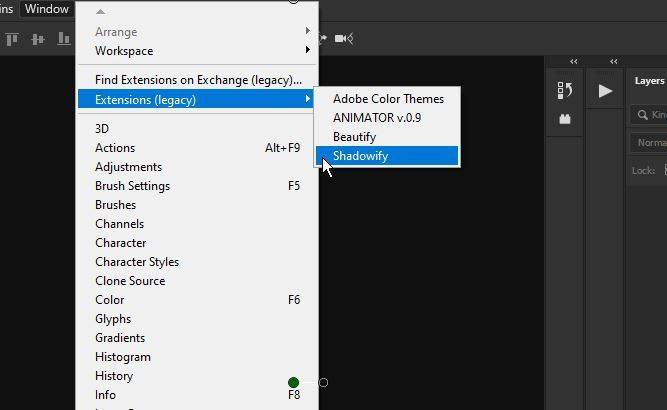
- Step 10: Drumroll, please! Reopen Photoshop like a grand reveal, and you’ll find Shadowify all set to bring your designs to life.
That's it! You now know how to install Shadowify magically! Get your design wand ready, because it's time to make some beautiful shadows. Don't forget our secret spell either: "Free Download Shadowify." It's your pass to the awesomeness of shadows! 🥄✨"
How to create shadow using Shadowify
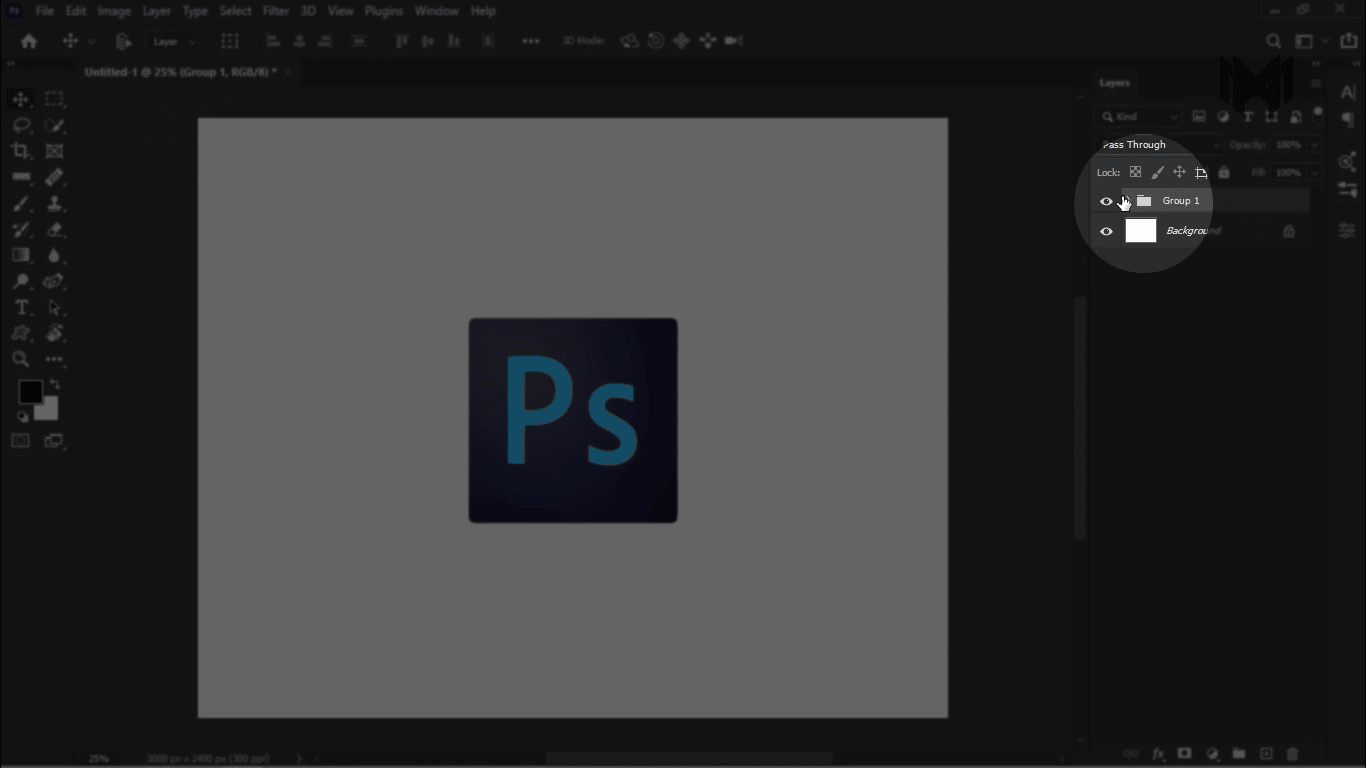
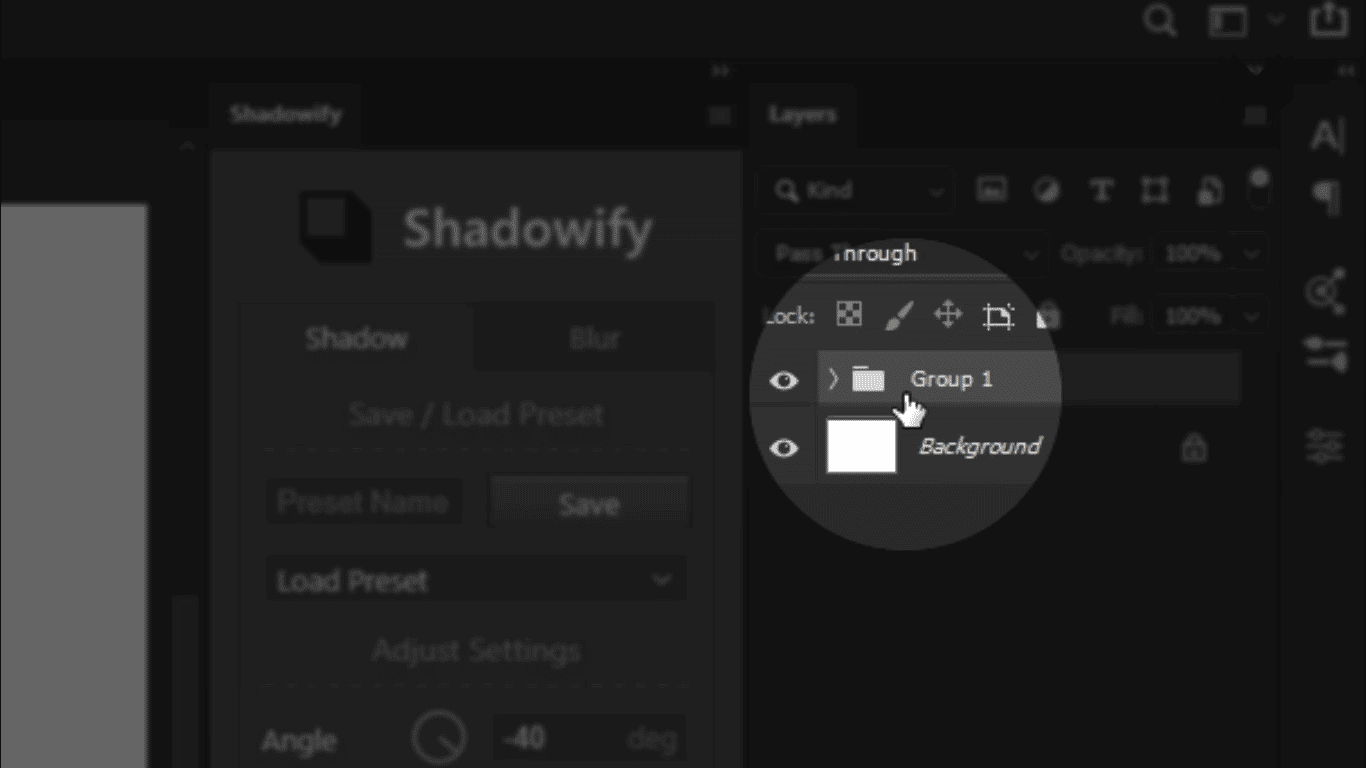
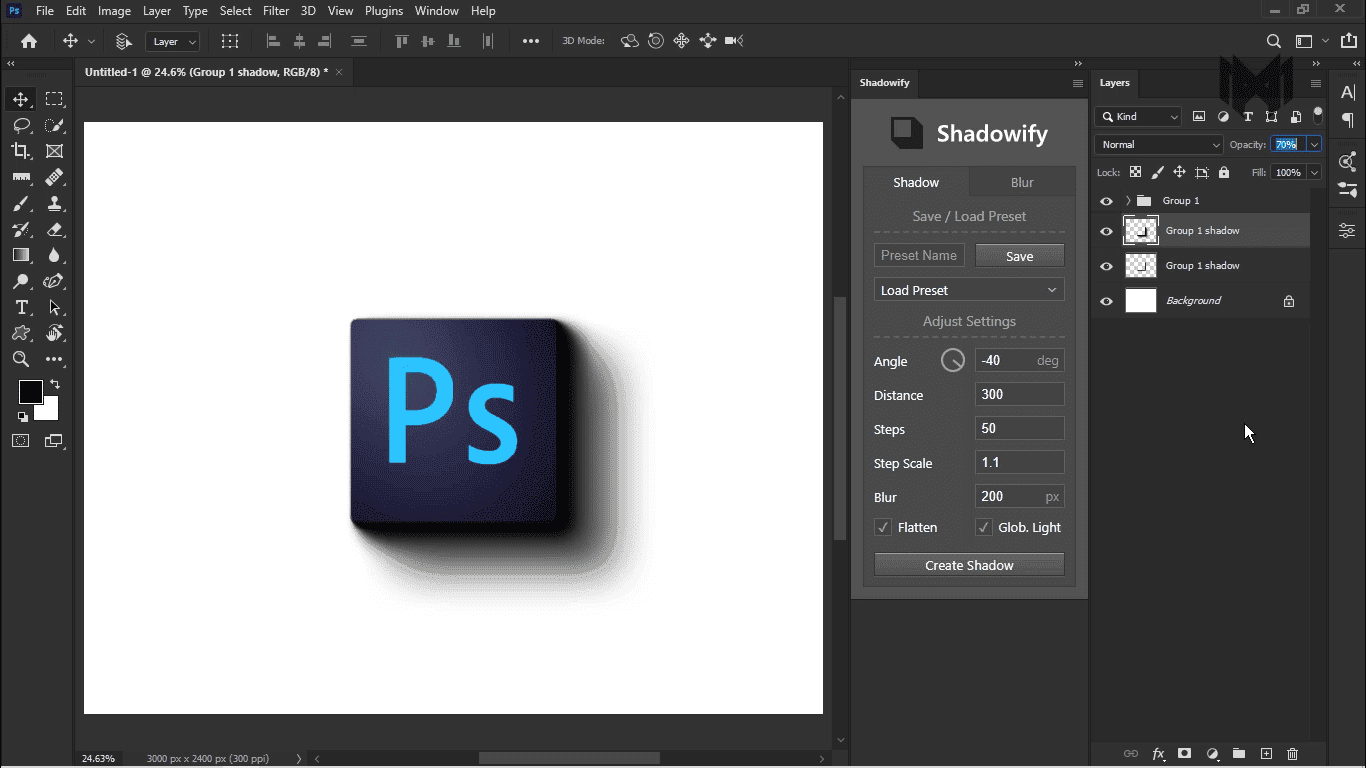
Step 1: Picture this - you've got your canvas with a white background and a snazzy Photoshop logo on top. But hey, don't think for a moment that Shadowify only works with folders; it's as flexible as a gymnast! You can use it on any layer.
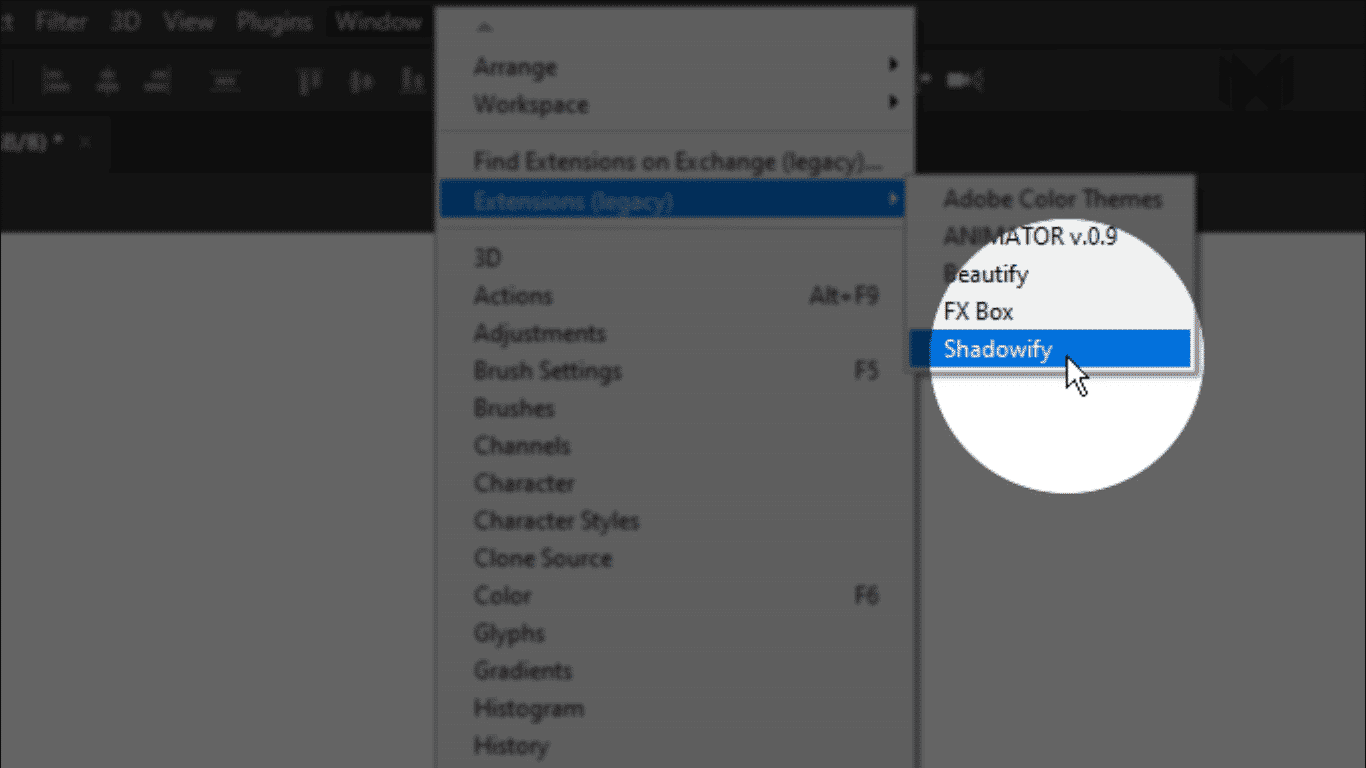
- Step 2: Let's kick things off by opening the Shadowify panel. Head over to 'Window' > 'Extensions' and select 'Shadowify.' It's like summoning a wizard to help with your shadows.
Angle
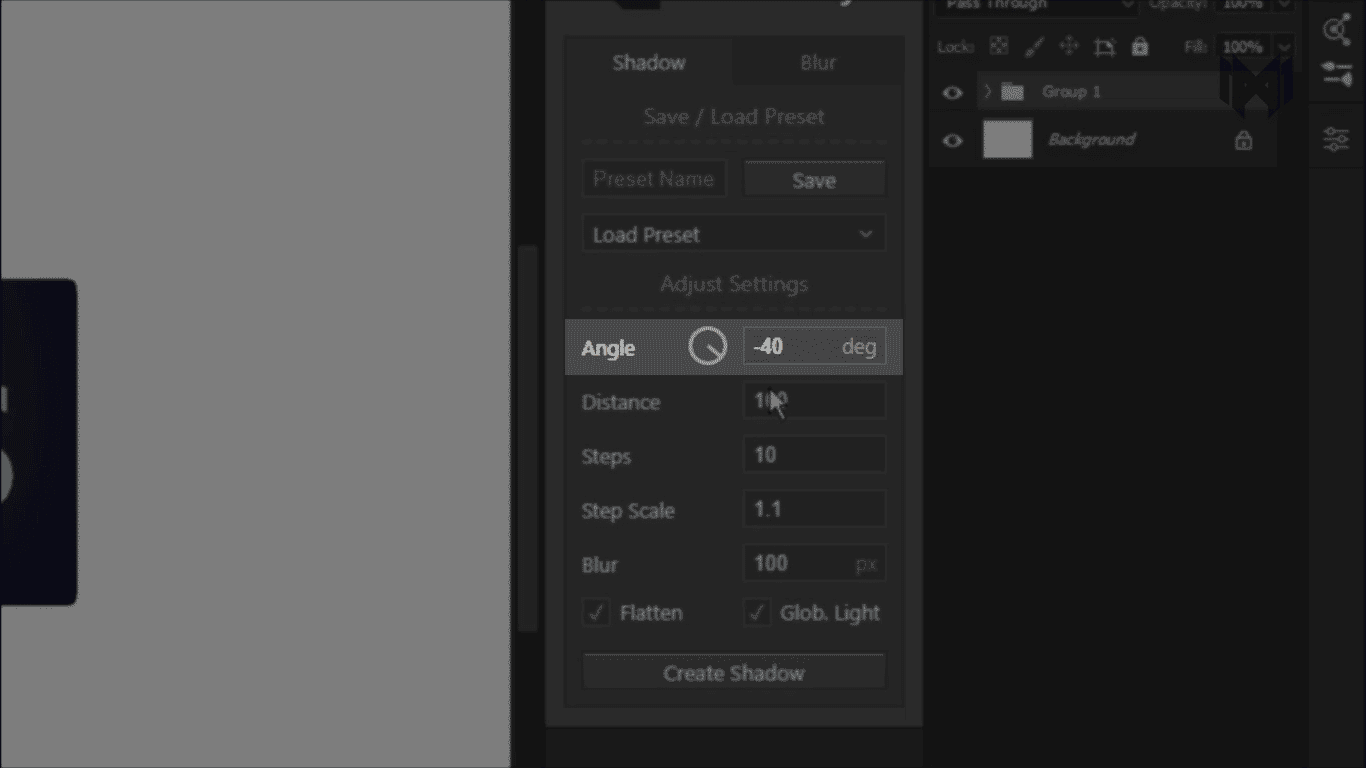
- Step 3 (Angle): First up, the angle. Decide which way your shadow should stretch. Imagine your light source and pick the perfect angle for your shadow to dance.
Distance
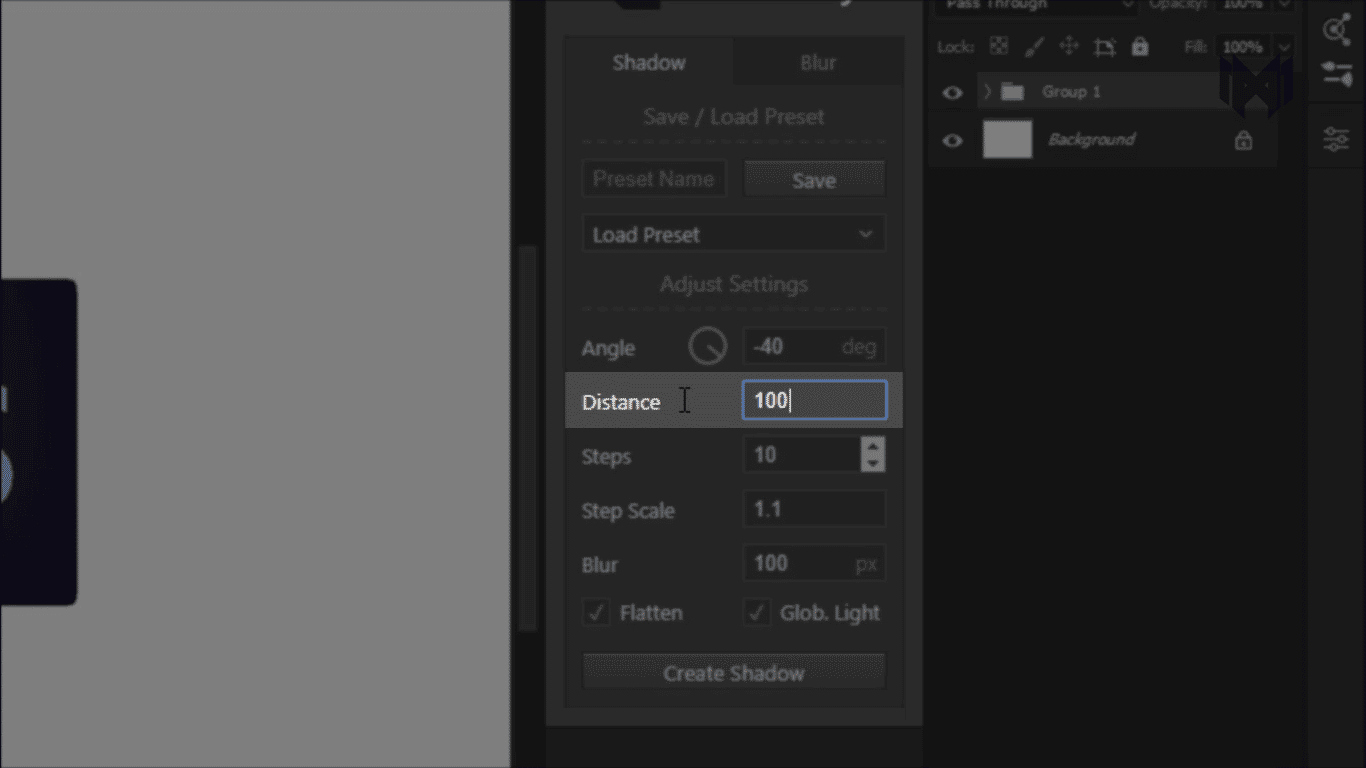
- Step 4 (Distance): Next, we tackle the distance. How far should your shadow reach? Think of it like a stretch limo for your shadow.
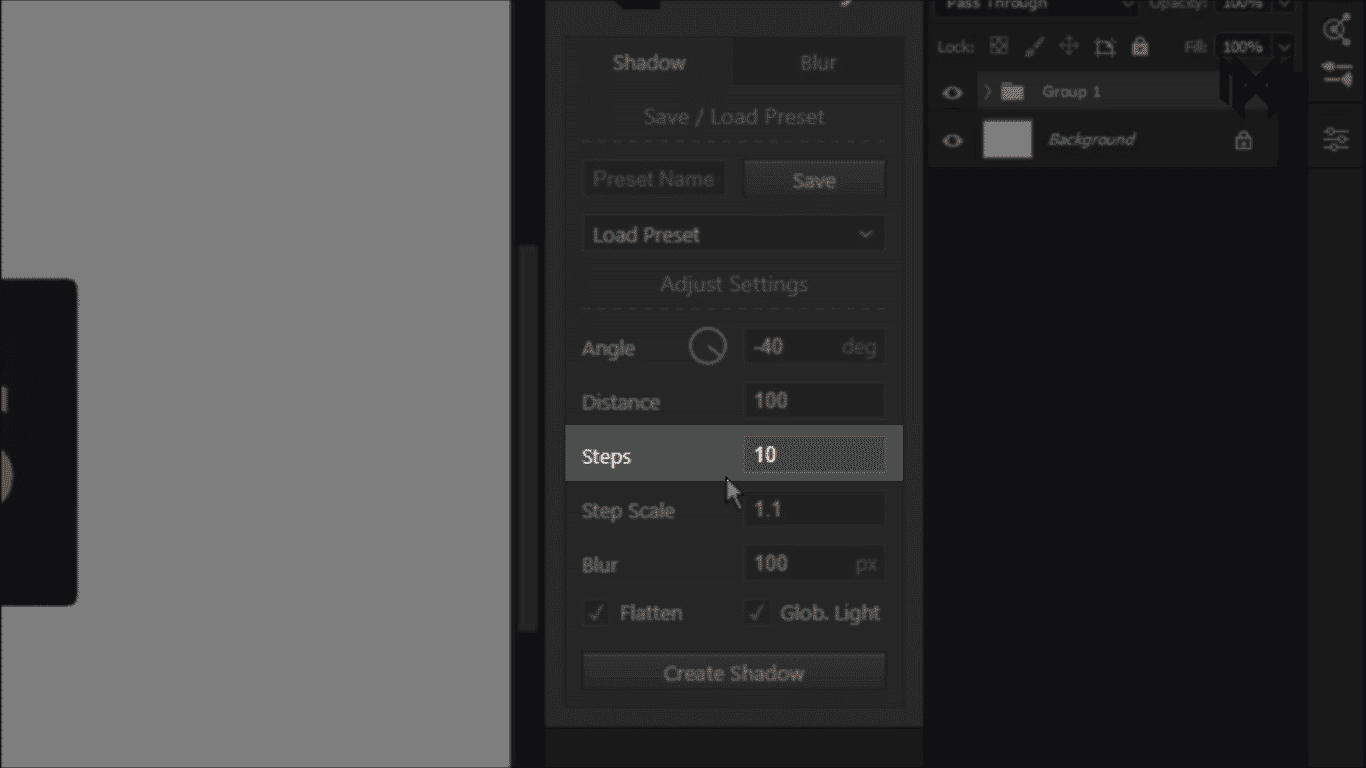
Steps
- Step 5 (Steps): Here's where the fun begins - steps! This is where you decide how many mini-shadows dance inside your main shadow. The more steps, the fancier the dance party!
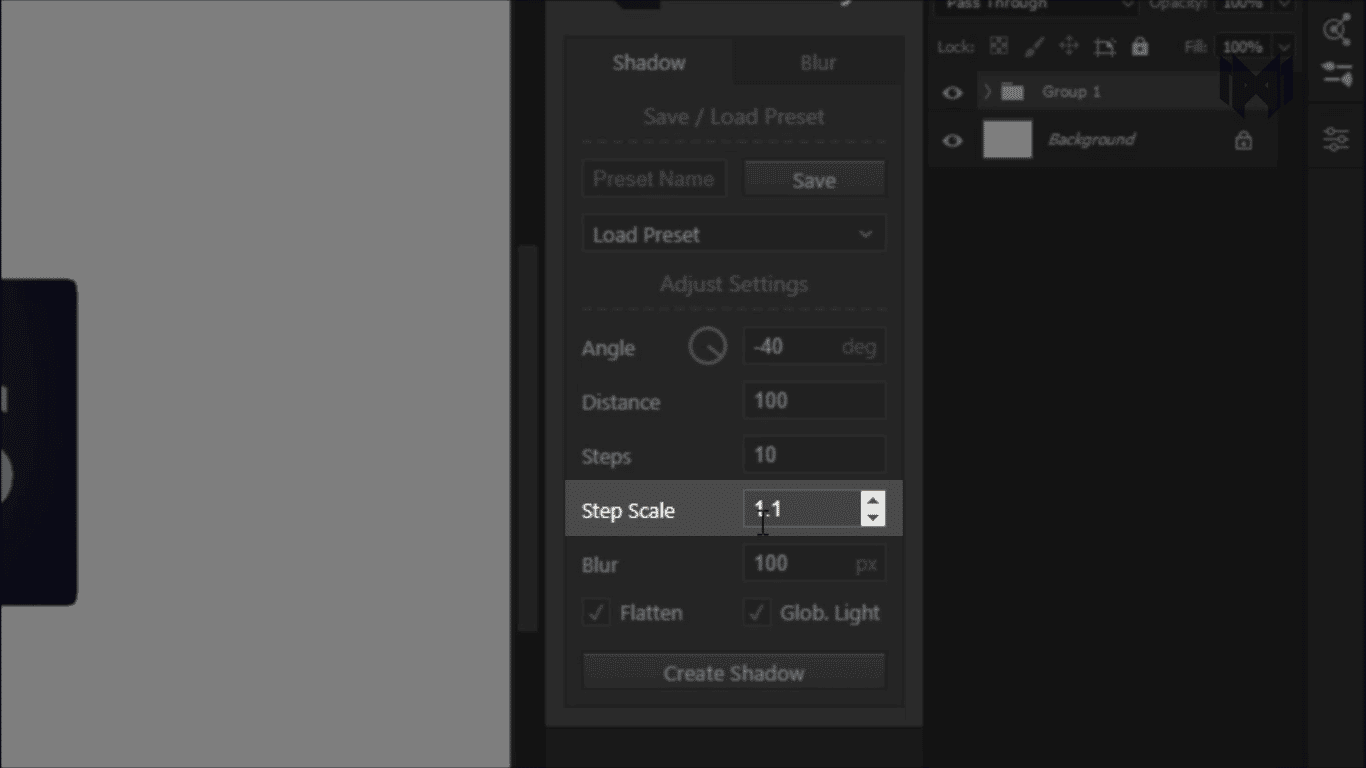
Steps Scale
- Step 6 (Steps Scale): Steps scale is all about how many times each shadow inside is smaller than the previous one. It's like a shadow hierarchy.
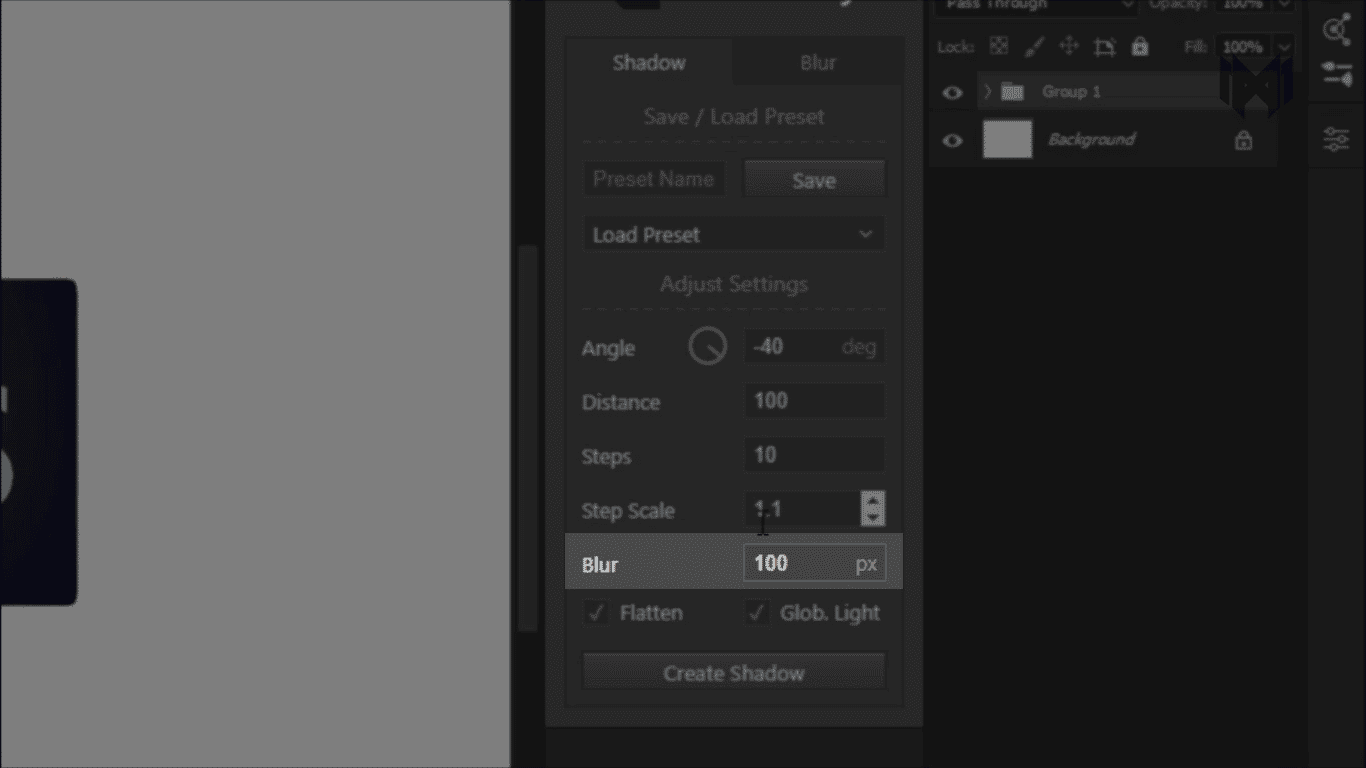
Blur
- Step 7 (Blur): Want that dreamy, 'is this real?' look? A larger blur value is your ticket to shadowy realism.
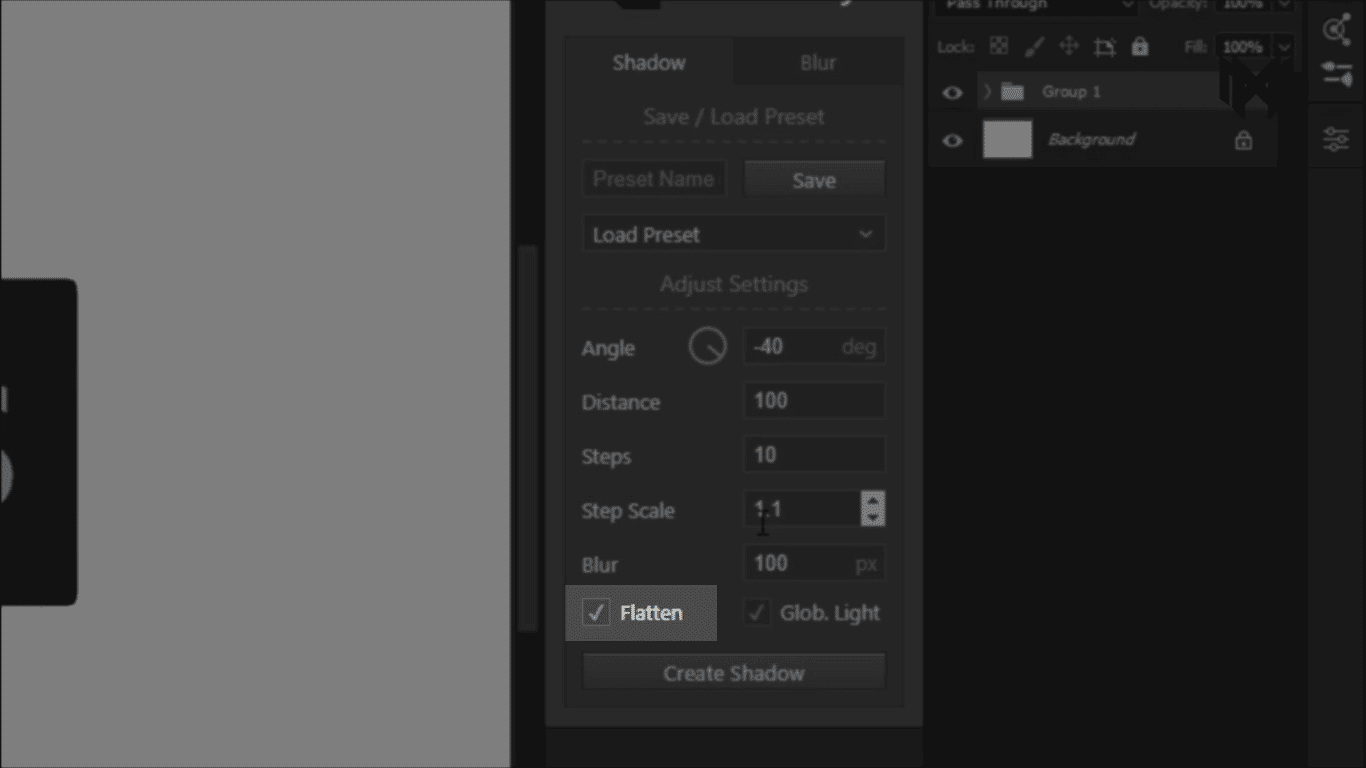
Flatten
- Step 8 (Flatten): Now, you have a choice. If you're feeling like a minimalist, check 'Flatten,' and all your shadow layers will be one big happy family. If not, leave it unchecked, and they'll form a layer group.
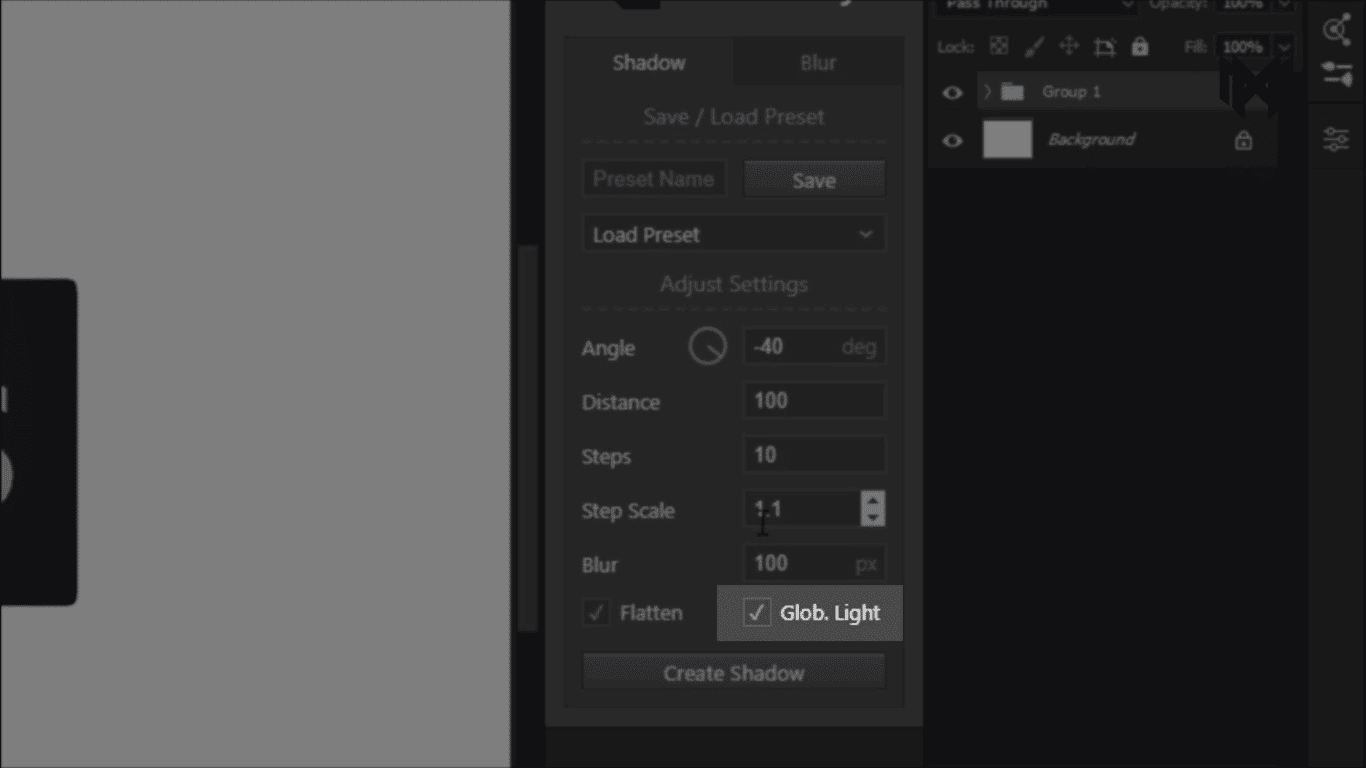
Global Light
- Step 9 (Global Light): Feel like a lighting director? Check 'Global Light.' This lets you adjust the angle and height of the light source. It's like playing with the sun and shadows!
- Step 10: Make sure you've got the layer you want to give a shadow selected.
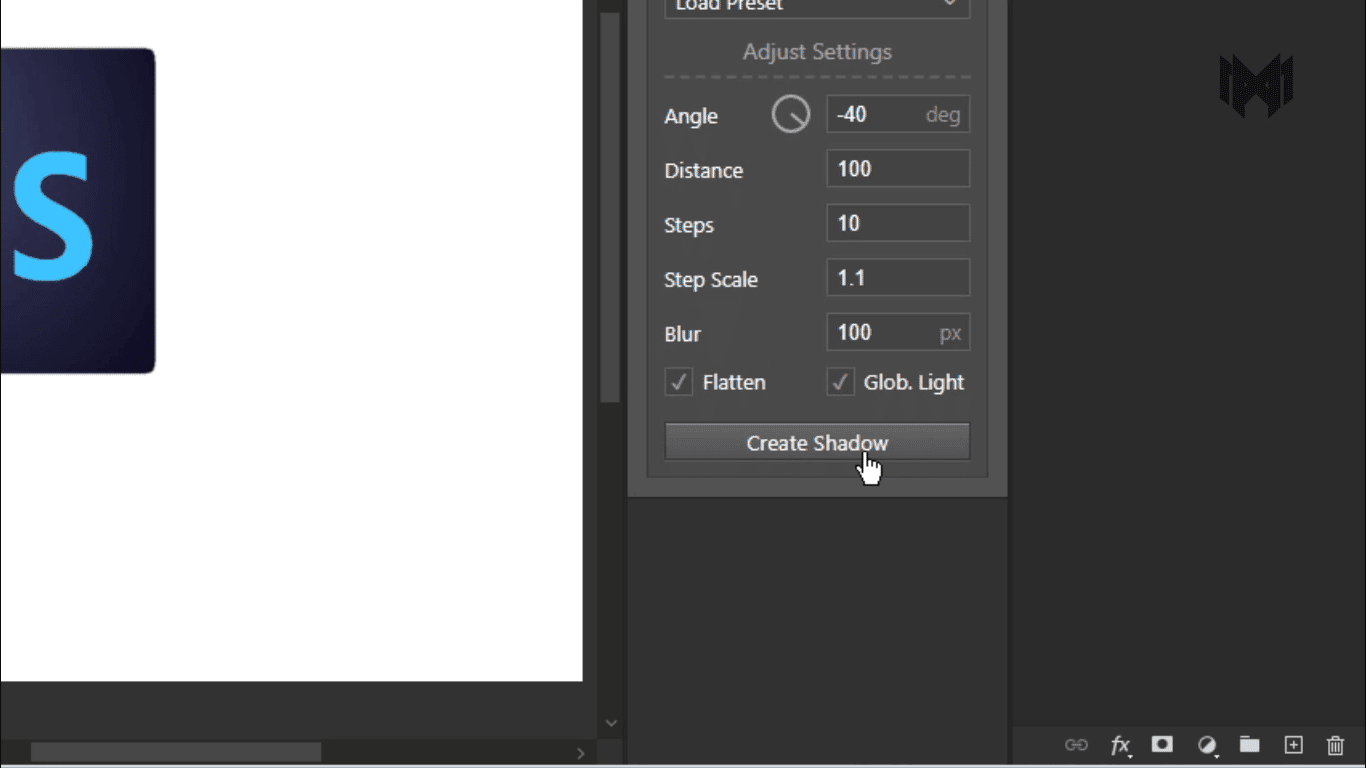
Step 11: Ready to bring your shadow to life? After setting all your values, hit 'Create Shadow.' But wait, that's not the end!
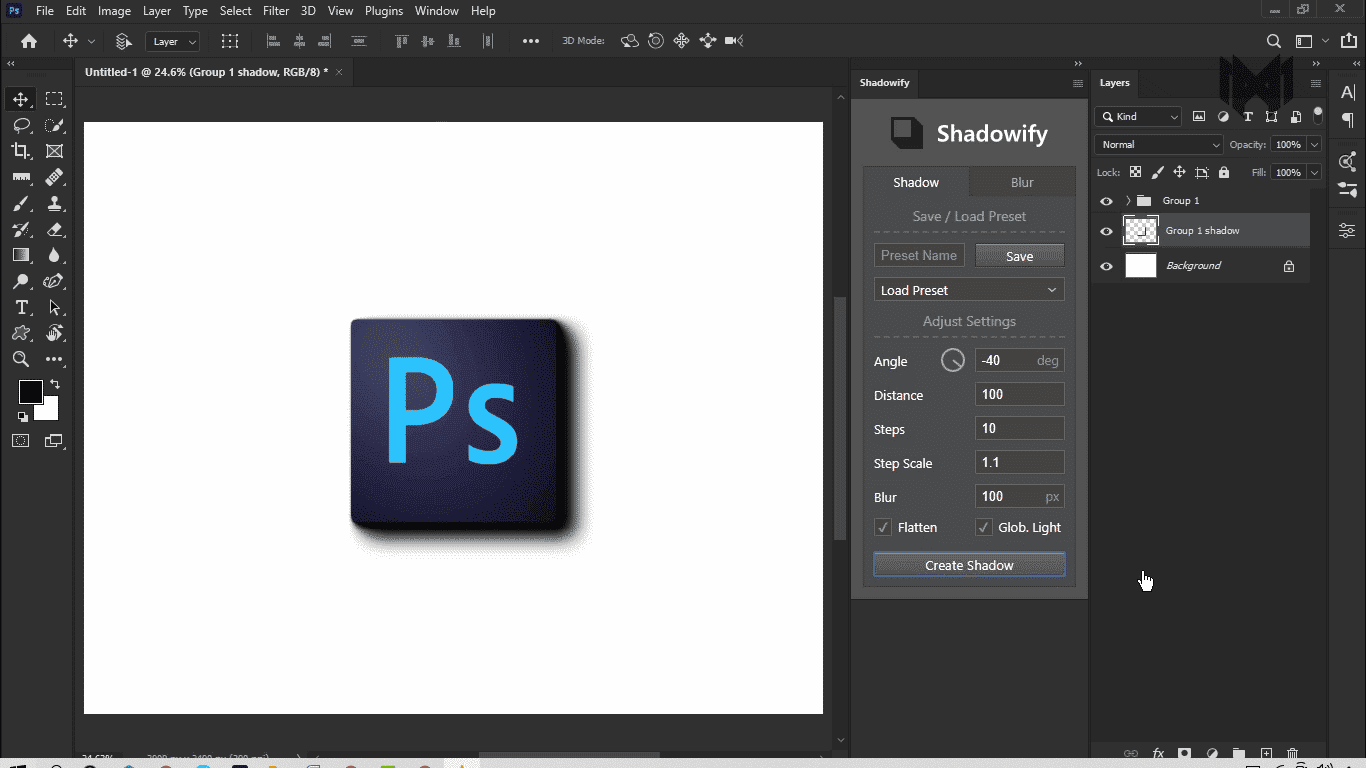
Sometimes, the first shadow isn't quite the star you're looking for. No worries! You can create more by adjusting the distance, steps, blur, and opacity until you've got the shadow that's just right.
And there you have it! You now know how to use shadows to give your images depth and magic. Now you need to make those shadows dance to your music. Don't forget our secret code, which is "Free Download Shadowify." "The magic keeps going!" 🪁🌟
How to Use Shadowify Video Tutorial
Conclusion
For the last part of our walk, we saw a tool called Shadowify that can do more than just add shadows to designs. It can also make them come to life. Anyone who wants to get better as an artist needs this program. It can make realistic shadows, save you time with one-click features, and let you change a lot of settings. No matter how much you know about Shadowify, I think you should download it and take a look around. This helpful tool is free and could potentially the last thing you need to finish your design set. Do some different things and see how your pictures change from flat to having a lot of depth. Shadowify isn't just a tool; it's what you need to do next to master digital design.
FAQs about Shadowify
Q1: Is Shadowify compatible with all versions of Photoshop?
A1: Shadowify is compatible with Adobe Photoshop CC 2015.5 and later versions. It is not compatible with earlier versions of Photoshop or Photoshop Elements.
Q2: Can I use Shadowify on both Windows and Mac?
A2: Yes, Shadowify is available for both Windows (7, 8, 10 - 64-bit) and macOS (10.12 Sierra and later).
Q3: Is Shadowify free to download and use?
A3: Shadowify is a premium plugin and requires purchase for download and use. It is available on platforms like Creative Market and Envato Elements, typically priced at $15. However, you can take advantage of a special offer on our website, where Shadowify is available for just $2.50. This makes it an affordable option for those looking to enhance their graphic design projects with realistic shadows.
Q4: Do I need an internet connection to use Shadowify?
A4: An internet connection is required for the initial download and software activation. However, once activated, Shadowify can be used offline.
Q5: How do I install Shadowify in Photoshop?
A5: After downloading Shadowify, you can install it using a third-party extension manager compatible with Photoshop. Follow the extension manager's instructions for installing Photoshop plugins.
Q6: Can I customize the shadows created with Shadowify?
A6: Absolutely! Shadowify is designed for customization, allowing users to adjust shadow angle, blur, color, opacity, and more to achieve the desired effect.
Q7: Are there any tutorials available for learning how to use Shadowify?
A7: Yes, there are several resources available for learning how to use Shadowify, including video tutorials on YouTube, step-by-step guides on the Shadowify website, and community forums for user tips and advice.


Leave a comment