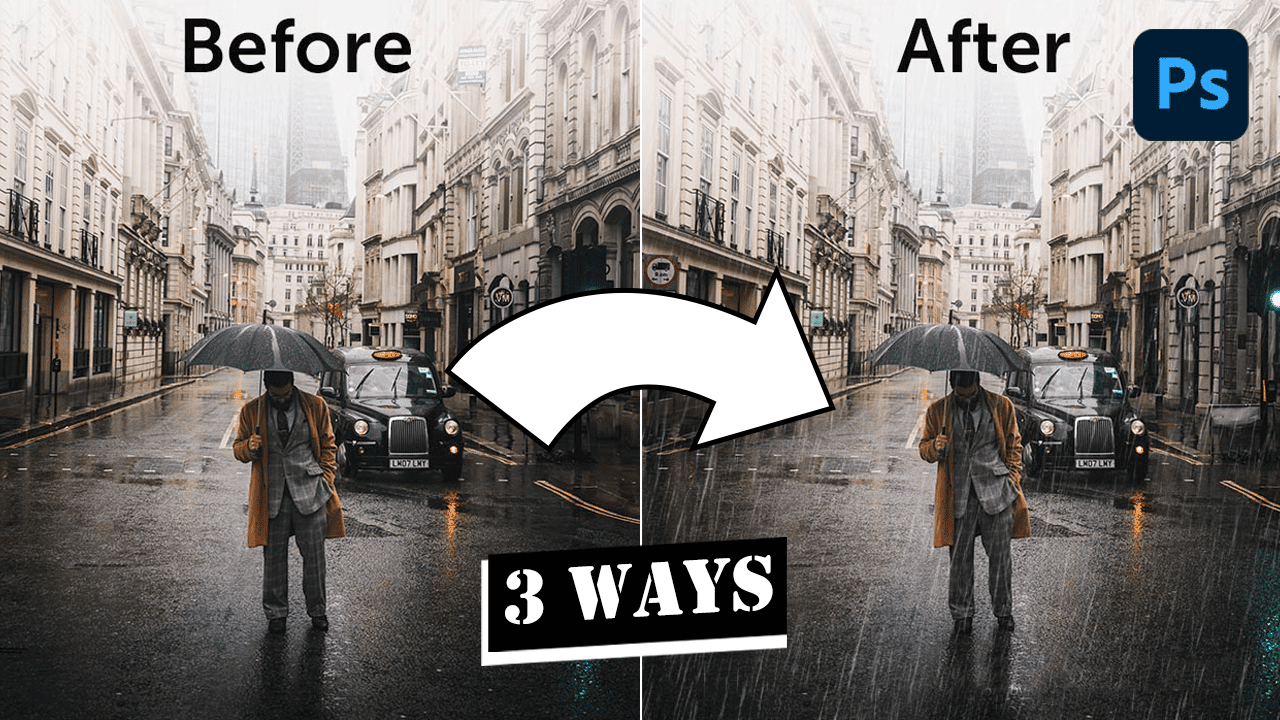
As we look at how other Photoshop features can change things, get to know the rain effect in photoshop and how it can be used to improve your digital designs. Adding something that can be seen is only the beginning. At this point, we also give our photos feeling, depth, and drama. Surprisingly, making copies of real things in Photoshop doesn’t hurt our computers. It gives me great pleasure to share three great ways to improve your pictures in Photoshop by adding rain.
These steps can help people of all skill levels, from beginners who just want to learn how to use the filters to pros who want to make their own tools and layers. By following the tips in this article, you will be able to use every feature of Photoshop to turn a boring sky into a crazy, dramatic background. By doing this, you will improve the look and quality of your photos. If you learn these techniques, you will be able to make people feel things as well as seeing things. As a result, your visual story will become more captivating and beautiful.
Why Add Rain Effects?
It’s not enough to make a picture or piece of digital art look better by adding rain effects. When we use our method, the watcher goes on a deeper, more emotional journey that lets them really feel the mood. It makes people think, feel sad, or feel calm, which lifts their mood. It also gives an intellectual piece a sense of truth. Putting these general ideas into real things that the audience can relate to makes the story better. This is a way for digital artists to add what they feel to their ideas along with what they see. This makes a lot of story ideas possible.
Preparing Your Image
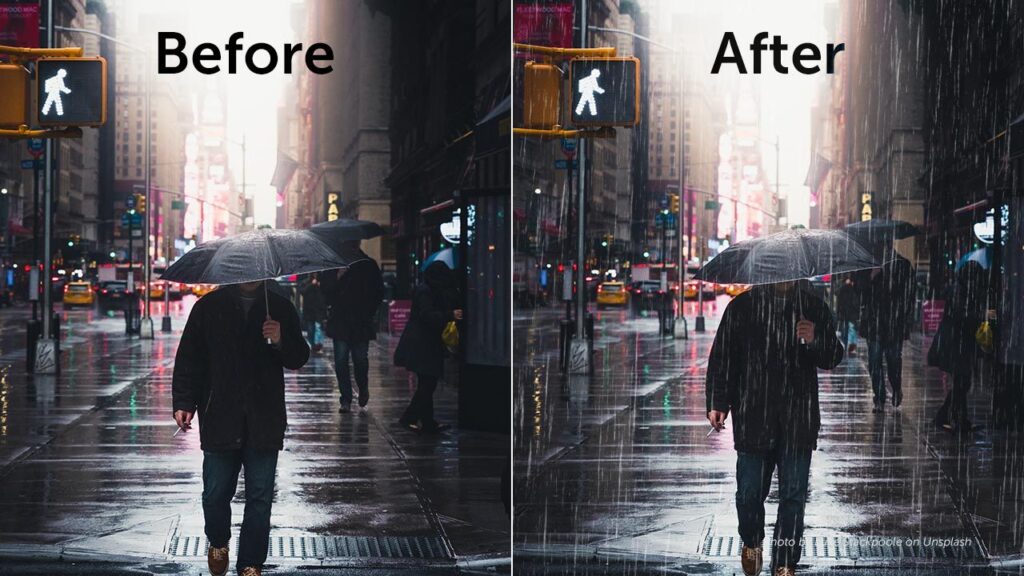
It is very important to choose the right picture for rain effects so that Photoshop can do its job. If you look for scenes with dark skies or people standing alone in the open, the rain can easily add to the story. It changes more than just how these scenes look. It changes how you feel about them too. Now the story is more interesting. Of course, the shot was already good before the rain. These easy things are possible.
The rain will stand out more against the sky if you raise the contrast. This will add more tension and depth to the scene. You can also change the brightness to make the colours darker with softer tones or brighter so that bright colours can be seen through the rain. One of these steps is getting the tools ready. Also, try to picture what the end result will be like. It doesn’t feel like an extra thing when it rains; instead, it’s a treat that brings out the feelings and stories that were hidden in the picture.
First Method
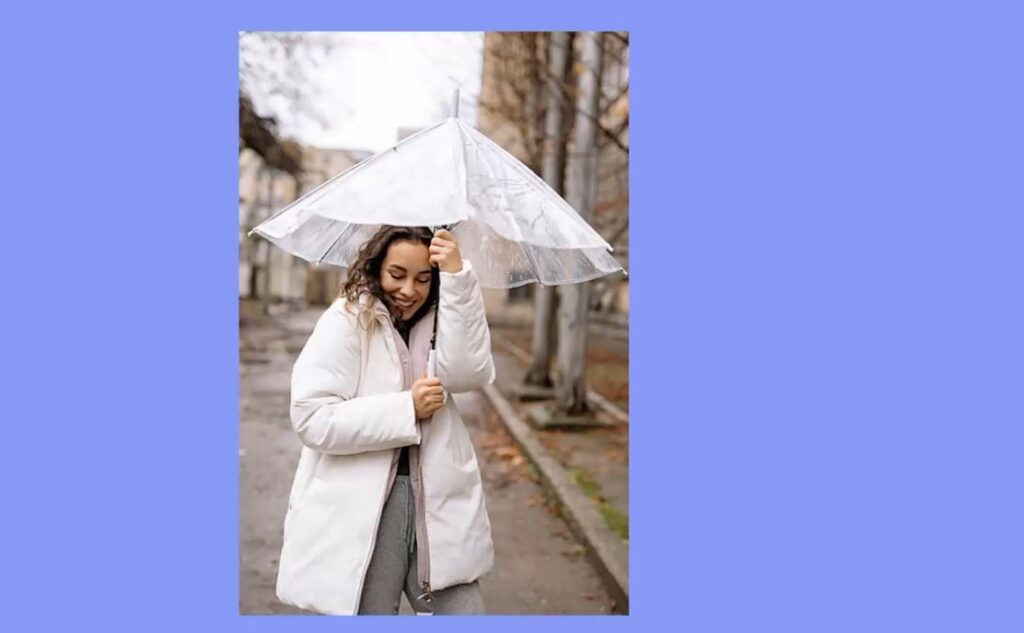
Using Photoshop’s built-in filters to make a realistic rain effect can take a simple picture and turn it into a scene with a lot of dramatic depth. Finding a picture that already makes you think of rainy weather is important. Make sure that the extra rain doesn’t look out of place with the other elements.
Creating Rain with Noise and Motion Blur
Step 1: Setting Up Your Canvas
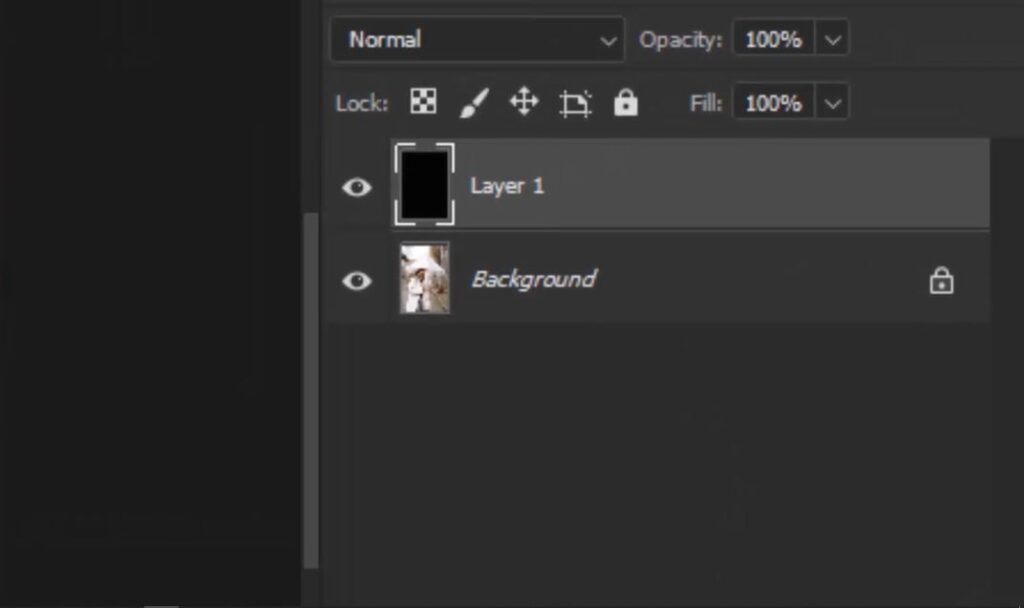
- Begin by creating a new layer in your Photoshop project.
- Fill this layer with black, setting a dark canvas for your rain effect.
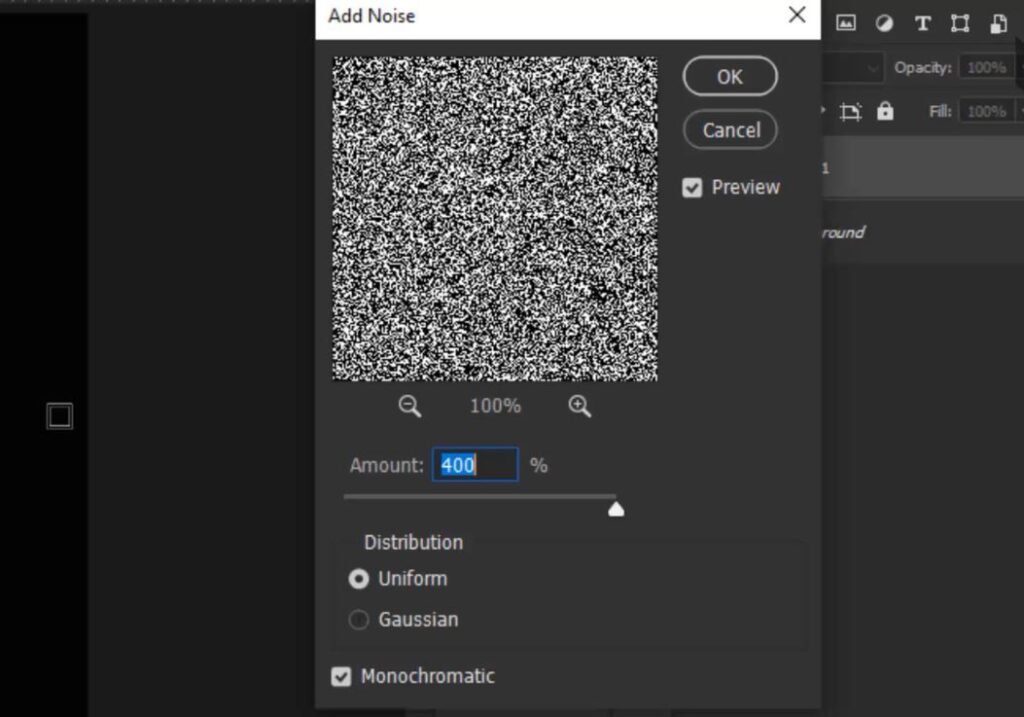
Step 2: Adding Noise
- Navigate to
Filter>Noise>Add Noise. - In the noise settings panel, opt for
Uniformnoise and ensureMonochromaticis checked to keep the raindrops realistic. - Adjust the noise amount to your preference, then click
OK.
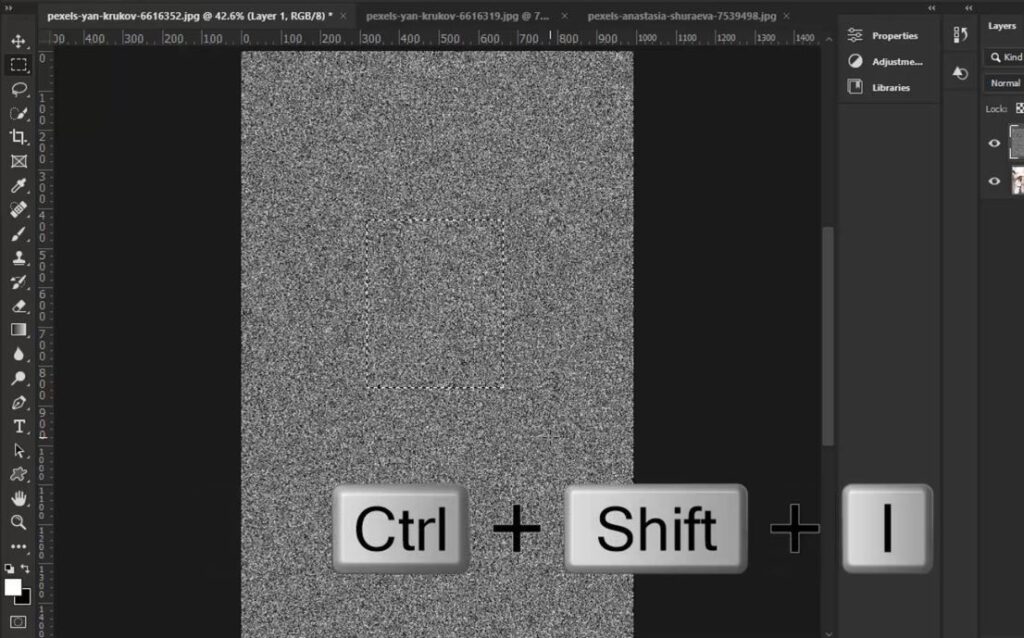
Step 3: Refining the Noise
- Use the
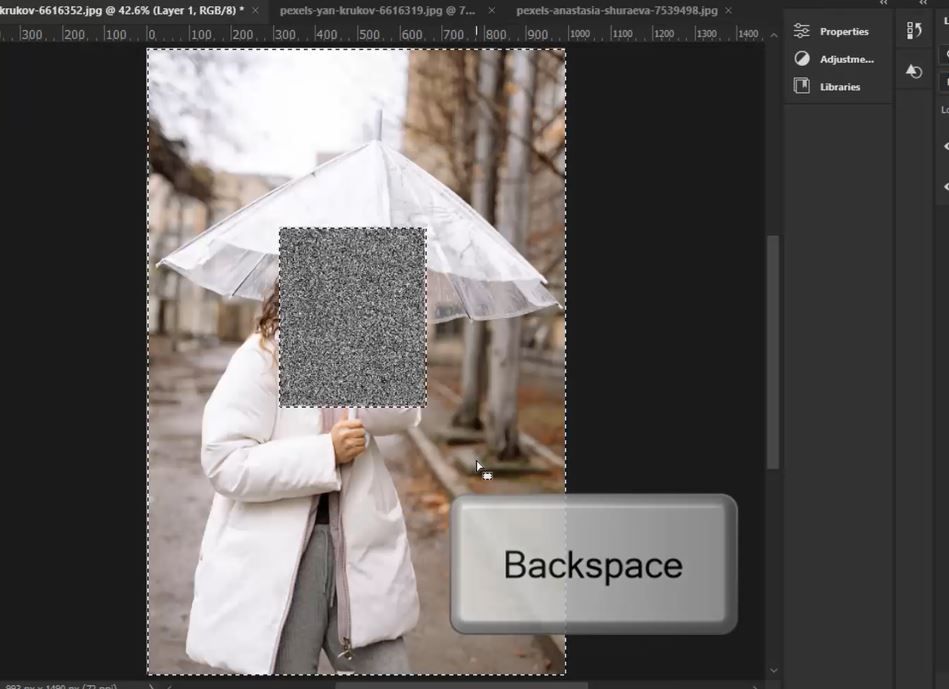
Rectangular Marquee Toolto select a portion of the noise layer. - Invert the selection (
Ctrl + Shift + I) and delete the unselected area.
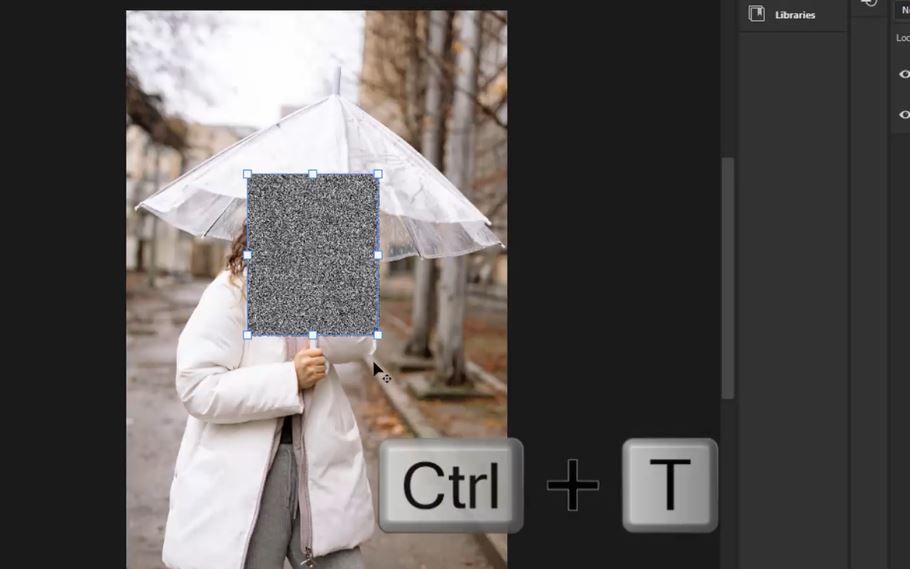
- Then Press Ctrl + t, to transform.
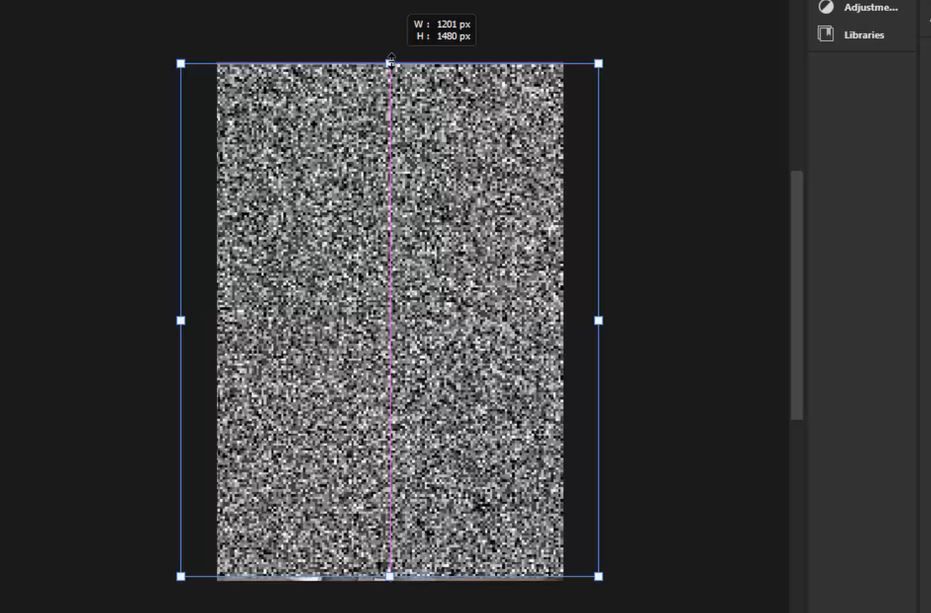
- Transform the remaining noise (
Ctrl + T) by scaling it up, which enlarges the noise particles to resemble raindrops more closely.
Step 4: Adjusting Visibility
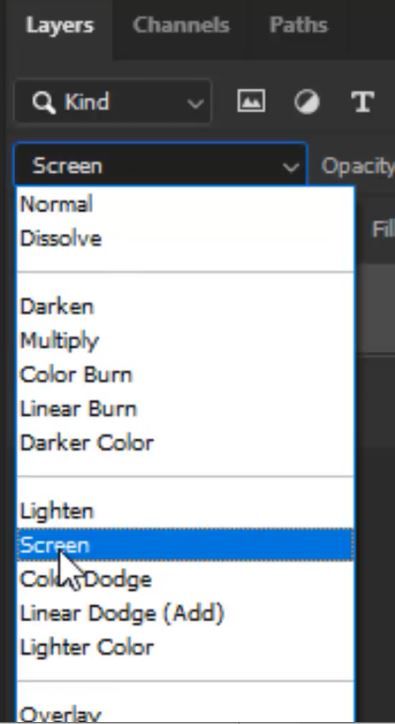
- Change the layer’s blend mode from Normal to Screen. This adjustment makes only the white noise visible, mimicking the appearance of rain.
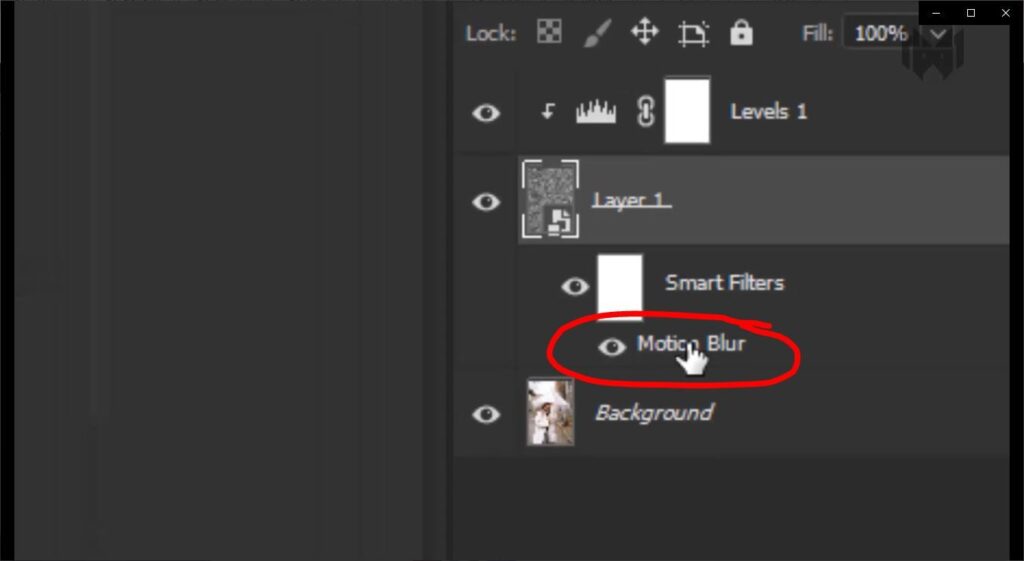
Step 5: Converting to Smart Object
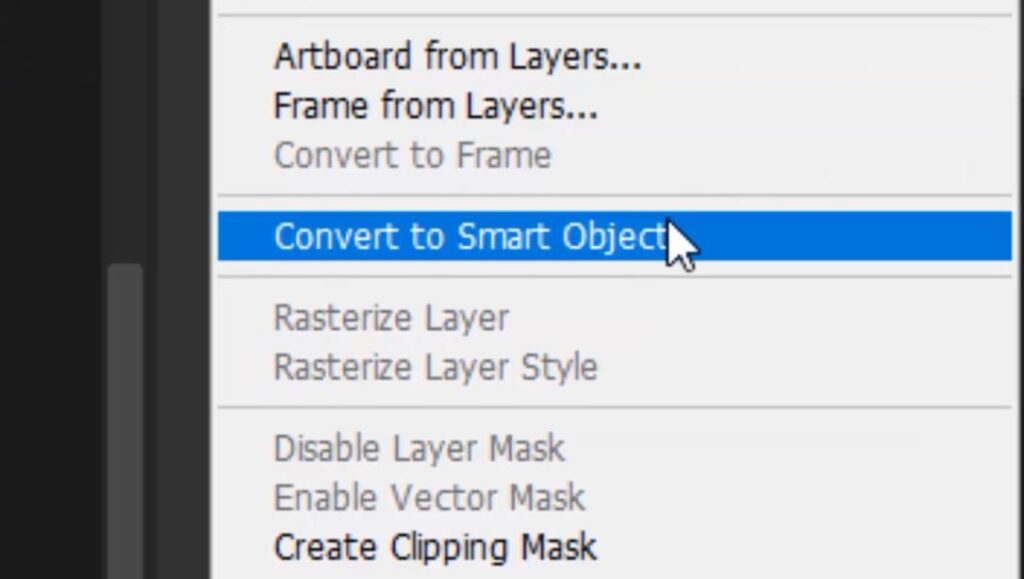
- Convert the layer to a Smart Object, allowing for future adjustments without starting over.
Step 6: Applying Motion Blur
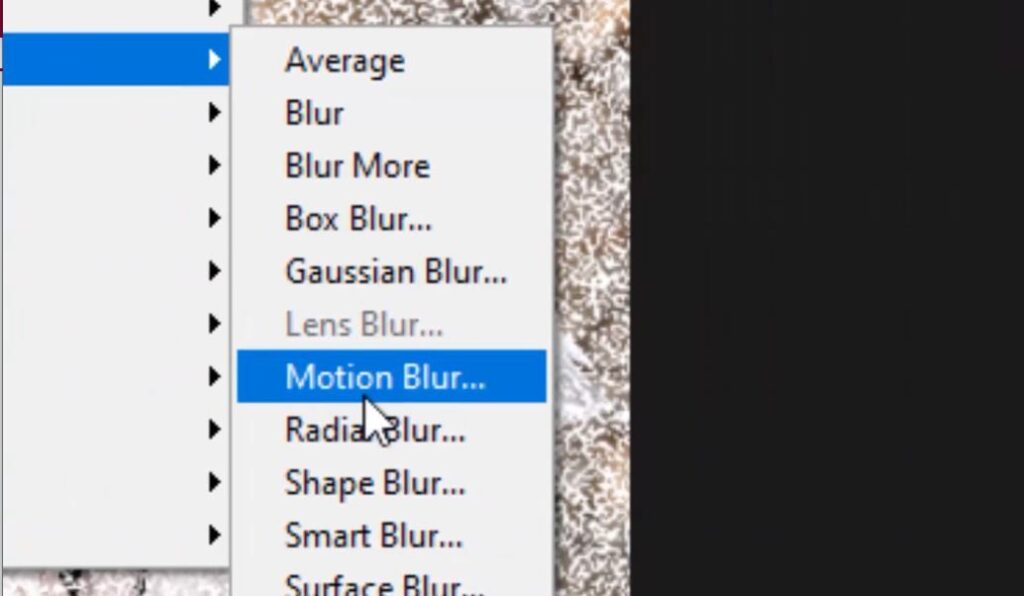
Step 5: Applying Motion Blur
- Go back to the Filter menu, select Blur, and then Motion Blur.
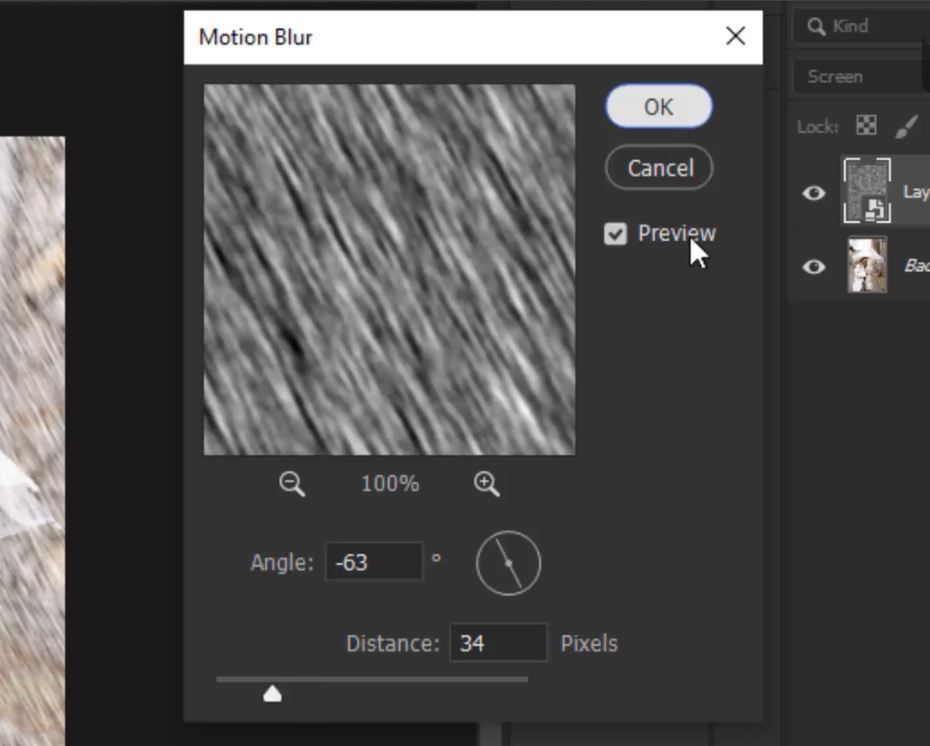
- Set the angle and distance in the Motion Blur settings to give direction and speed to your rain, then click OK.
Step 6: Refining the Rain
- The rain might look too dense at this point. To thin it out, add a Levels adjustment layer directly above your noise layer and create a clipping mask.
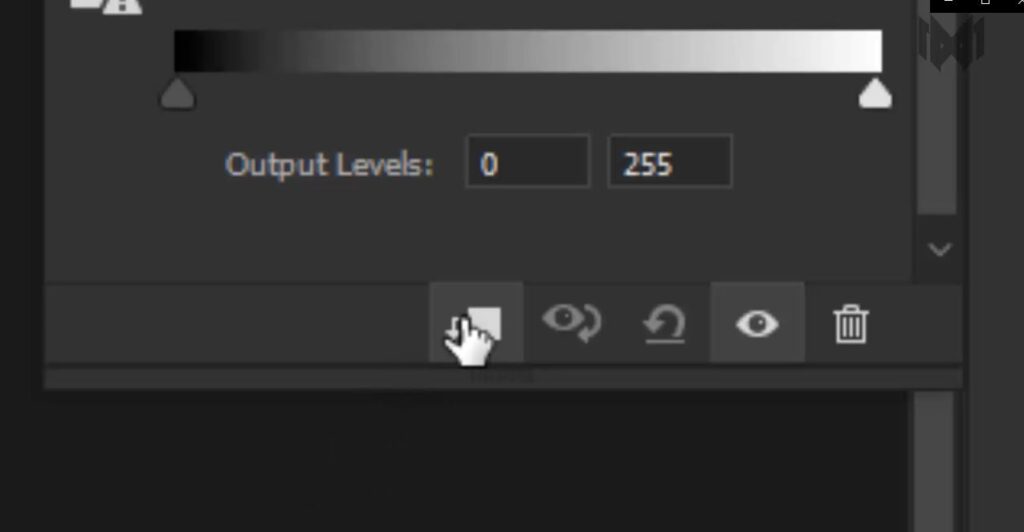
- Adjust the Levels to reduce some of the noise, tailoring the rain’s intensity to your scene.
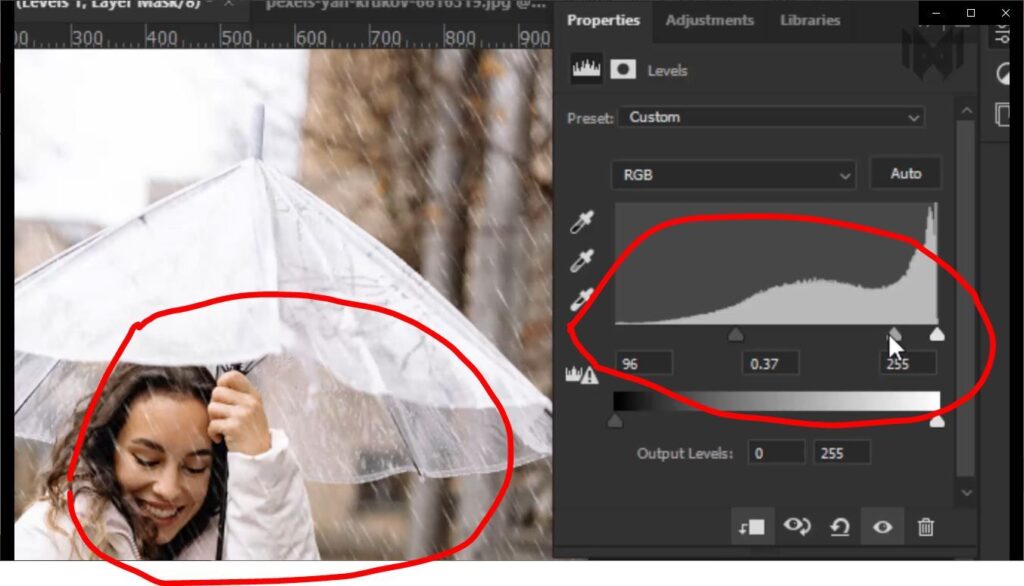
- Now adjust these points to get rid of some amount of noise that we don’t need.
Customization Tips:
- you can change the speed of rain, by adjusting the distance of motion blur.
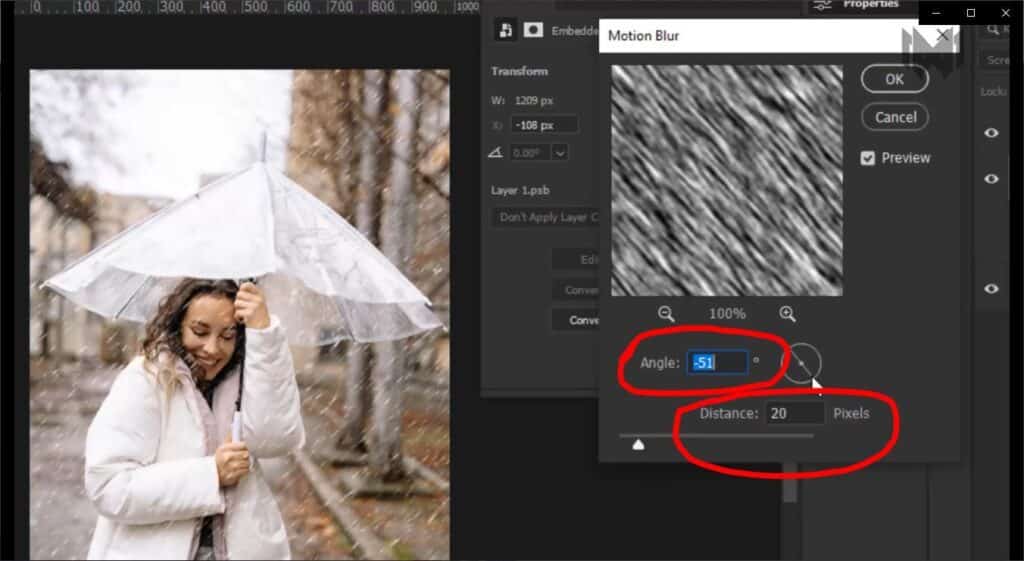
- if you want to change the direction of rains, just change the angle value of motion blur.
- you can increase the number of raindrops by levels, that i already shown you.
- The beauty of this technique lies in its flexibility. You can adjust the rain’s speed by tweaking the Motion Blur distance.
- Changing the Motion Blur angle alters the rain’s direction, allowing you to match the rain to any environmental cues in your image.
- To increase or decrease the raindrop count, simply adjust the Levels as shown.
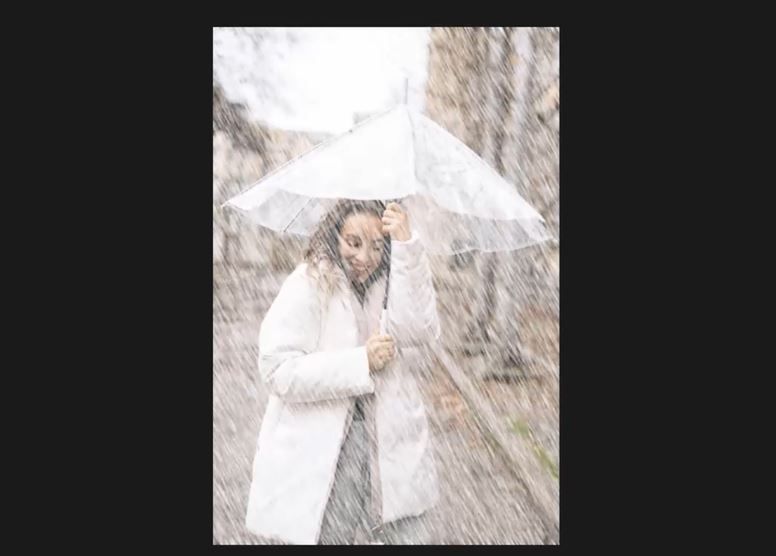
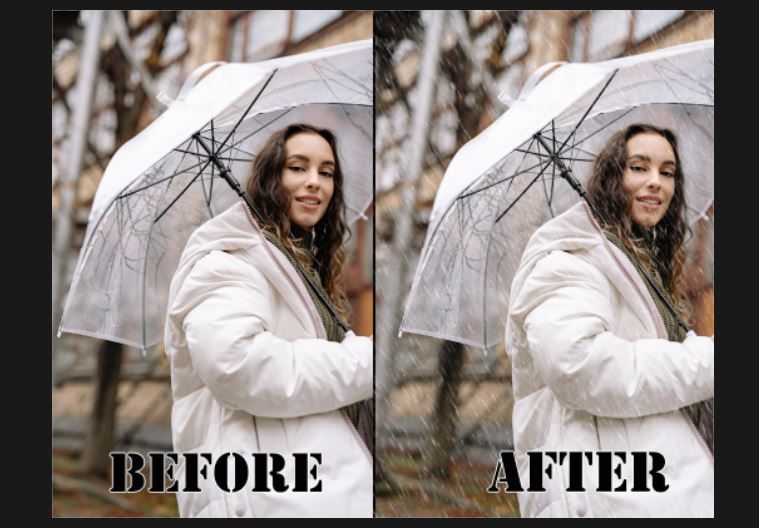
By following these steps and utilizing Photoshop’s Noise and Motion Blur filters, you can create a customizable rain effect that adds depth and atmosphere to your images. This method not only enhances the visual appeal but also invites viewers into the scene, feeling the rain’s presence as if they were there.
you can achieve that kind of rain effect with this action. Let’s move on to our second technique.
Method 2
If you want to add rain effects to your photos in a creative and exciting way, you can use Photoshop’s rain brushes. This method gives you freedom and imagination because it can be used to make effects ranging from a light drizzle to a heavy downpour. To learn how to use a rain brush, do the following:
Step 1: Acquiring Premium Rain Brushes
- Begin by expanding your toolkit with premium rain brushes. A wealth of high-quality options is available on platforms like Envato Elements. These brushes are designed to mimic various rain intensities and styles, providing a solid foundation for your rain effects.
- Download your chosen rain brushes by following the provided links, ensuring you have a diverse set to choose from.
- You can also create a rain effect in Photoshop with the Photoshop Rain Brushes.
Step 2: Loading Your Brushes into Photoshop
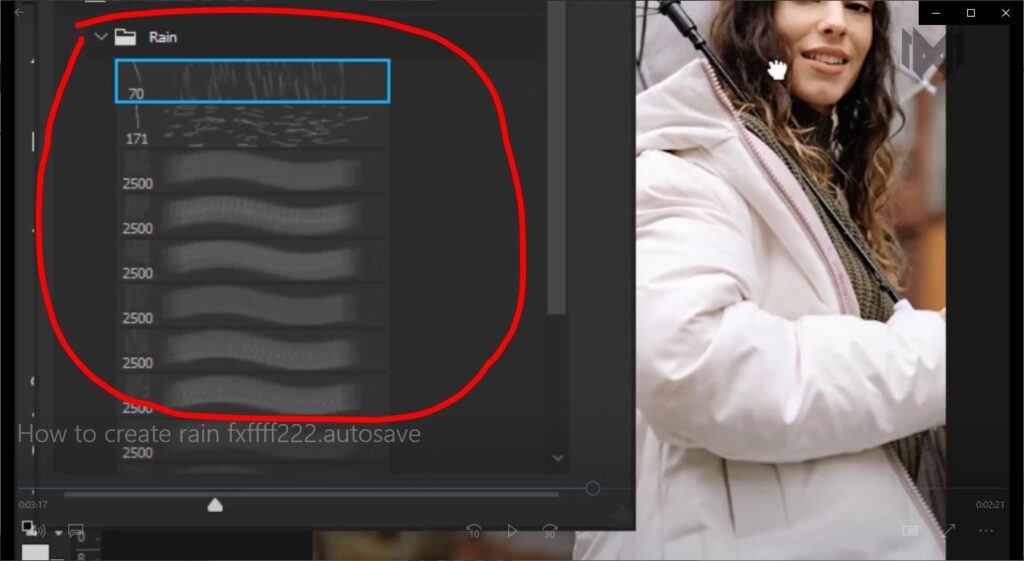
Step 3: Applying the Rain Brushes
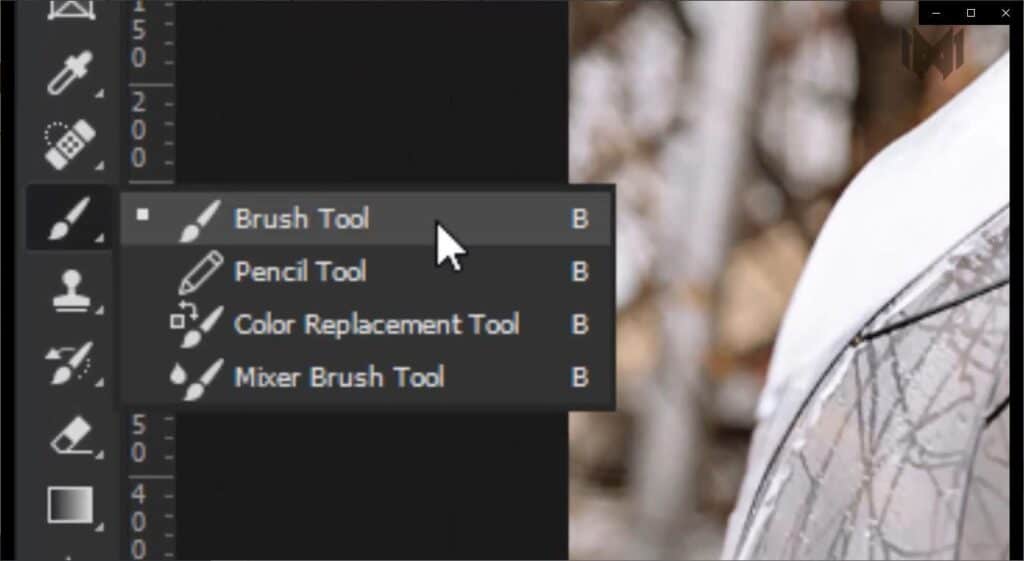
- With your brushes imported, select the Brush Tool (B) from the toolbar.
- From the Brushes panel, choose one of your newly imported rain brushes.
- Create a new layer above your image to start applying the rain effect. This keeps your original image unaltered, allowing for non-destructive editing.
Step 4: Customizing the Rain Effect
- Adjusting the Angle: To change the rain’s direction, adjust the angle of your brush. This can be done in the Brush Settings panel, allowing you to align the rain with environmental cues in your image for a more natural look.
- Layering for Depth: For a more complex and realistic effect, apply rain using multiple layers. Each layer can feature different brushes, rain densities, and directions.
- Experimenting with Opacity and Blend Modes: Varying the opacity of your rain layers can simulate rain at different distances or intensities. Experiment with blend modes like “Screen” or “Soft Light” to see how they affect the interaction between the rain and your image’s colors and lighting.
Step 5: Refining Your Rain Effect
- After applying the initial rain effects, refine your work by adjusting the layer opacity and blend modes further. This step is crucial for integrating the rain seamlessly into your image, ensuring it complements rather than overwhelms.
- Consider adding a slight Gaussian Blur to some of the rain layers for a sense of depth, simulating raindrops closer to the camera lens.
By following these steps and embracing experimentation, you can create stunning, realistic rain effects in Photoshop using rain brushes. This technique not only adds atmospheric depth to your images but also offers the freedom to customize the rain to match the mood and story of your photography.
Method 3
I’m going to talk about a third way to add rain effects to your pictures using Photoshop. It uses a tool that was made just for that purpose. This plugin, which is a work of digital art, speeds up the process so you can quickly and beautifully add rain to your pictures.
Introducing the Rain FX Plugin
This Photoshop plugin is a game-changer for shooters and digital artists who want to add realistic rain effects to their work. Forget about the time-consuming process of doing things by hand; Rain FX provides a quick and easy way to make your rainy-day dreams come true.

Download more creative assets from our store.
How the Rain FX Plugin Transforms Your Images
Installation and Access:
- After Downloading the plugin, install it to integrate seamlessly with Photoshop.
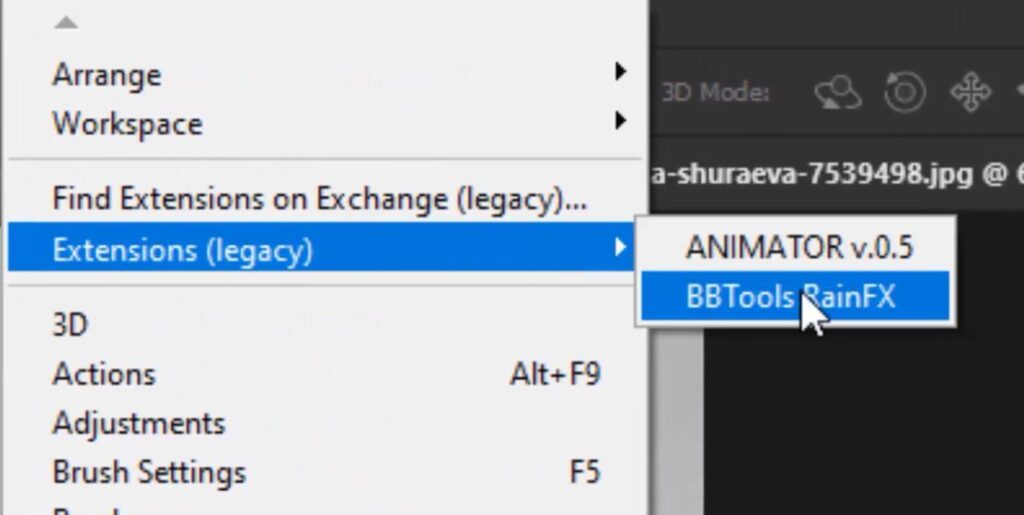
- You’ll find it under
Window>Extension>Rain FX, ready to elevate your images with a few clicks.
Ease of Use:
- The beauty of Rain FX lies in its simplicity. The plugin features an intuitive interface, making it accessible for users of all skill levels.
- Adjusting the rain’s angle to match the perspective and mood of your scene is straightforward, thanks to the plugin’s design.
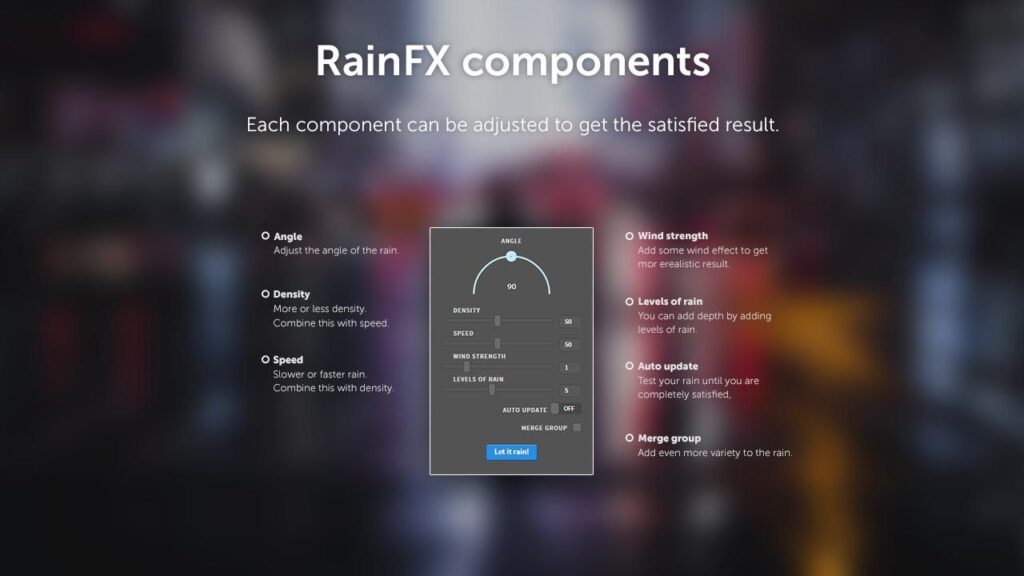
Customization at Your Fingertips:
- With user-friendly sliders, you have control over the rain’s appearance, from its intensity to the size of the droplets.
- A single click on the blue button activates the plugin, applying your customized rain effect to the selected image.
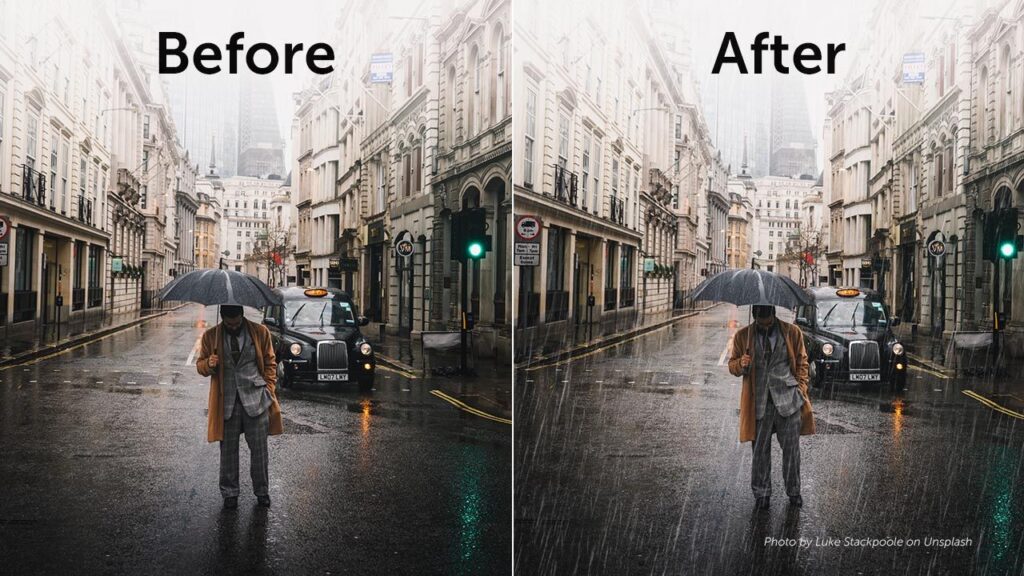
Instant Transformation:
- In moments, Rain FX works its magic, altering your photo’s atmosphere with a realistic rain effect that blends seamlessly into the scene.
The Rain FX plugin is a great example of how powerful current Photoshop tools can be. It makes it easy to get results that are both beautiful and quick. This plugin makes it easy and very effective to add rain effects to any image, whether it’s a moody landscape or a dramatic portrait. It takes very little work to turn the ordinary into something special.


Your point of view caught my eye and was very interesting. Thanks. I have a question for you.