The project’s appearance and impact are greatly influenced by the color and pattern choices you make. Lots of people use brick wall patterns for these because they give designs a sense of history, depth, and realism. It has many levels and can be used in many ways, so it can make a plain black-and-white room look interesting. It mixes old and new styles and gives the computer drawing a bit of realism. Artists love building with bricks because they can use them in a lot of different ways.
With a plethora of features and capabilities, Photoshop is the finest program for creating durable brick wall designs. It can copy almost every feature of a real surface. This lets artists make patterns that look great and like they are real. You can make brick shapes in Photoshop that can be changed to fit any design need. It’s simple to add brick lines and change the color. Photoshop gives artists complete freedom over how they use brick wall patterns. If you want to get better at creation, you should learn how to use Photoshop. This can be used to give a project a rustic look or a room its own style.
What is Brick Wall Patterns
There aren’t many rock walls in the world of logo design. It only has pictures that have been changed to look like brick walls on it. It looks like bricks since the color changes and the surface is rough. When they are there, it looks and feels more like the real world. You should use them because they can give patterns depth, warmth, and a real feel. Having brick walls in a room can make it feel stronger and more real. They make places look friendly and warm. People really feel old, safe, or like they’re in a city when they come here.
A lot of digital art and design projects use brick wall shapes. A lot of computer backgrounds have them because they make plain pages look better. The places in video games look and feel like they fit in the real world thanks to these shapes. A lot of ads and brands use brick shapes to make it look like people should trust them. Bricks are helpful since they can be used for many things. You can use them to set the scene or give things more depth in a computer picture.
Prepare your PC. You have to do that first before you can draw cool brick walls. You can’t start getting ready while the show is going on. Also, check that your board looks good and helps you with your plan. The first time you set up, you need to pick the right record size, picture, and color mode. If you do these things, your plan will work better.
Step-by-Step Guide to Creating Brick Wall Patterns
Creating a brick wall pattern in Photoshop is a meticulous process that blends creativity with precision. This guide will walk you through each step, ensuring that every pixel contributes to the final masterpiece. Let’s break down the process:
Document Setup
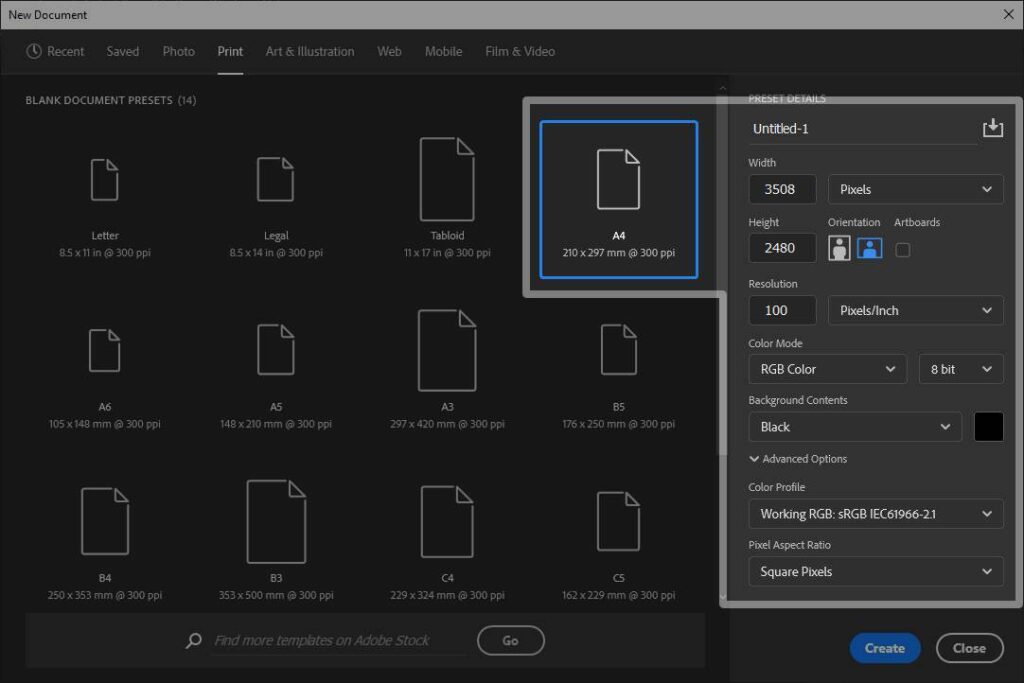
- Size and Resolution: Begin with an A4-sized document at 100 DPI resolution, ensuring your canvas is square. This setup is crucial for the pattern’s clarity and scalability.
- Background Color: Set your document’s background to black for better visibility of the pattern as you work.
Utilizing Rulers and Guides
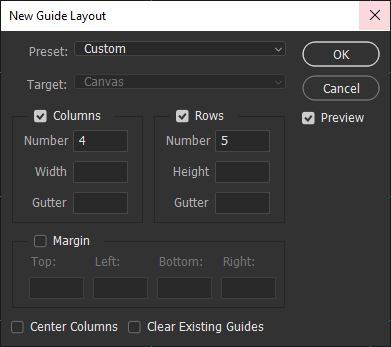
- Accuracy with Rulers: Navigate to the View menu, select New Guide Layout, and configure it to display 4 columns and 5 rows. This layout is instrumental in achieving a perfectly aligned brick pattern.
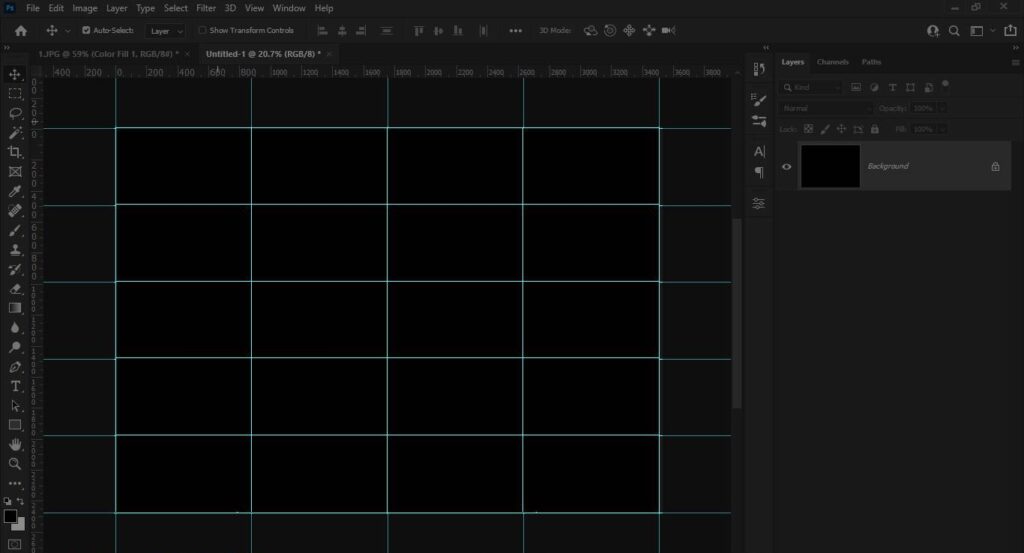
Here you can see, that we have 4 columns and 5 rows, that’s all we need to make a perfect brick wall pattern.
Drawing the Base Shape
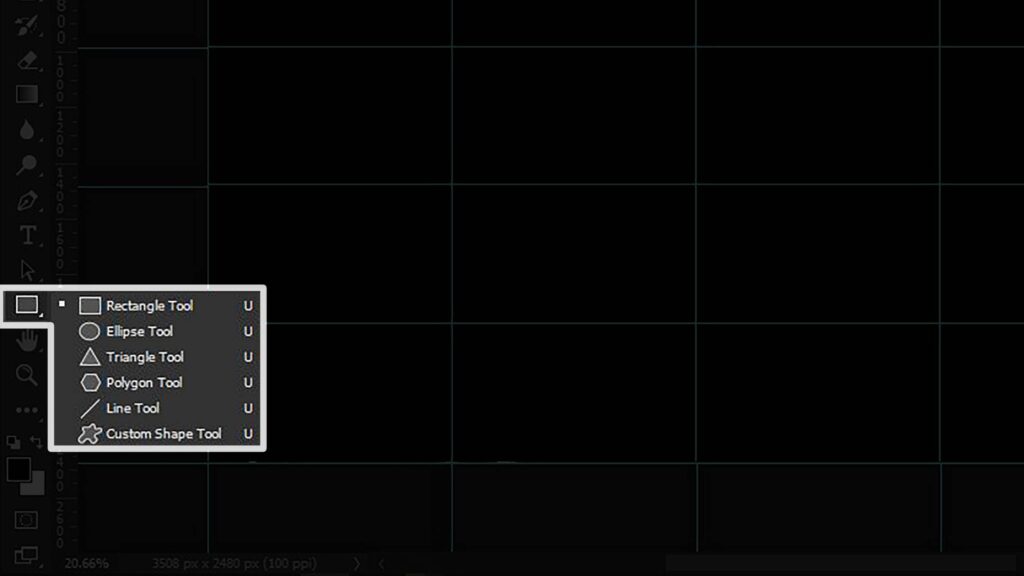
- Shape Tool: Select the Rectangular Shape Tool
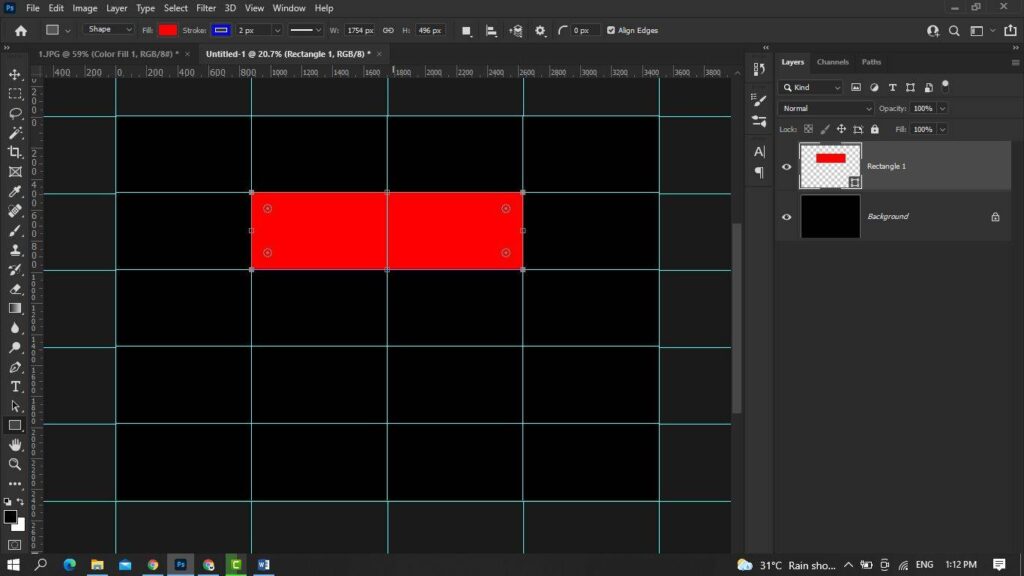
And draw a rectangular shape to represent a single brick. This initial shape is the cornerstone of your pattern.

Fill and Stroke Settings: In the properties panel, adjust the fill to a bright color for the brick and set the stroke color to a slightly darker shade. Opt for a 2-pixel stroke thickness, applying it inside the shape for crisp edges.
Creating the Brick Pattern
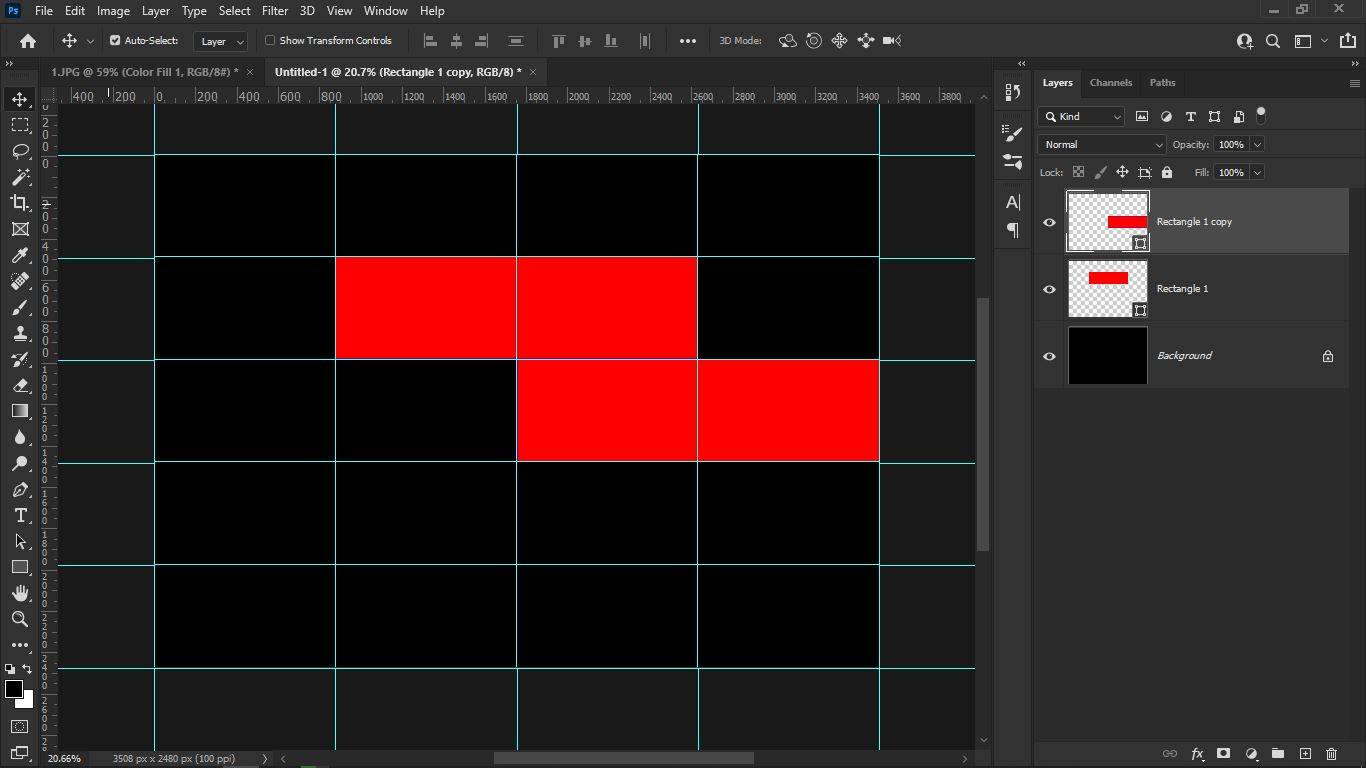
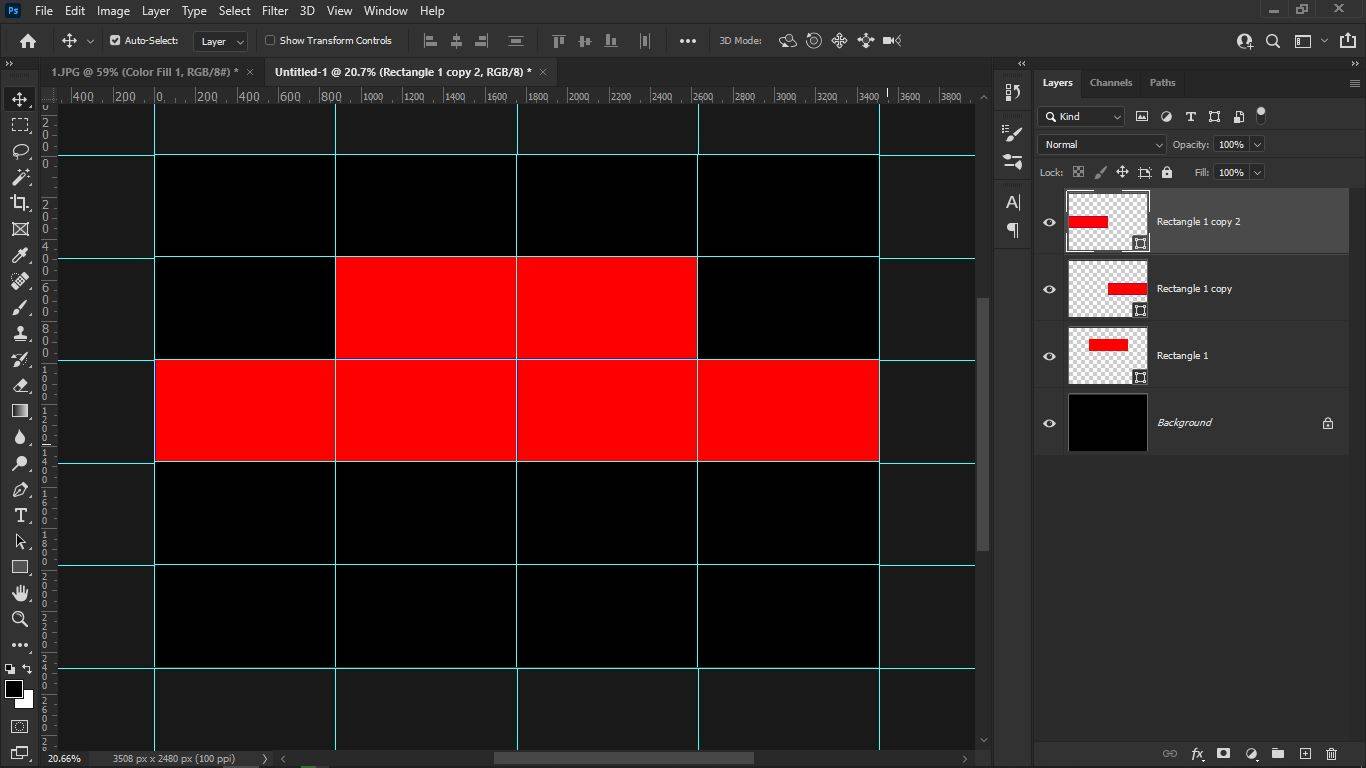
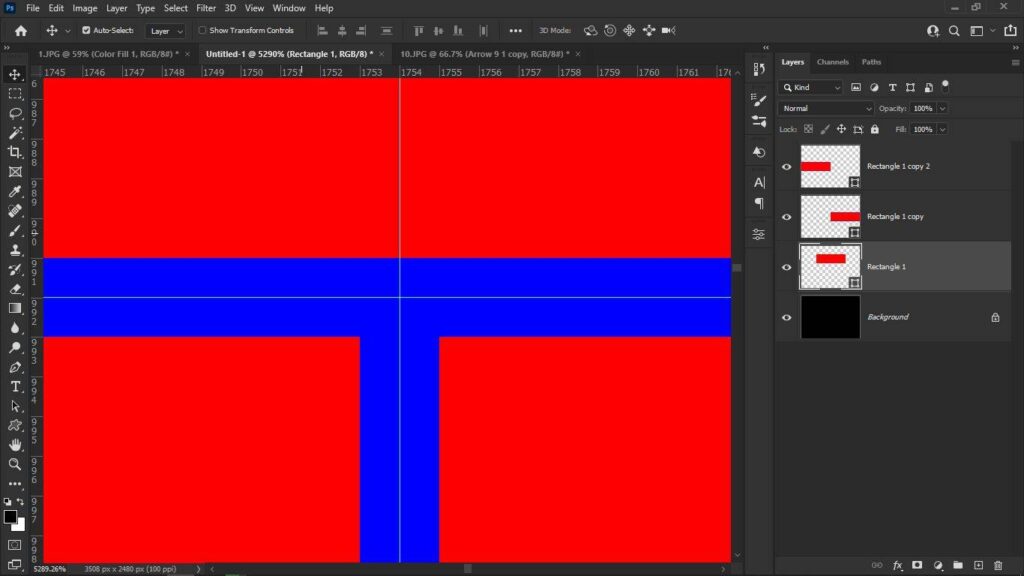
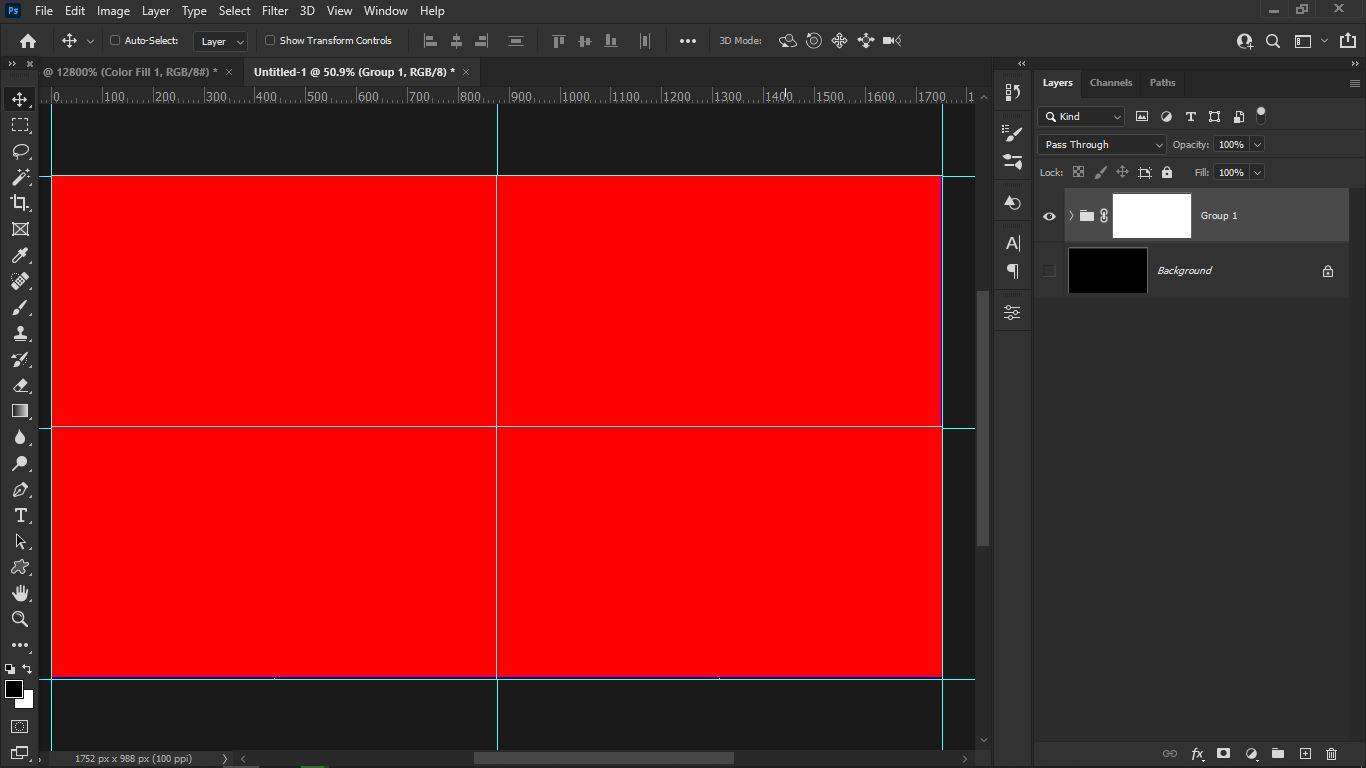
- Duplicating Shapes: Duplicate your initial brick shape twice (Ctrl+J or Cmd+J) and position these duplicates to start forming the wall pattern. Ensure the arrangement mimics the staggered layout of real bricks.
But when you zoom in between all these shapes. you will see the horizontal line and vertical line have now become 4 pixels. but we only need 2 pixels.
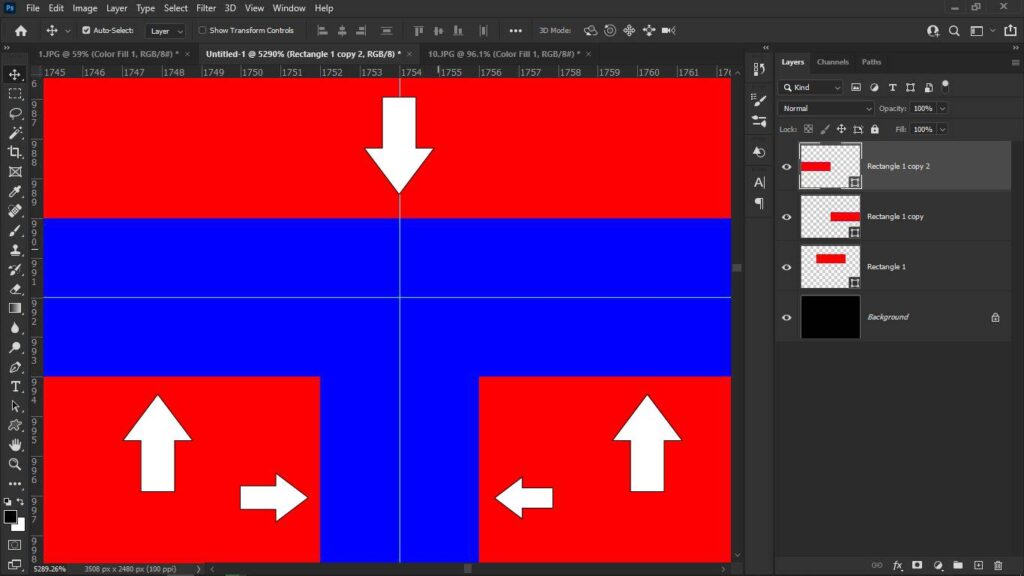
Adjusting Spacing: If the spacing between bricks appears too wide (4 pixels instead of 2), nudge the shapes one pixel closer using the arrow keys for a tighter pattern.
Done, we have merged them successfully
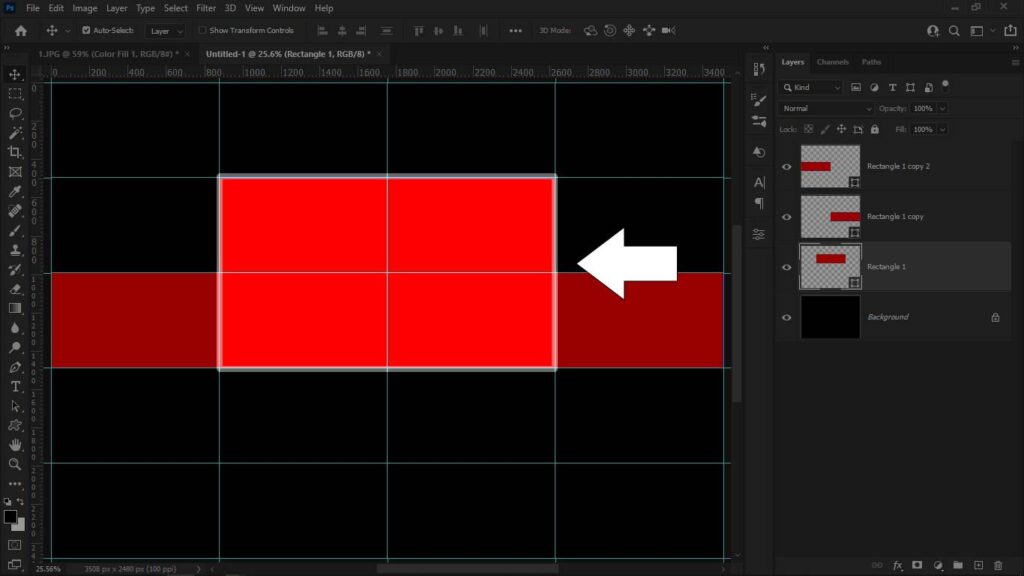
but still, there is a problem. We only need this part to make the brick wall pattern, and not only that, we also have to make sure that all the corners have only one pixel left from the outside.
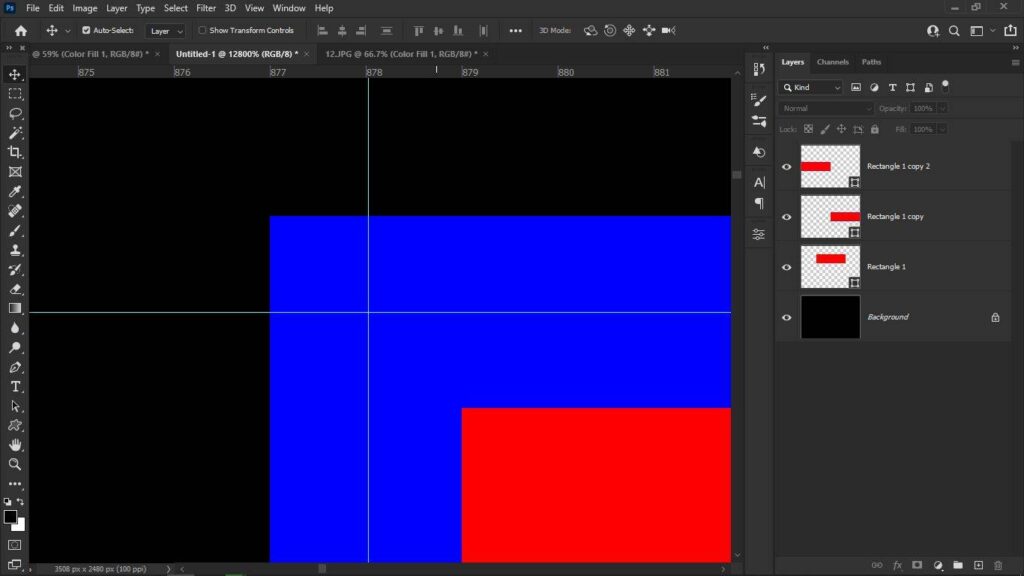
First, take the rulers and place them between two pixels. you can do it accurately by holding the shift key and move the rulers to the next pixel, it will automatically stick with next pixel if you holding the shift key. Do the same with all the corners.
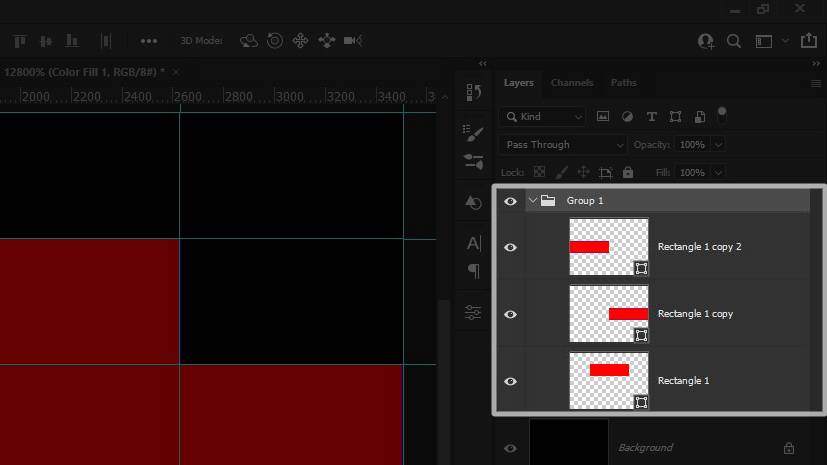
now select all the shapes and add them to the group.
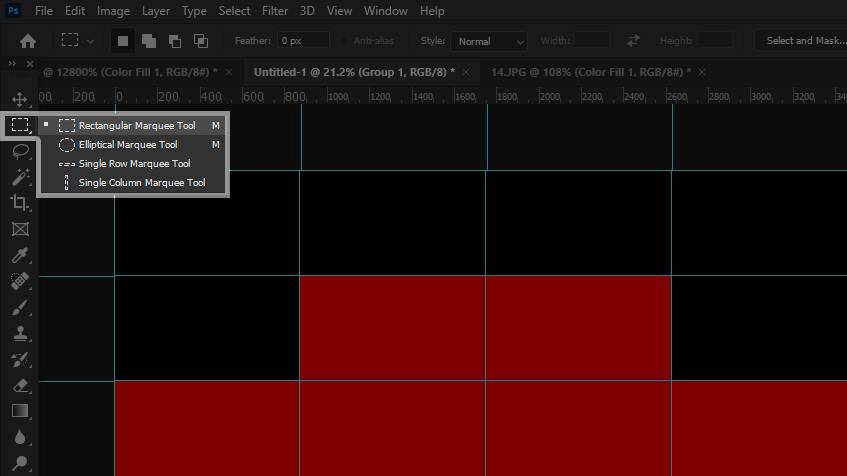
Then take the Rectangular Marquee Tool from the toolbar.
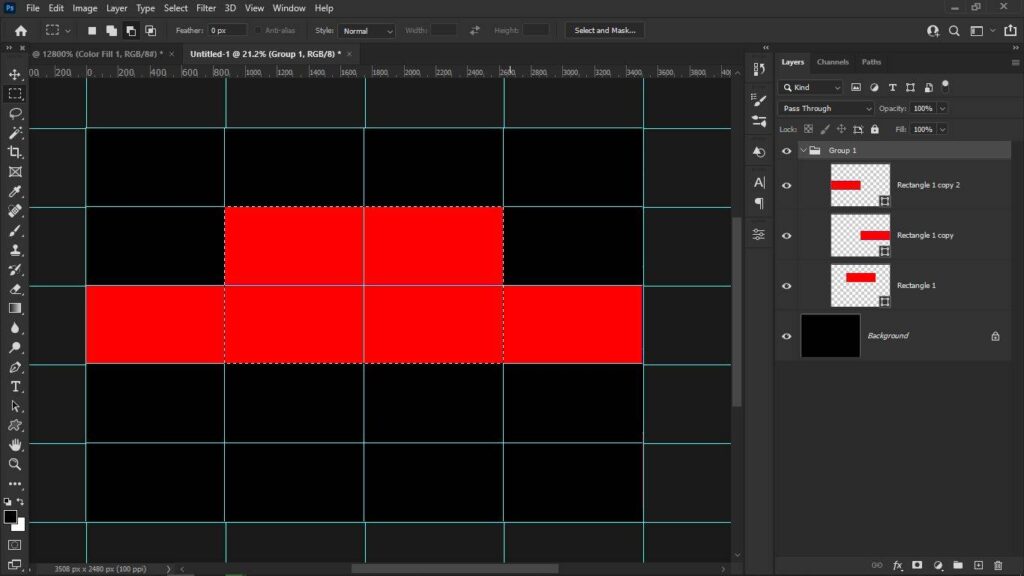
and make a selection by sticking with the rulers.
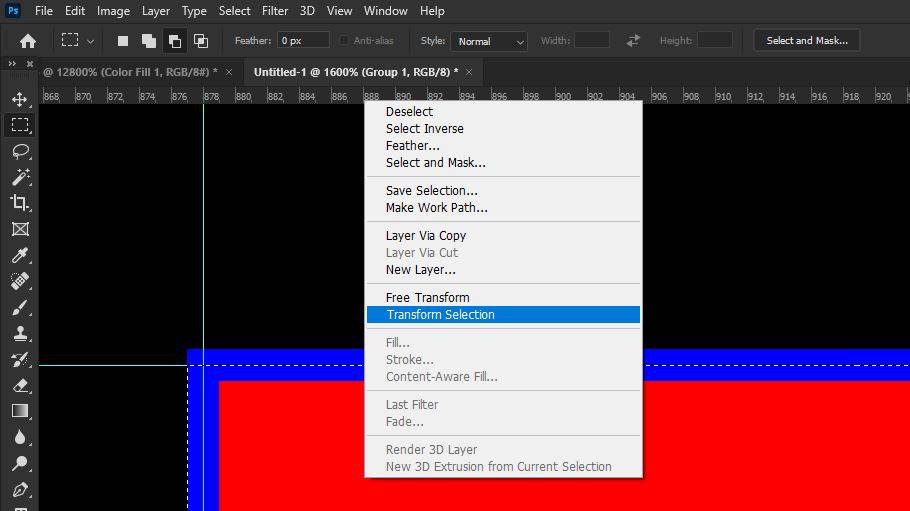
and if it does it stick with rulers, then right-click and choose transform selection. now you can easily fix the selection.
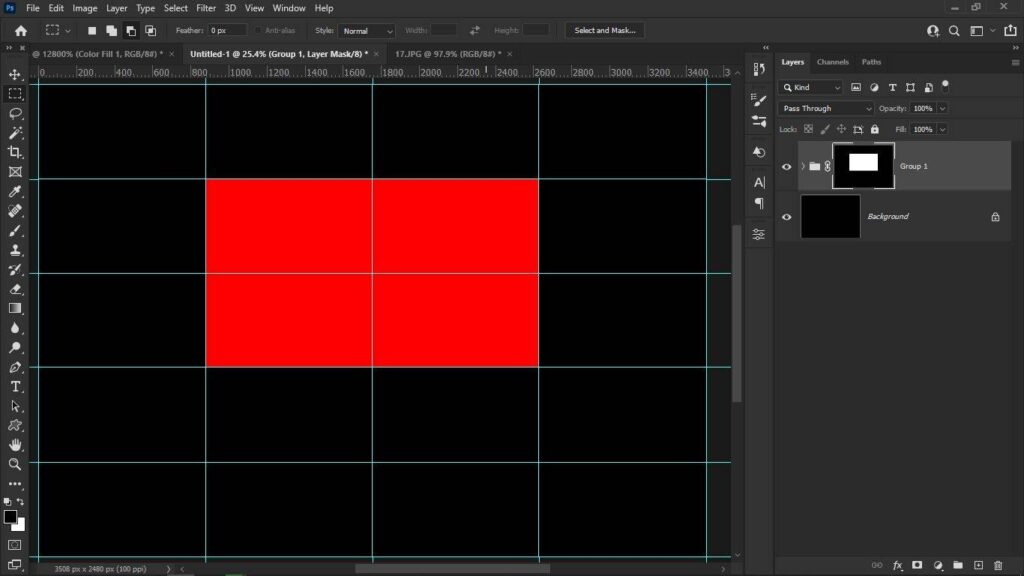
then click on the mask icon to hide the extras.
we have to do one last thing before saving them as a pattern.
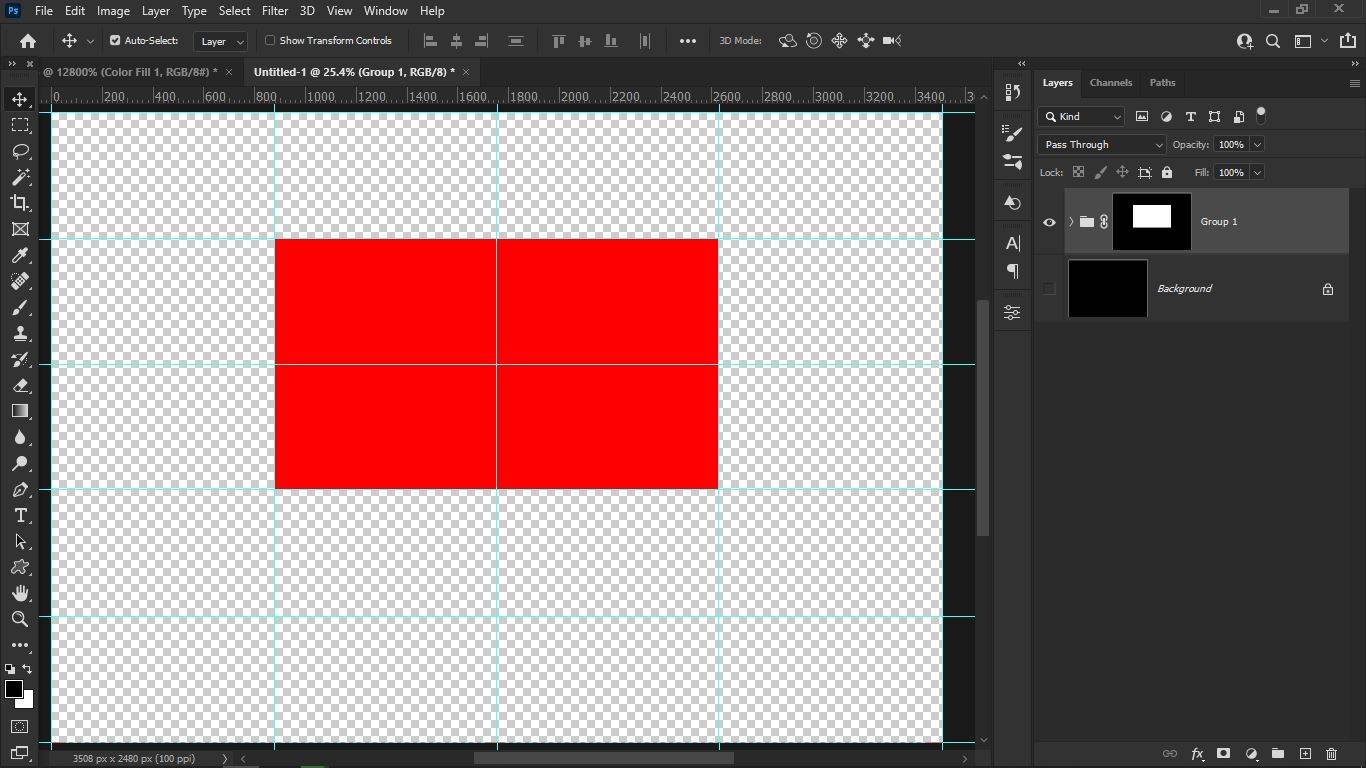
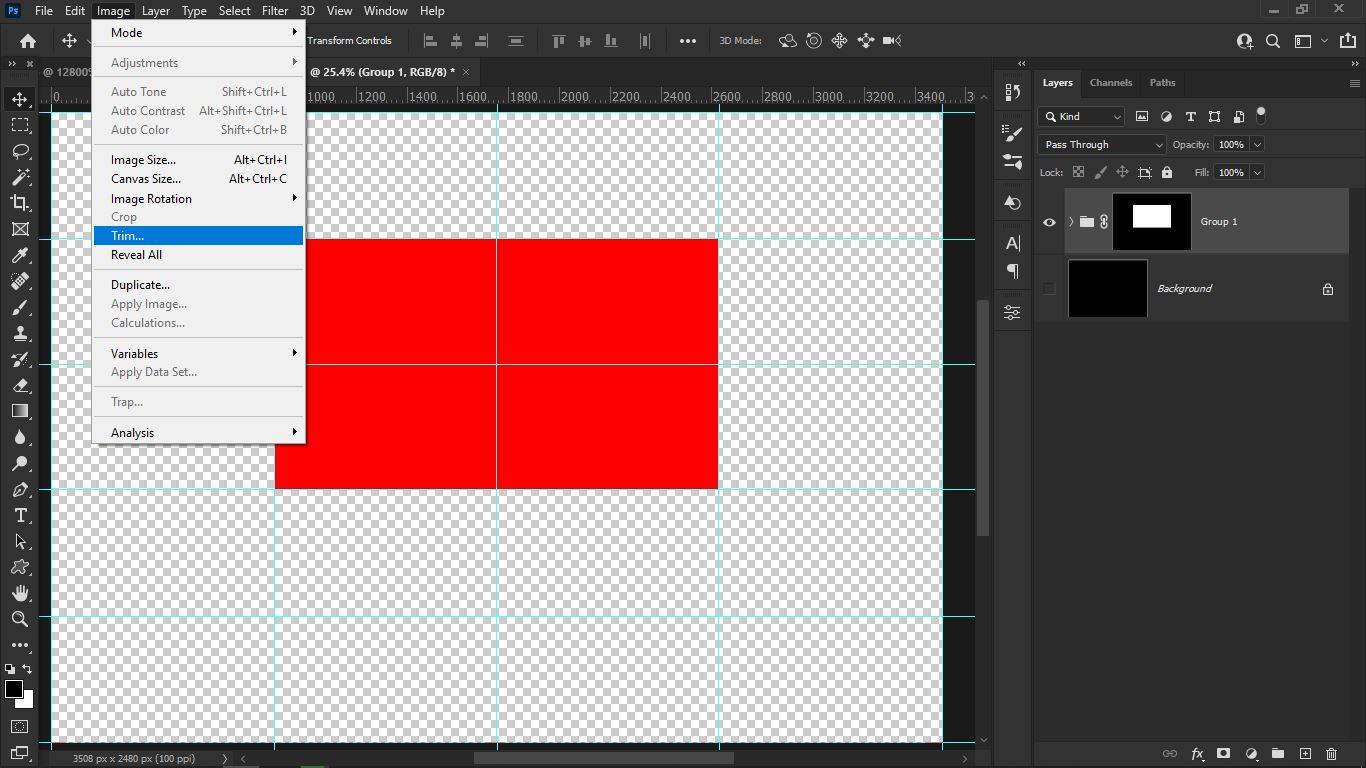
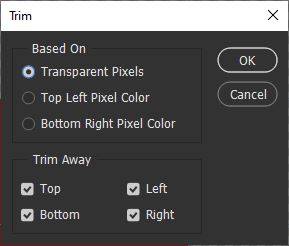
go to the image from the menu bar and select trim.
this will crop all the transparent areas.
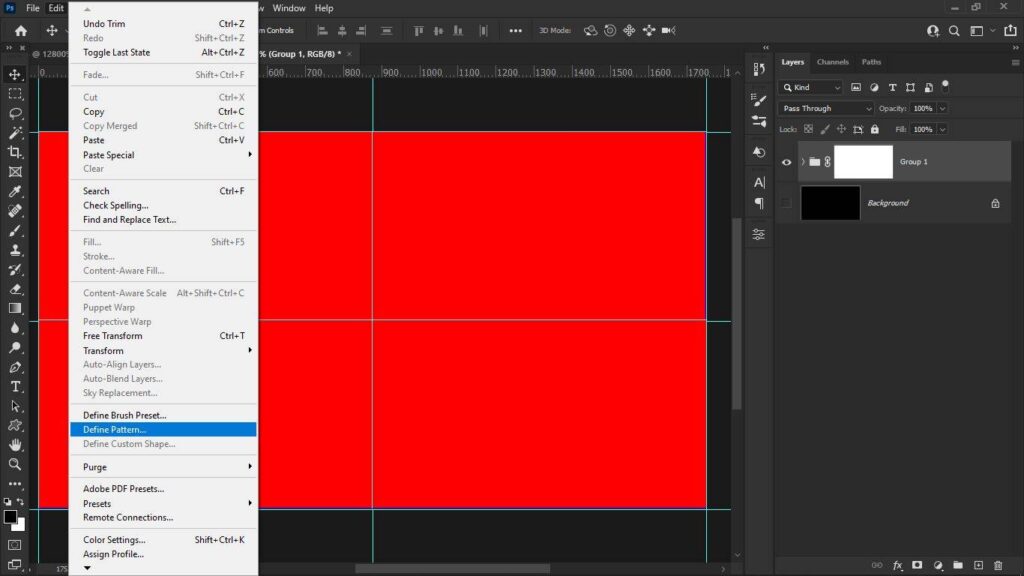
now let’s save it as a pattern. to do that go to the edit from the menu bar and choose define pattern, give the name for the pattern and that’s it.
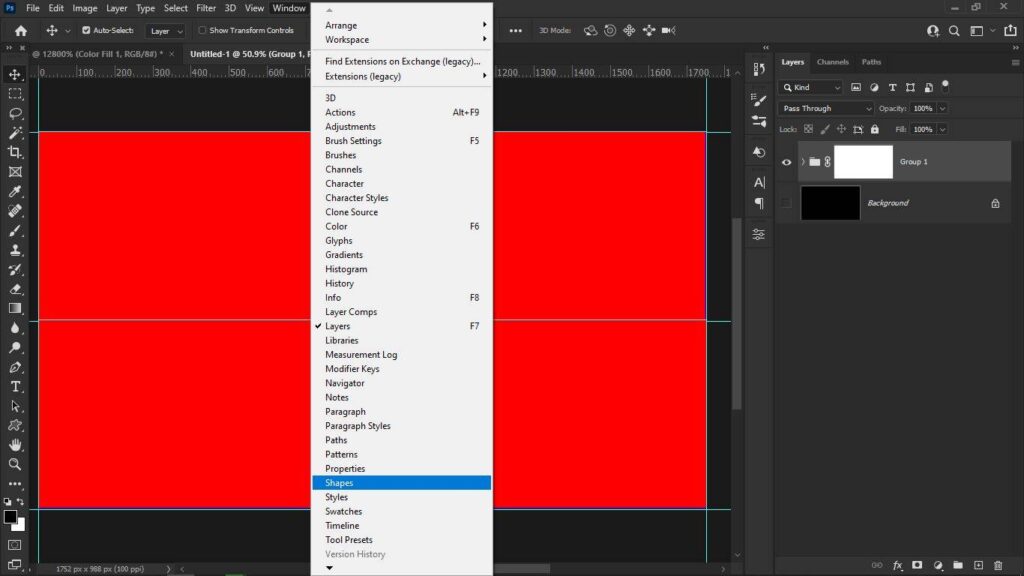
to find your shape, go to the window from the menu bar, and choose shapes.


I will really appreciate the writer’s choice for choosing this excellent article appropriate to my matter.Here is deep description about the article matter which helped me more.
What a really awesome post this is. Truly, one of the best posts I’ve ever witnessed to see in my whole life. Wow, just keep it up.