This Covid-19 Photo Manipulation tutorial will help you create a powerful piece of art. Not just a tutorial. It’s a voyage into the heart of a crisis that has impacted us all, especially those with ties to India, where COVID-19 has been catastrophic. As we explore the techniques and resources utilized to bring this concept to life, including stock pictures, PNGs, and Brushes for download, please pause and ponder on the bigger picture.
This artwork is highly personal. I saw actual people and suffering in India’s COVID-19 pandemic. Families are broken, communities are wrecked, and healthcare is overloaded. Millions have been harmed, and many have died from a shortage of oxygen, a basic need we often overlook.
This artwork tells a story of loss, resilience, and hope. It honors individuals who fought the epidemic, frontline healthcare personnel, and families who suffered unspeakable loss. I want to generate empathy and solidarity through manipulation. We’ve seen tragedy and tremendous human courage in the face of hardship.
As we create this modification technically, remember that each element and layer tells a story. Image, color, and texture depict India’s Covid-19 experience. I want to teach you a new skill and honor those most affected by sharing this process.
Let’s start this adventure with open hearts and brains to build something significant. Let’s develop soulful, eye-catching art together.
Now let’s get started
In this section, we dive into the intricate process of separating the tree from its background, a foundational step in our Covid-19 photo manipulation project. This technique not only requires a keen eye for detail but also a solid understanding of Photoshop’s powerful tools. Let’s break down the process step by step, and I’ll share some tips and resources to help you overcome common challenges.
Step 1: Open Your Image in Photoshop
- Start by opening your chosen tree image in Photoshop. Ensure it’s in a high-resolution format to maintain quality during the manipulation.
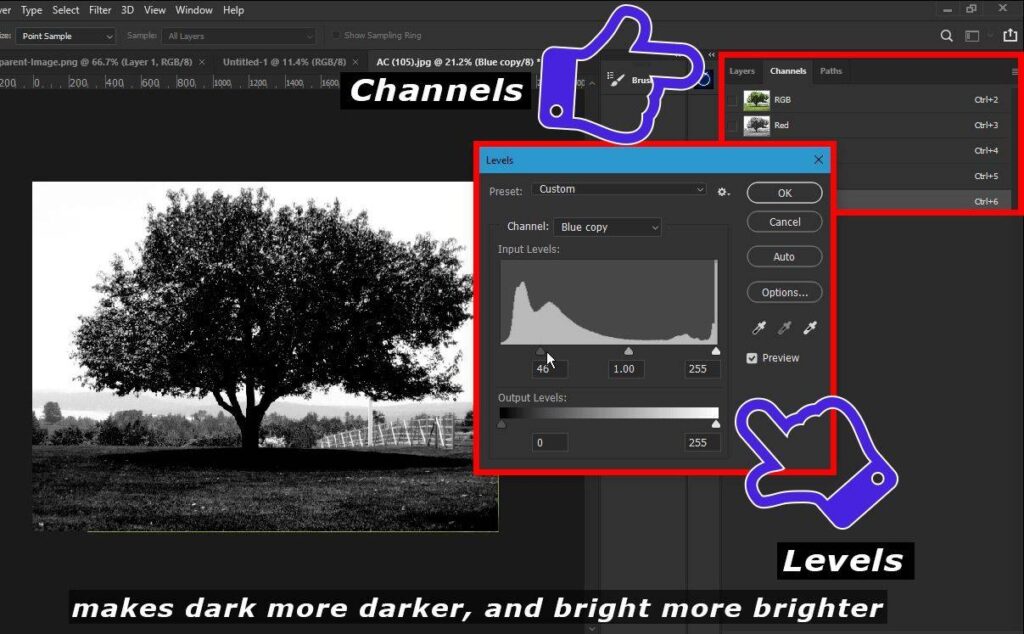
Step 2: Use Alpha Channels to Isolate the Tree
- Navigate to the Channels Panel. Here, you’ll see different color channels for your image. Our goal is to find the channel that offers the highest contrast between the tree and its background.
- Duplicate the channel with the most contrast by right-clicking on it and selecting “Duplicate Channel.”
- With the duplicated channel selected, go to
Image > Adjustments > Levelsor pressCtrl + L(Windows) /Cmd + L(Mac) to adjust the levels. Increase the contrast until the tree is as dark as possible, and the background is white.
- I separate the tree from this image, with the help of alpha channels and levels if, you don’t know how to do it, then search on YouTube, or google, soon I will make a video tutorial on that topic
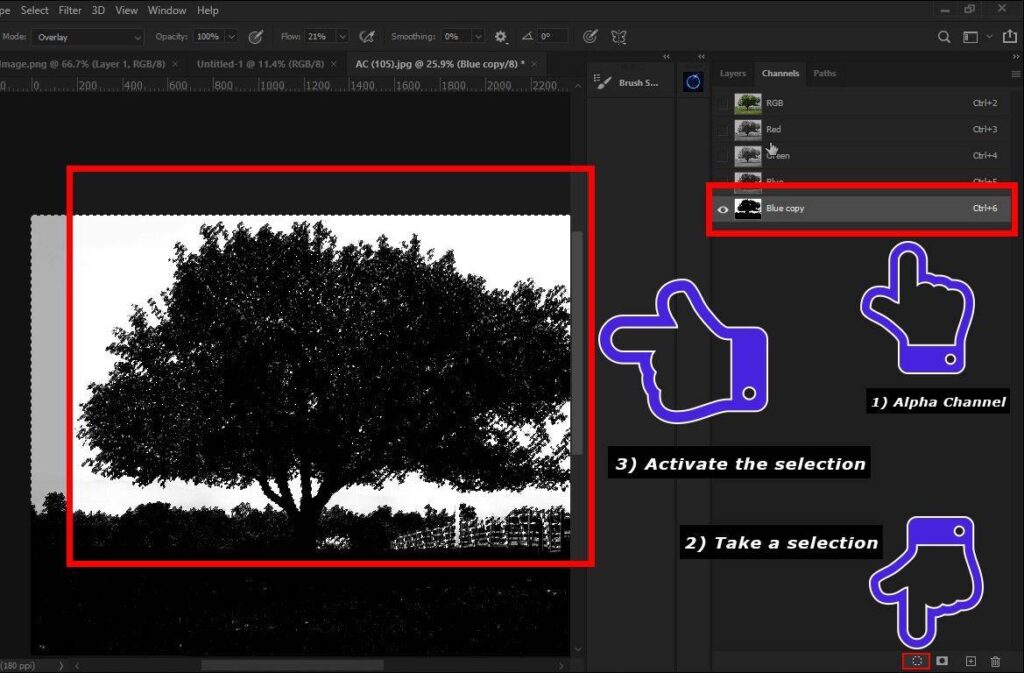
Convert the Channel into a Selection
- Once you’re satisfied with the contrast, Ctrl-click (Windows) / Cmd-click (Mac) on the thumbnail of your edited channel to load it as a selection.
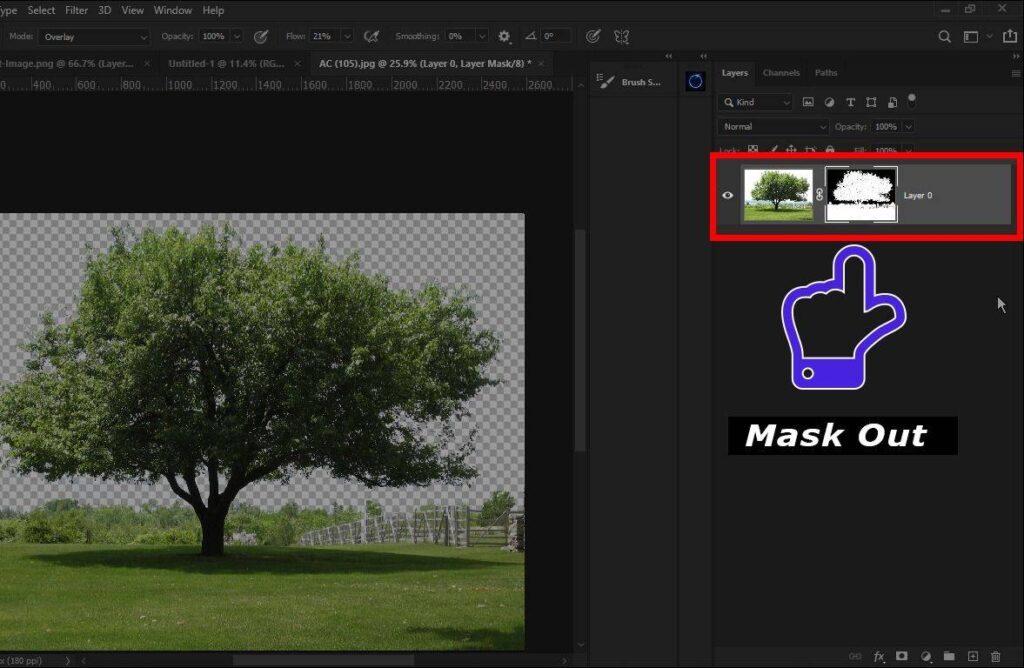
- Return to the Layers Panel and create a mask on your tree layer by clicking the “Add layer mask” icon at the bottom of the panel.
Step 3: Refine the Selection
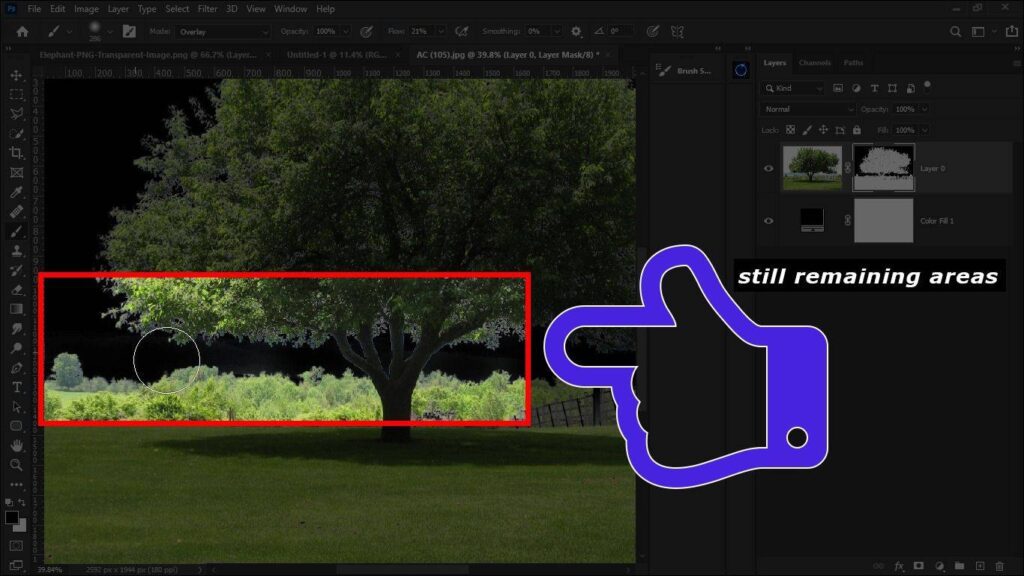
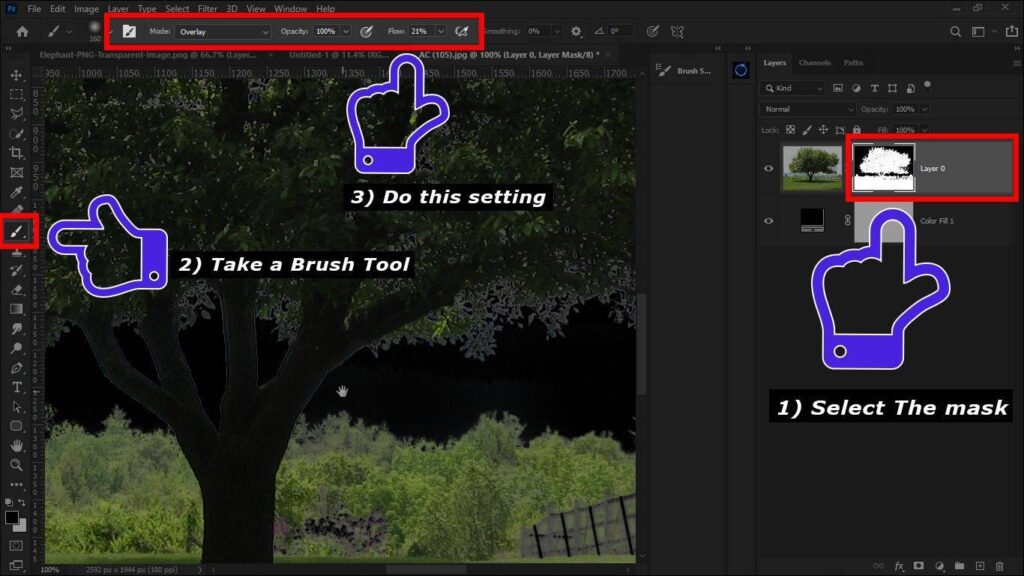
- Use the Brush tool to manually refine the edges of your tree. Set the brush mode to Overlay; this will allow you to paint over the white areas without affecting the black areas (the tree) significantly.
- If there are any areas that need more precise adjustments, switch to a smaller brush size and zoom in on the area.
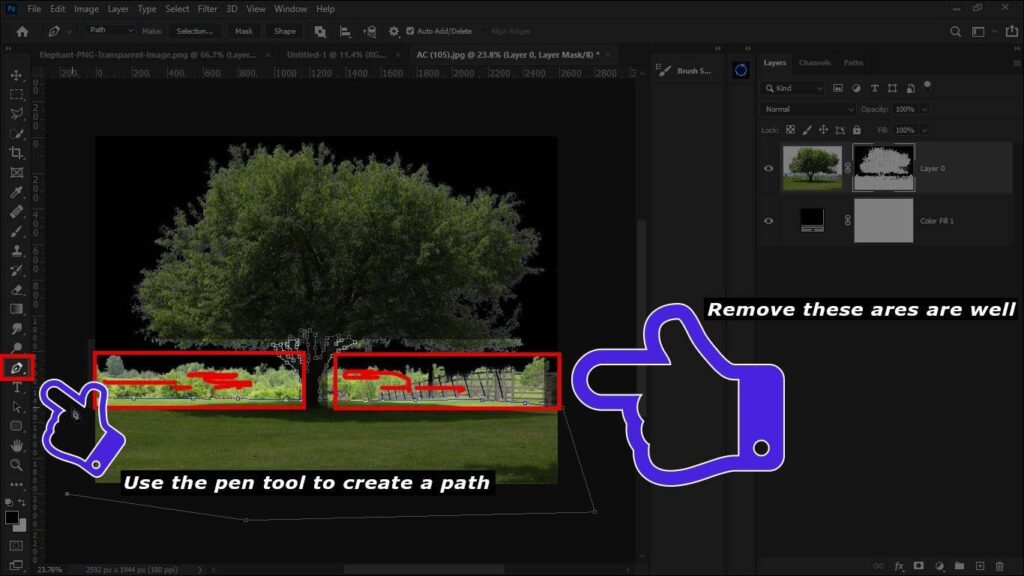
at that point of time, I decided I should also remove this area which is surrounding the tree, so I take a brush tool and the mask is selected and just start painting on that areas
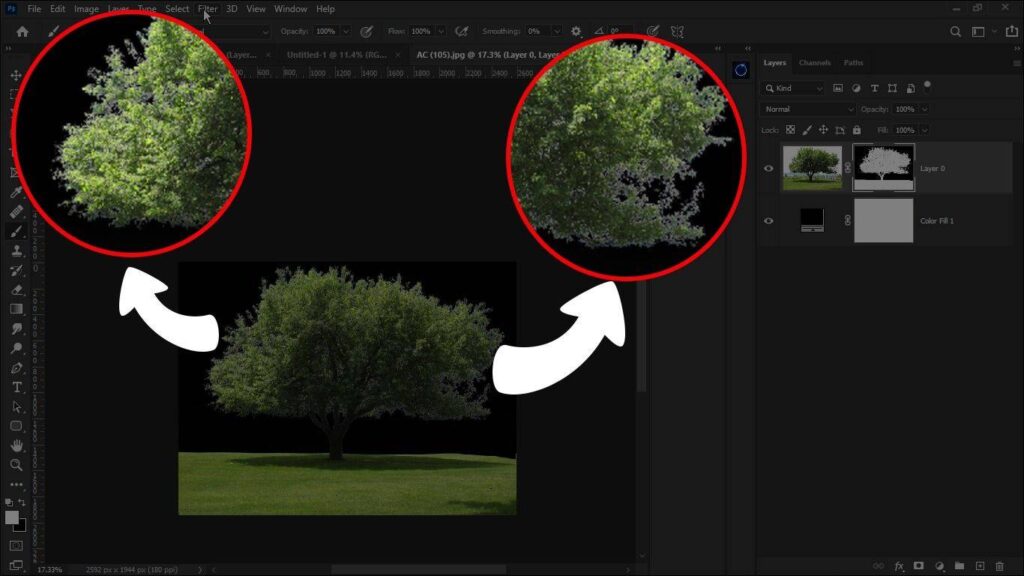
After isolating the tree, our next step in this Covid-19 photo manipulation project is to refine its edges for a seamless blend into our new background. One of the most effective tools for this task is Photoshop’s “Minimum” filter. Let’s explore why it’s useful, introduce some alternative methods for edge refinement, and compare the results.
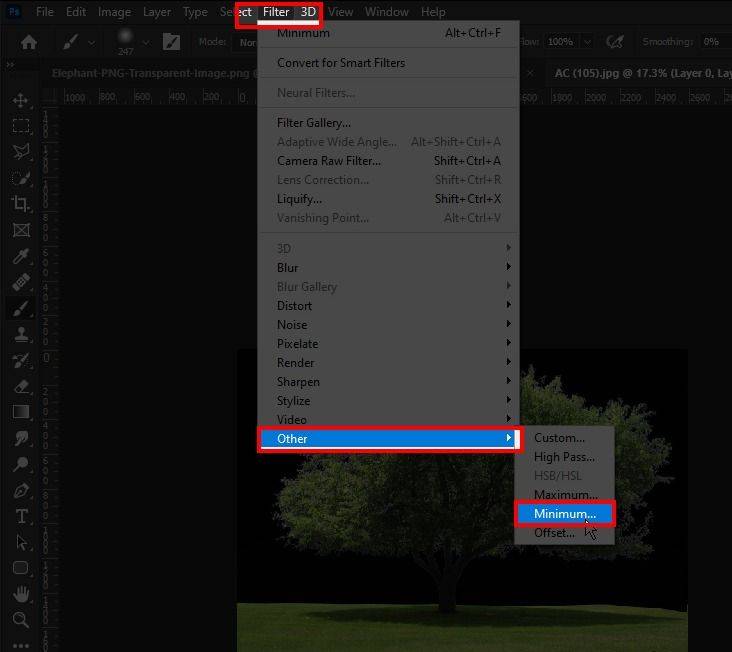
Using the “Minimum” Filter: The “Minimum” filter is a powerful tool for edge cleanup because it contracts the selection edges by reducing the pixel radius, effectively smoothing out jagged or rough edges around our isolated tree. Here’s how to use it:
- With your tree layer selected, go to
Filter > Other > Minimum.
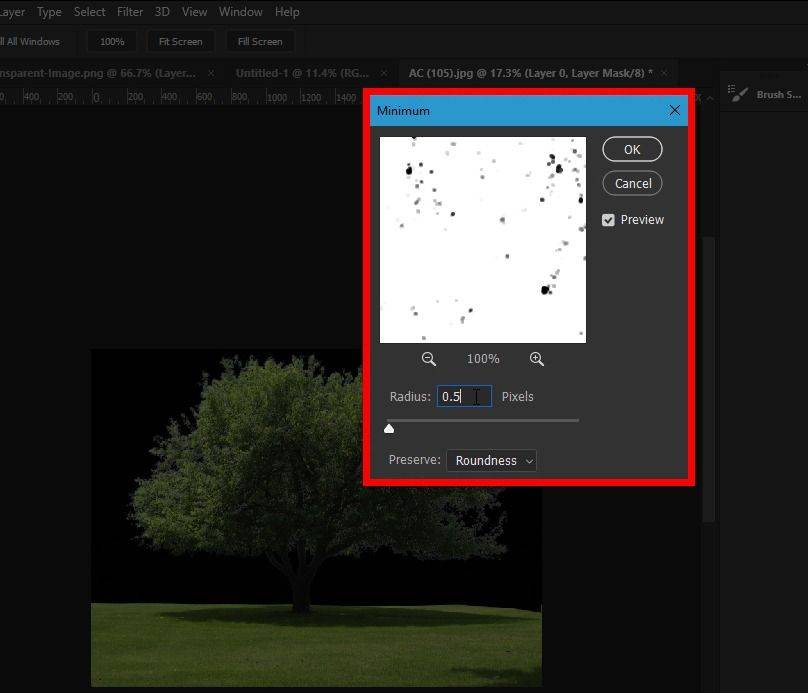
- In the dialog box, start with a small Radius value (around 0.5 to 1 pixel). This will contract the edges slightly and remove any white halos or roughness.
- Preview the effect and adjust the radius as needed. A lower value preserves more detail, while a higher value can make the edges too smooth or artificial.
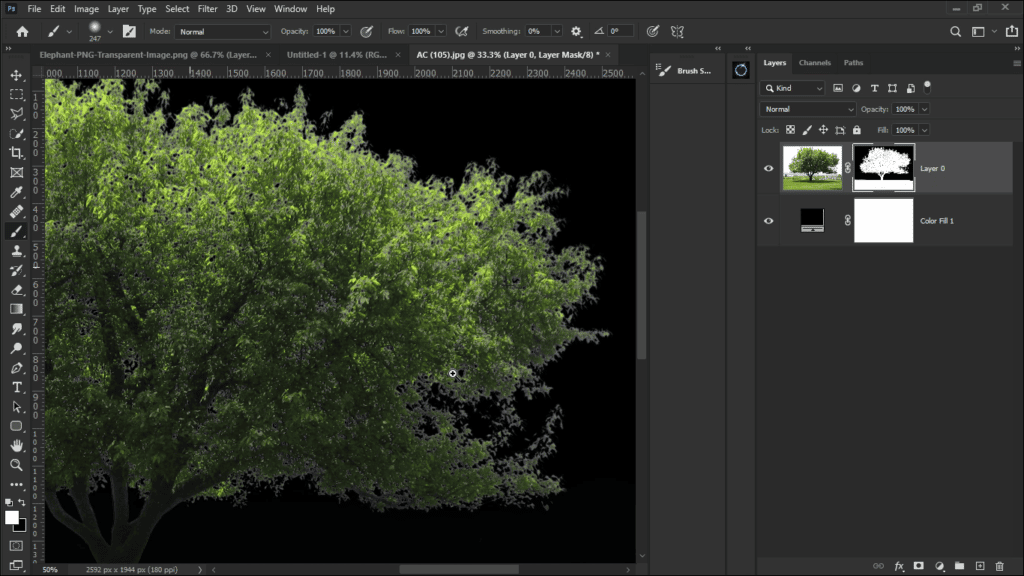
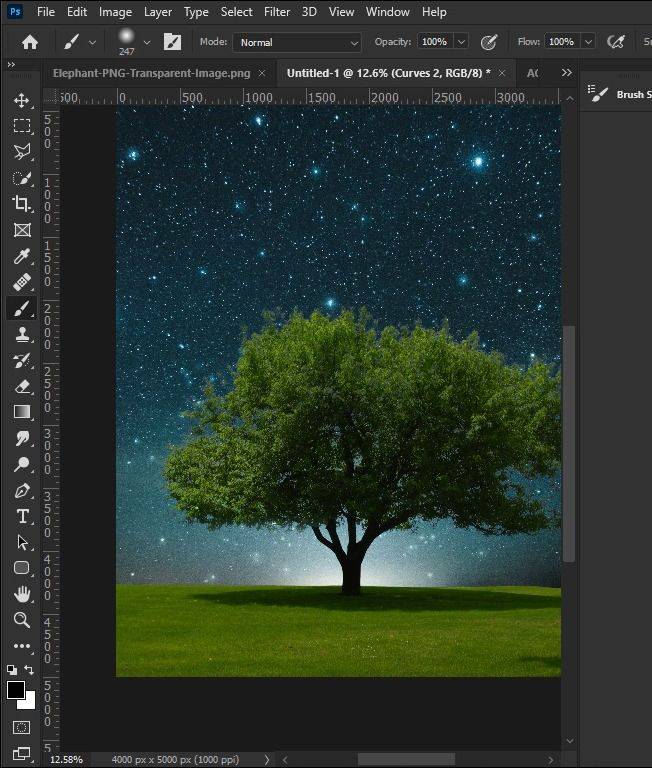
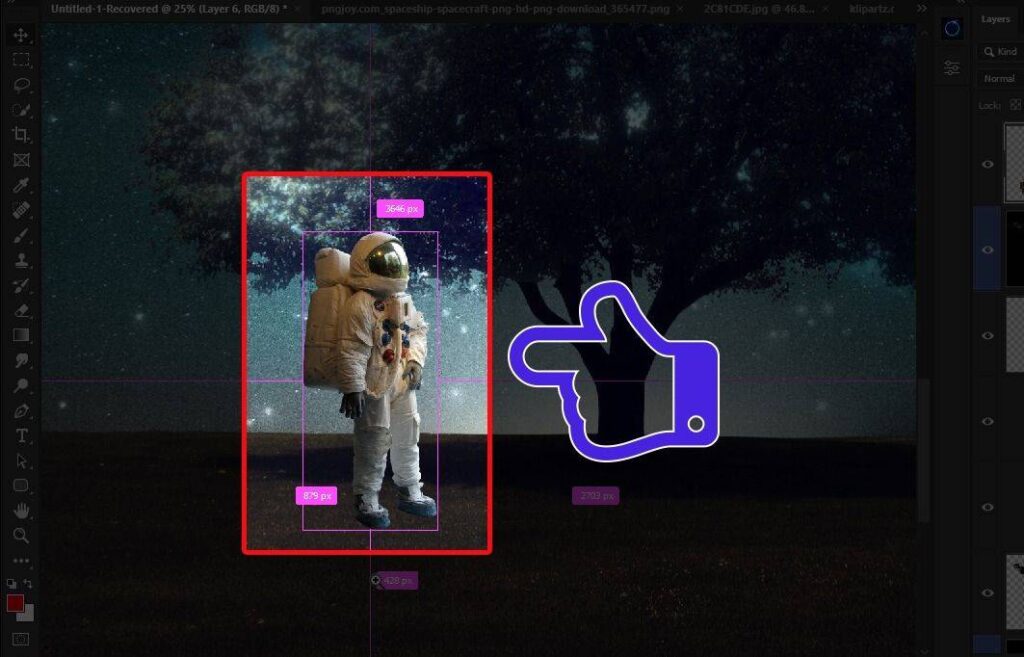
now I drag and drop this tree image into the new document and the size of this document is 4:5 inches, then I fit the image with this document,
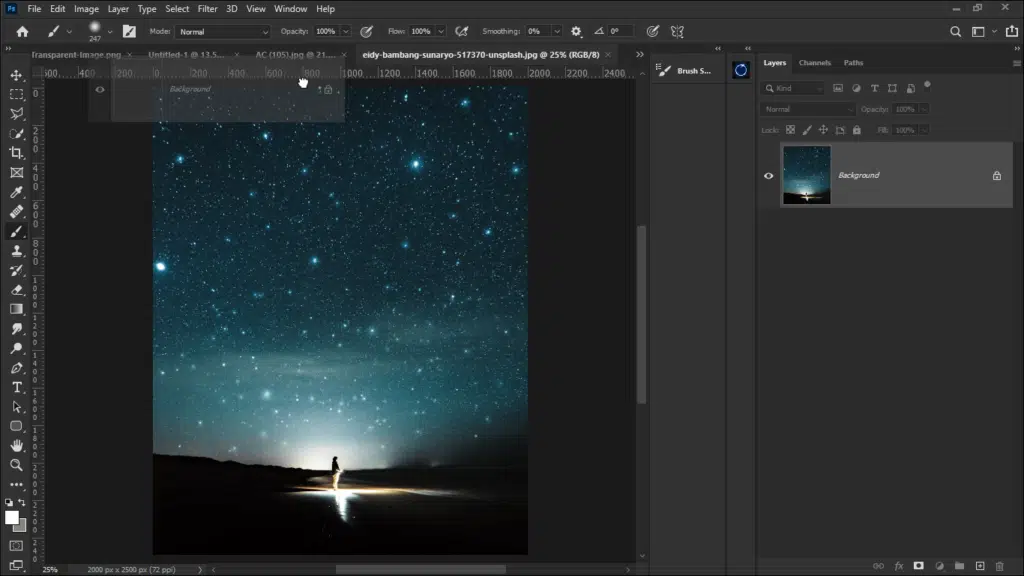
After that I move on to the next image of this concept, this image I have used as a sky, so i drag and drop this image into the same document and move it to below the tree image
And at this stage, it looks very strange because the background and foreground colors don’t match together,
Match the Background with Foreground
there are a lot of ways and a lot of videos are available on youtube on that topic, you can go and check them out, soon I will make a dedicated tutorial on that topic as well but for now, go ahead watch some videos about it, here i just Roughly explain you what i did here
When integrating the tree into a new background, ensuring that the lighting and color tones match between the foreground (tree) and the background is crucial for a realistic result. Curves adjustment layers in Photoshop offer a precise tool for achieving this harmony. Let’s delve into a step-by-step tutorial to master these adjustments.
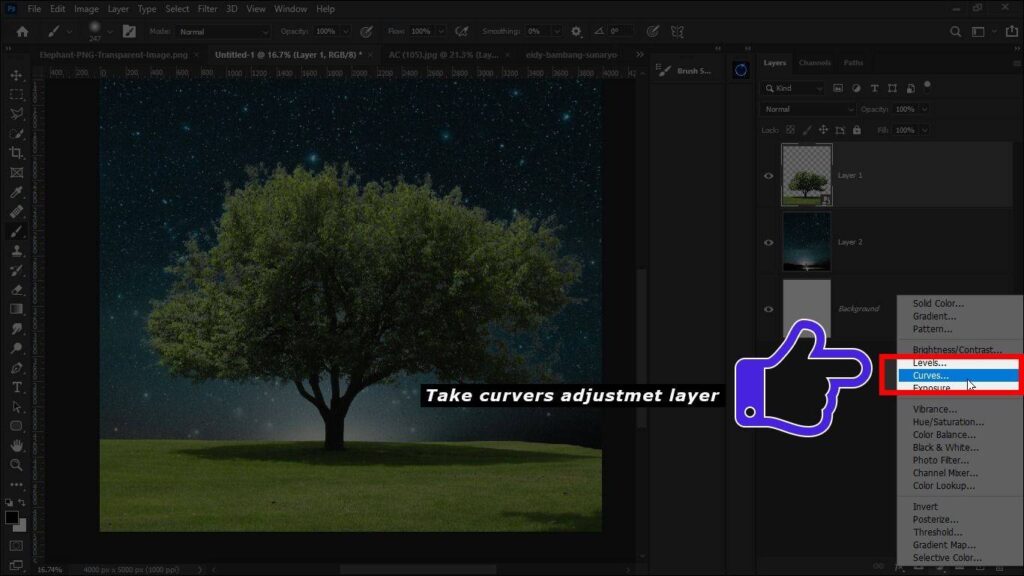
Step 1: Brightness Matching
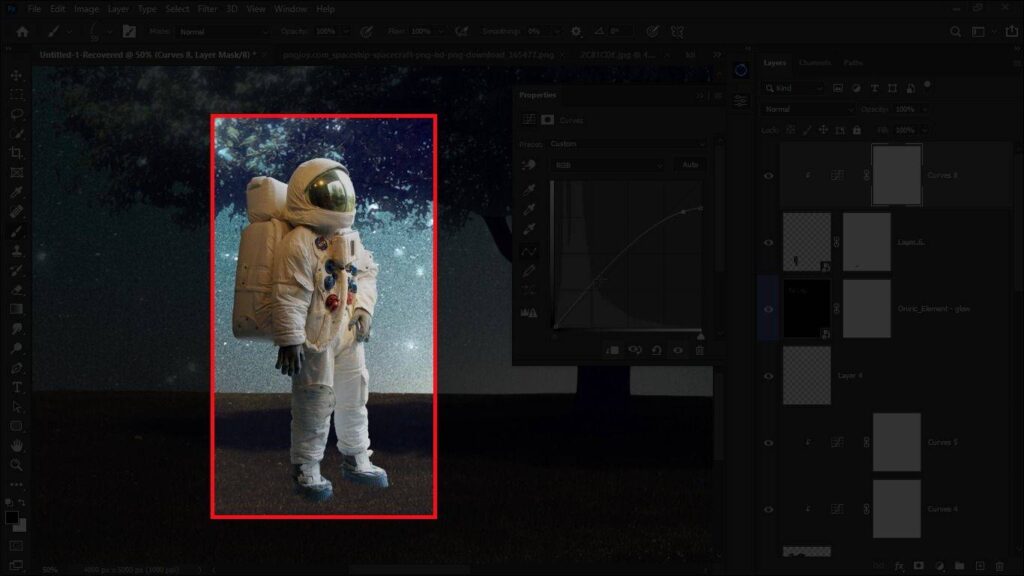
- Add a Curves Adjustment Layer directly above your tree layer. This layer will control the brightness levels of the tree to match the background.

- Adjust the Curve for brightness by clicking and dragging points on the curve line. To brighten the image, lift the curve upwards; to darken, pull it downwards. Focus on matching the overall luminosity of the background.
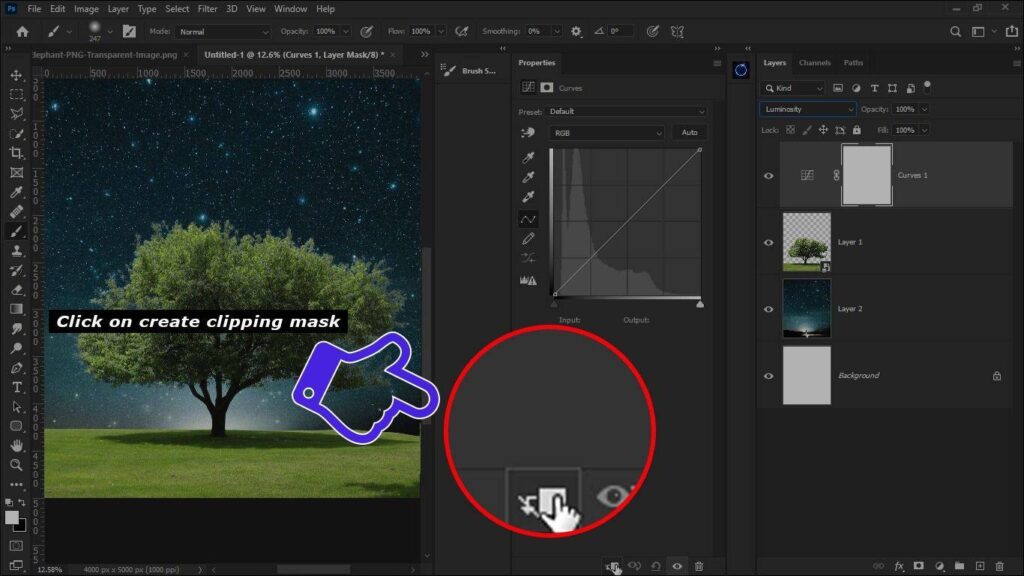
- Use the Clipping Mask Feature by clicking the clipping mask icon at the bottom of the curves panel or alt-clicking between the curves layer and the tree layer. This ensures the adjustment only affects the tree, not the entire composition.
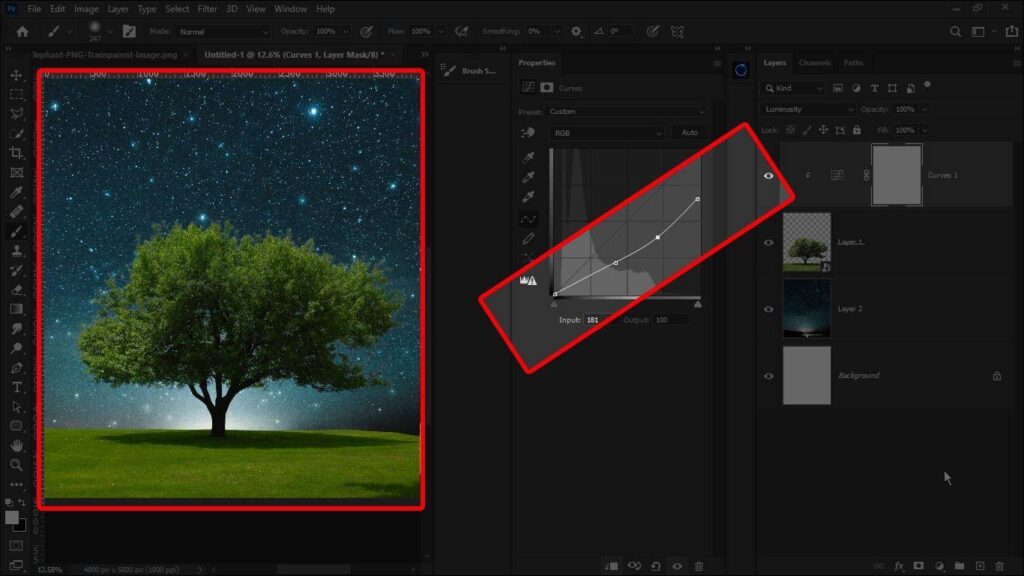
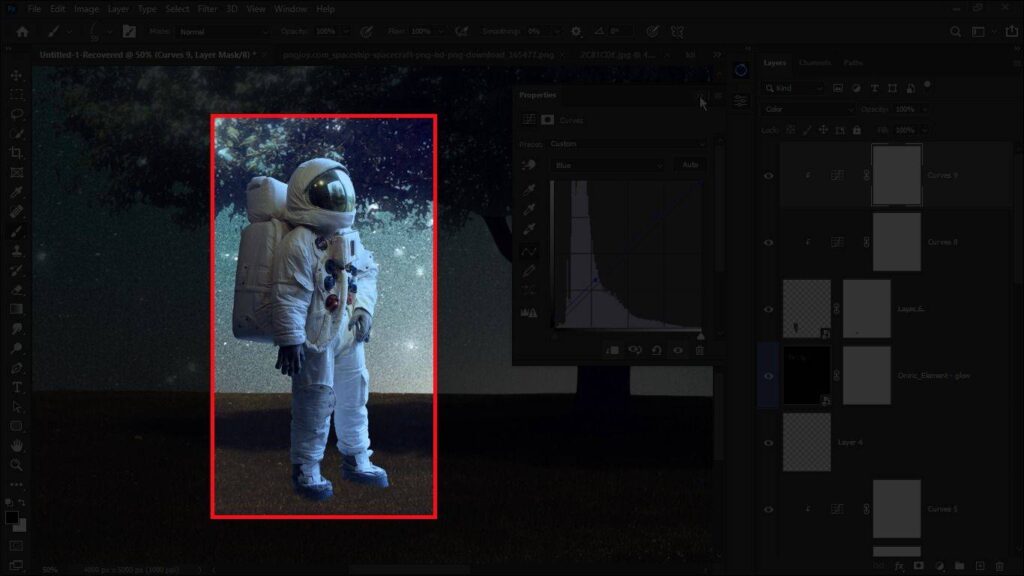
- now try to adjust the brightness similar to the background image by using curves, keep in mind here I’m only optimizing brightness, not the color, once your satisfied with the brightness, let’s match the colors
Step 2: Color Matching
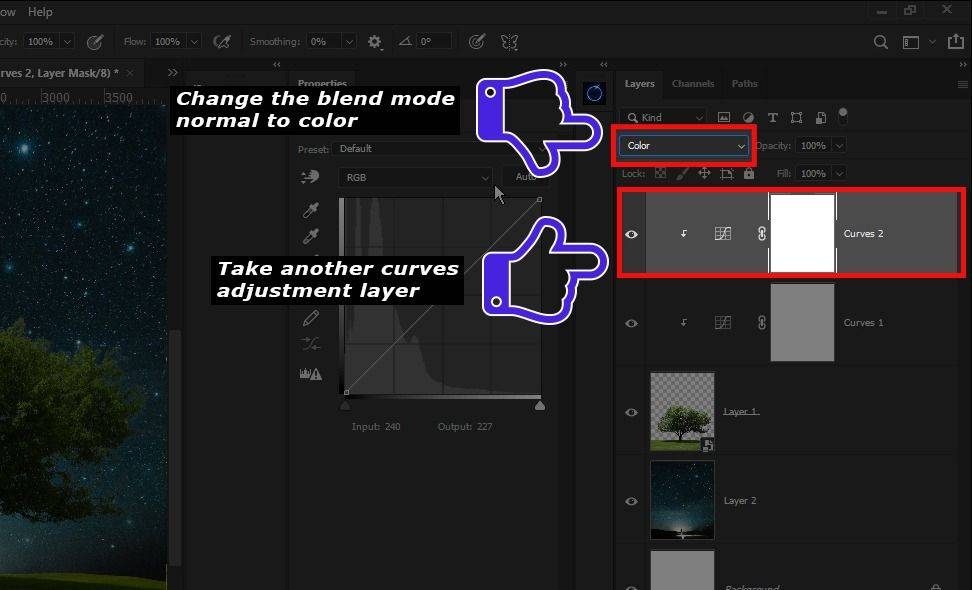
- Add Another Curves Adjustment Layer for color matching, placing it above the first curves layer.
- Change the Layer Blend Mode to ‘Color’. This mode allows the curves adjustment to affect only the color, not the luminosity.
- Adjust the RGB Curves Individually: Switch between the Red, Green, and Blue channels in the Curves adjustment panel. Manipulate each curve to introduce or reduce the respective color tones. The goal is to match the tree’s color temperature and hues with the background’s.
Examples of Settings for Different Lighting Conditions:
- Overcast Lighting: Lower contrast; focus on matching the muted colors and soft light. In the RGB curves, slightly raise the lower end of the curve for each channel to introduce a soft warmth.
- Sunset Lighting: Emphasize warm tones; increase the red and slightly adjust the green and blue curves to replicate the golden hour glow.
- Night Scene: Increase the blue channel’s mid to upper points for a cooler tone, and adjust the red and green to match the specific night scene’s color balance.
- and do the same thing with this curve, again click on the clipping mask
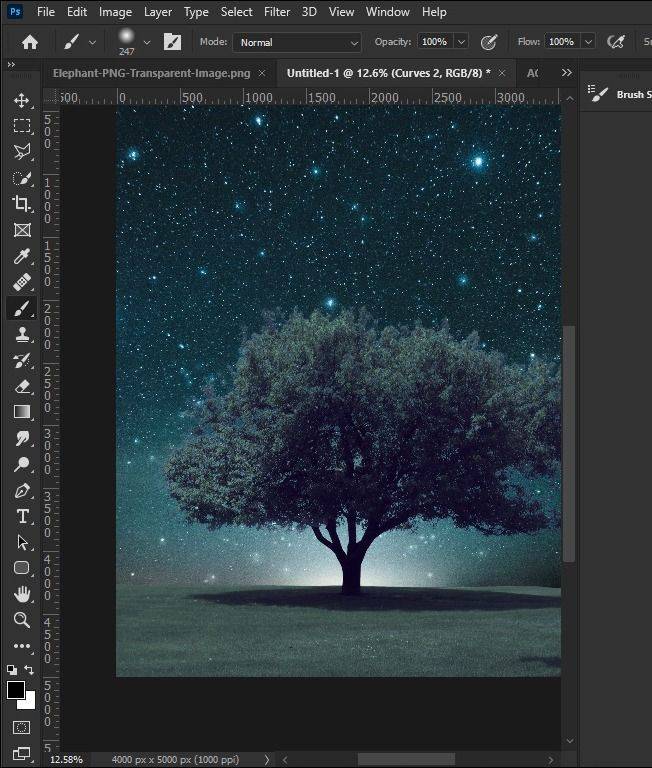
so that’s how I match the colors of the background and foreground, you can see the before and after here. and the best part of this technique is you can adjust them any time, simply clicking on the curves.
Create a glow by using the oniric plugin
In our journey of creating a compelling Covid-19 photo manipulation, one of the magical touches we can add is a glow effect, bringing our composition to life. The Oniric plugin for Photoshop emerges as an invaluable tool for this purpose, offering an intuitive way to add realistic glow effects that can transform the mood and atmosphere of our artwork. Let’s delve into how we can harness the Oniric plugin to achieve stunning glow effects, exploring its settings and demonstrating the influence of minor adjustments on our final image.
Getting Started with Oniric Plugin: First, ensure the Oniric plugin is correctly installed in your Photoshop. Once installed, it can be accessed from the Photoshop Extensions menu. The plugin interface is straightforward, providing a suite of options to customize the glow effect to fit your vision perfectly.
Understanding Oniric’s Key Settings:
- Glow Radius: This setting controls the spread of the glow effect. A larger radius creates a more diffuse glow, ideal for large light sources or to suggest a strong light emanating from the object.
- Brightness: Adjusts the intensity of the glow. Increase it to make the glow more pronounced or decrease it for a subtler effect.
- Color: Allows for the selection of the glow’s color, enabling you to match the glow with your image’s color scheme or create contrasting effects for visual interest.
- Threshold: Determines the luminance threshold for where the glow effect is applied. A lower threshold makes more parts of the image eligible for the glow effect, whereas a higher threshold restricts it to the brightest areas.
- Softness: Controls the softness of the glow edges. A higher softness value results in a smoother transition between the glow and the rest of the image.
Applying the Glow Effect:
- Select the layer you wish to apply the glow to.
- Open the Oniric plugin and start with a moderate Glow Radius and Brightness setting to see how the effect interacts with your image.
- Experiment with different colors and thresholds to achieve the desired mood. For instance, a warm orange glow can simulate sunset light, while a cool blue might suggest moonlight.
- Adjust the Softness to blend the glow naturally with the rest of the image.
Examples and Tips:
- For a Daytime Scene: Start with a lower brightness and a subtle blue or yellow hue to mimic natural light. A smaller glow radius can simulate sunlight filtering through trees or clouds.
- For a Nighttime or Sci-Fi Scene: Increase the glow radius and brightness for dramatic effects. Experiment with vibrant colors like neon pink or electric blue to create a futuristic or otherworldly atmosphere.
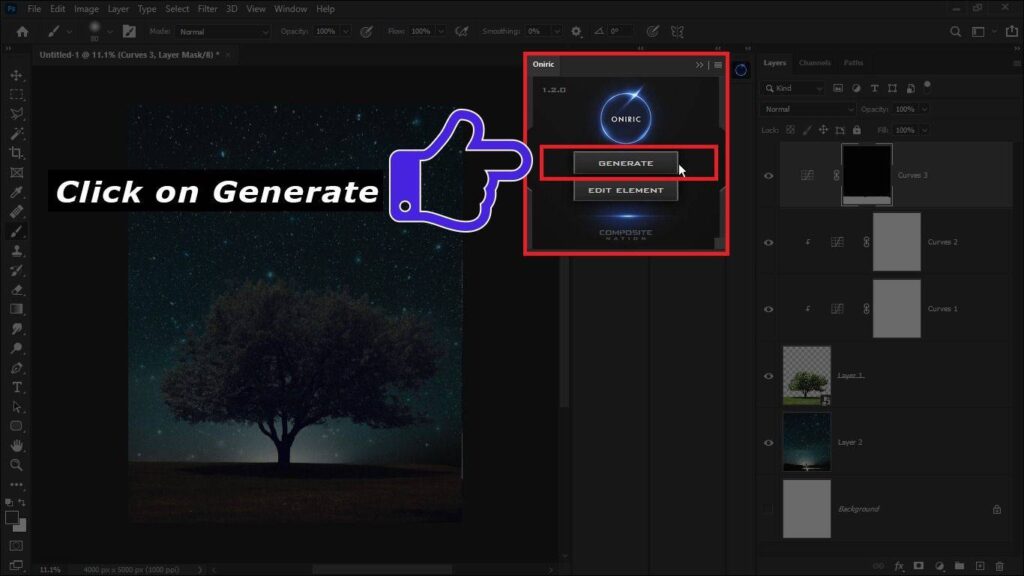
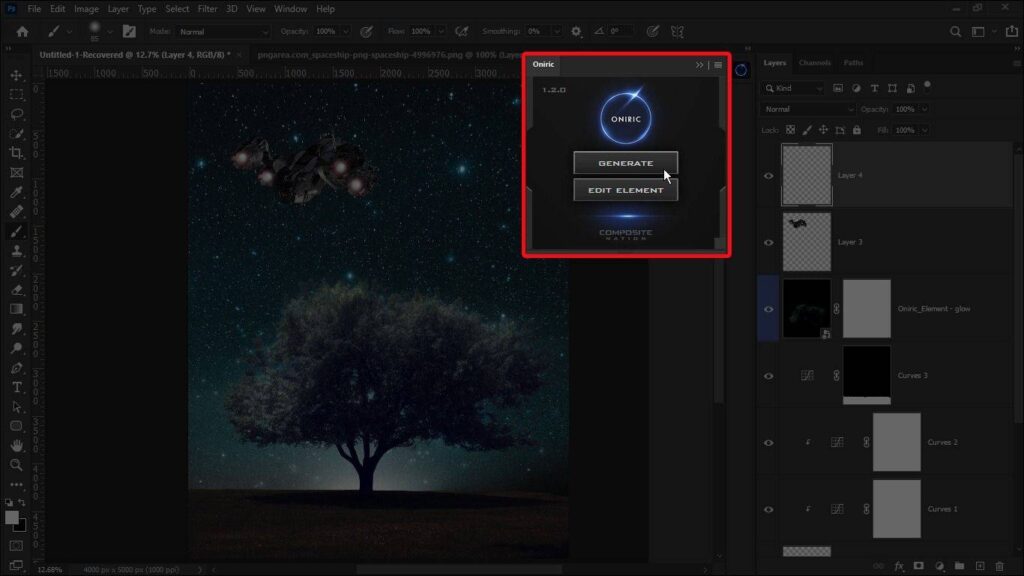
now let’s do some extraordinary things with the help of this photoshop plugin, oniric, just click on generate. I already made a video about that plugin.
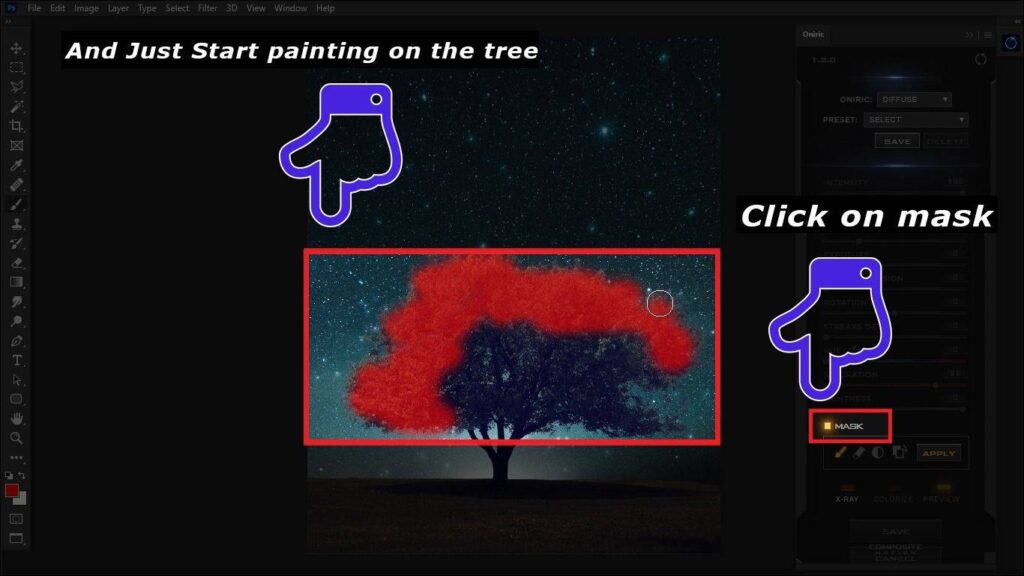
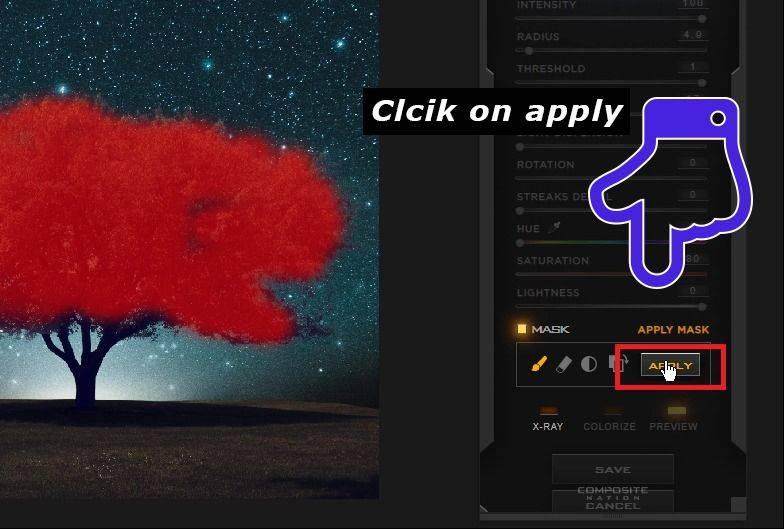
- Here In this panel, I click on this mask and just start painting on the tree, after that i click on apply

- you can control this effect by using these sliders, once you are done click on save
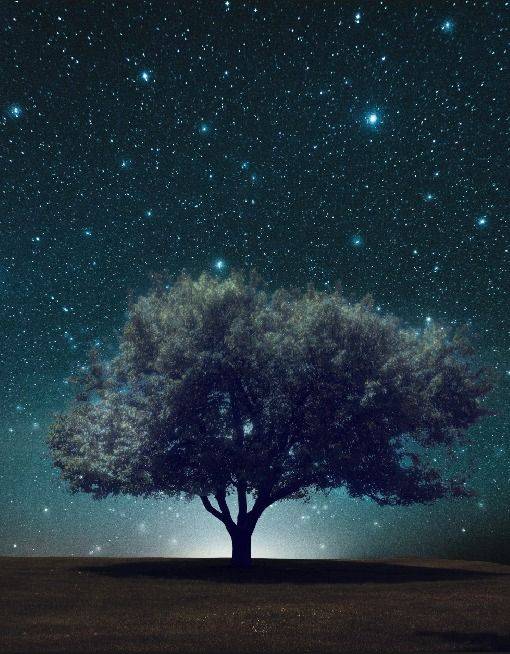
- and this is the end result that i got by using this plugin
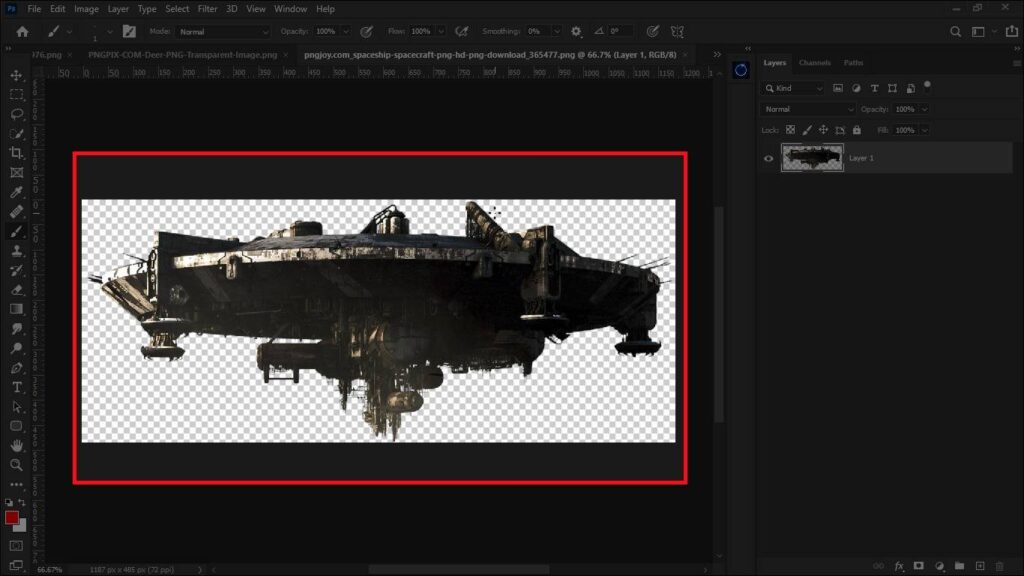
First PNG
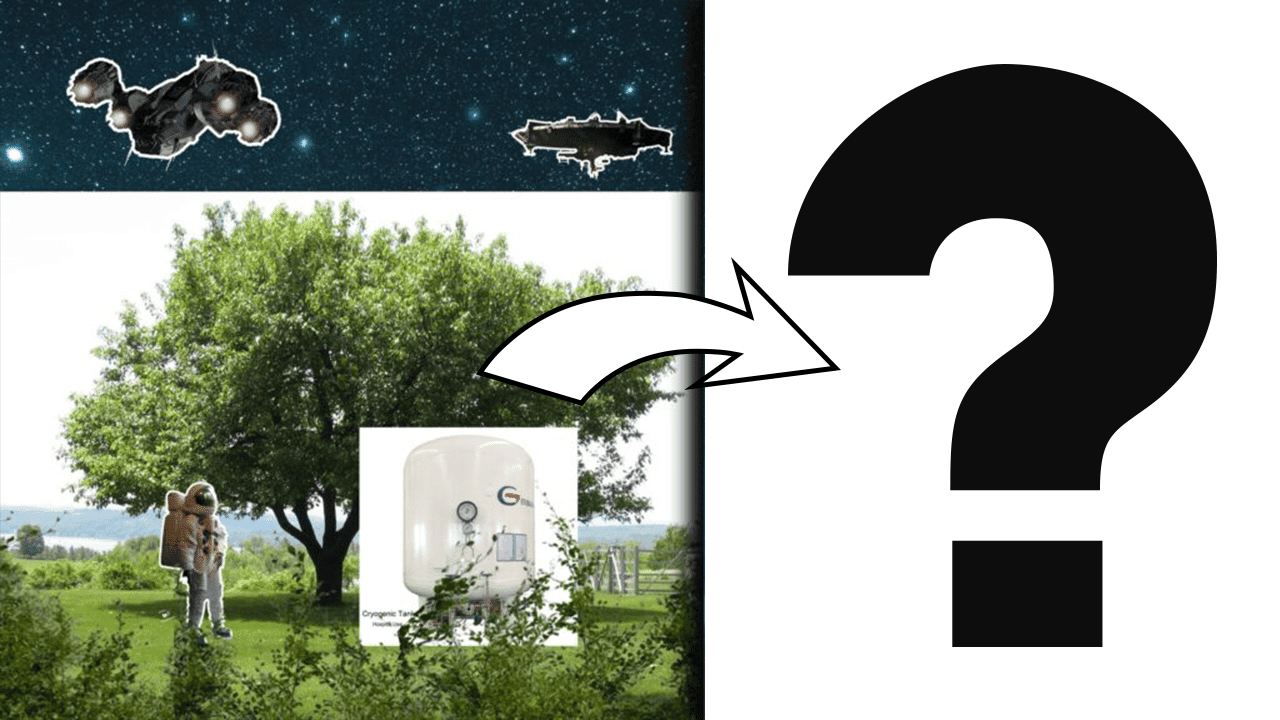
In our Covid-19 photo manipulation project, the incorporation of specific PNG elements like a spaceship and a UFO isn’t arbitrary. Each element is chosen to deepen the narrative, adding layers of meaning and enhancing the visual storytelling. Let’s explore how to select these PNGs thoughtfully and integrate them seamlessly into our artwork, using layer blending modes and opacity adjustments for a natural blend.
Selection Process for Storytelling PNGs: Choosing the right PNG elements involves a deliberate process that aligns with the narrative you wish to convey. For our project, the inclusion of a spaceship and UFO serves as metaphors for invasion and the unseen threat of the virus, illustrating its alien and disruptive impact on society. When selecting PNGs:

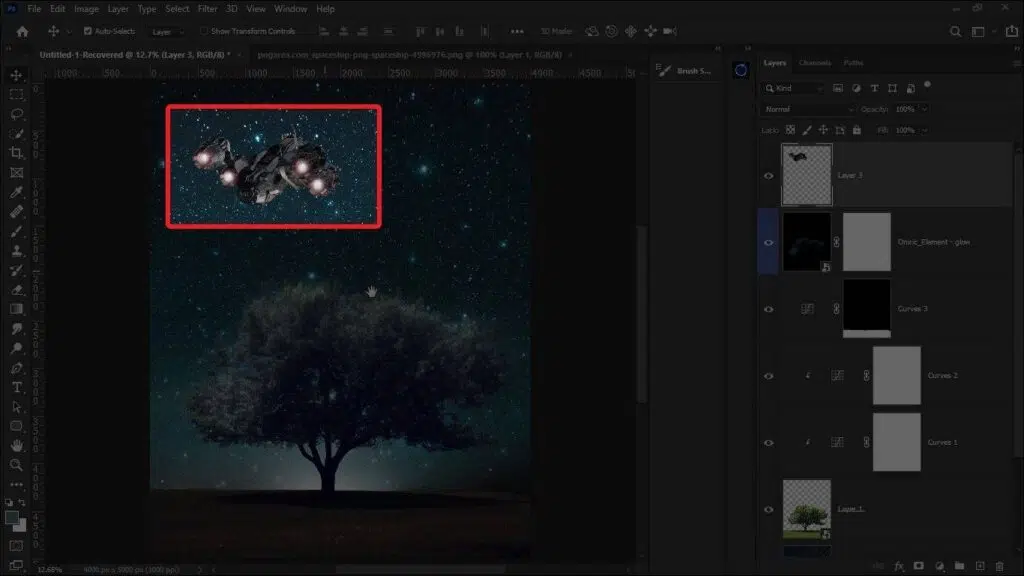
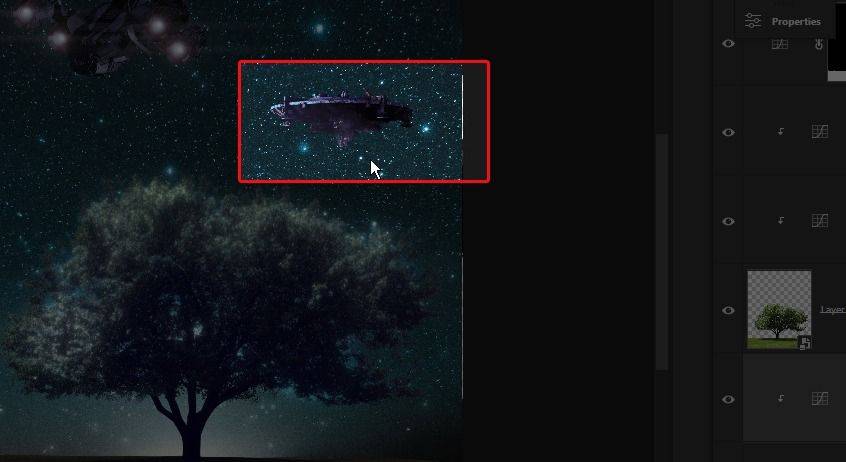
- I added this spaceship PNG to the sky.
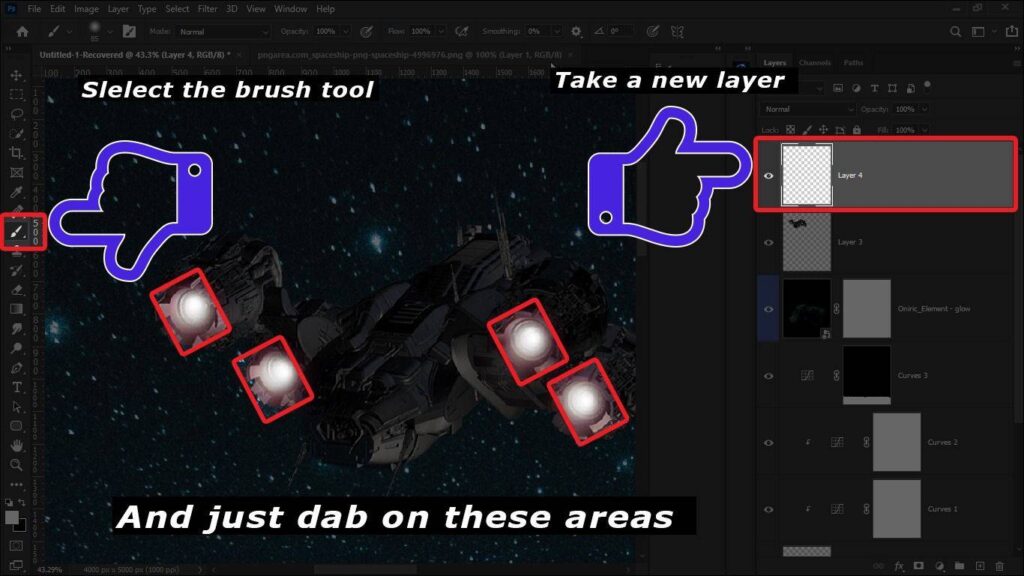
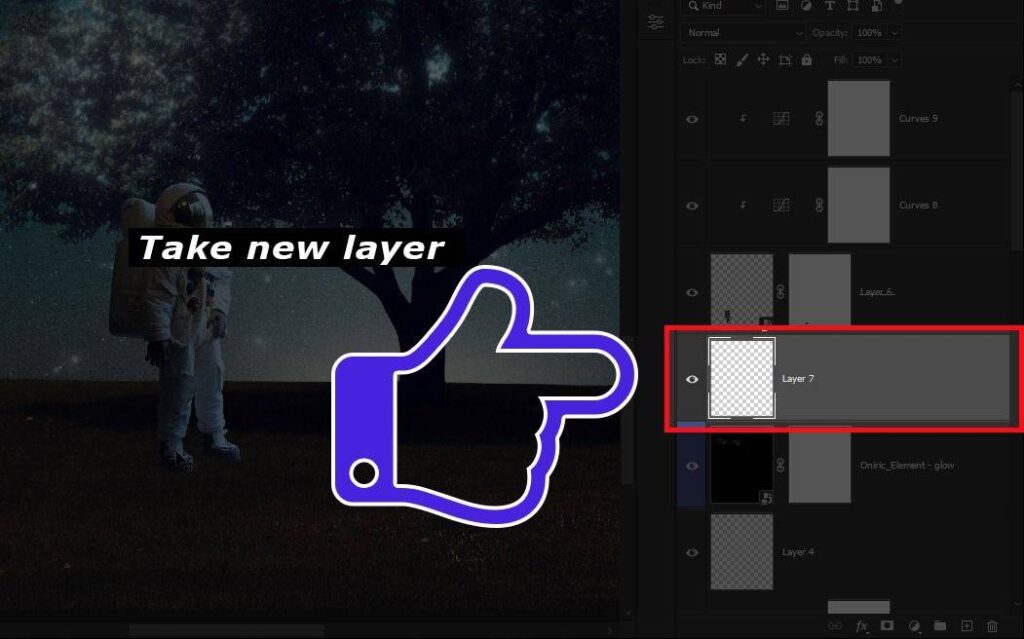
- now I take a new layer and select the brush tool, white is a foreground, color and just on those areas which I highlight on this screenshot
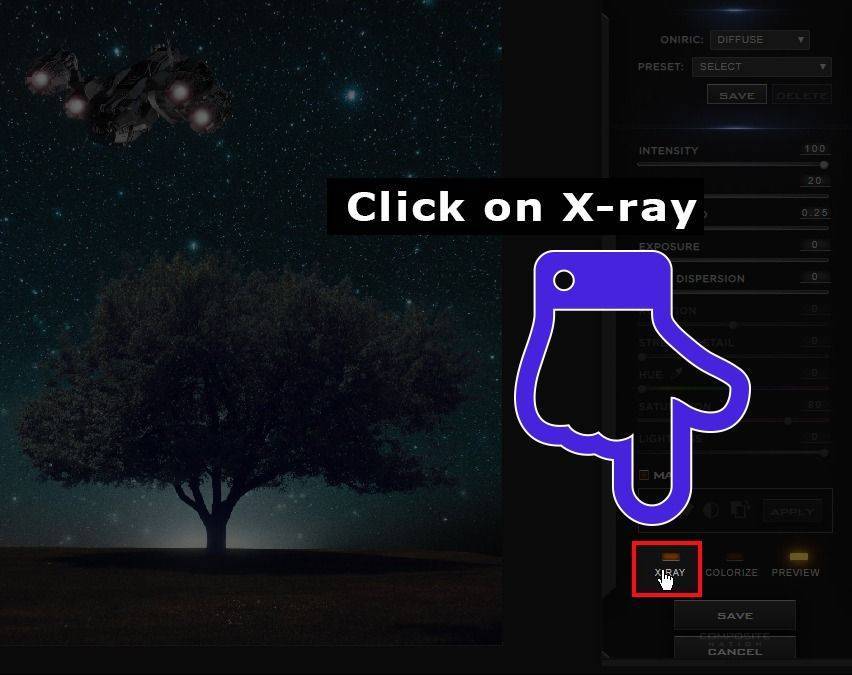
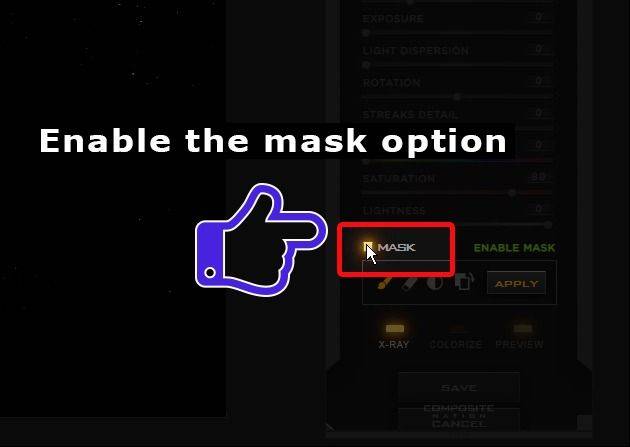
- then again go to the oniric and click on generate, now click on x-ray to see which are the areas are affected by the plugin. to choose the specific areas, enable the mask option
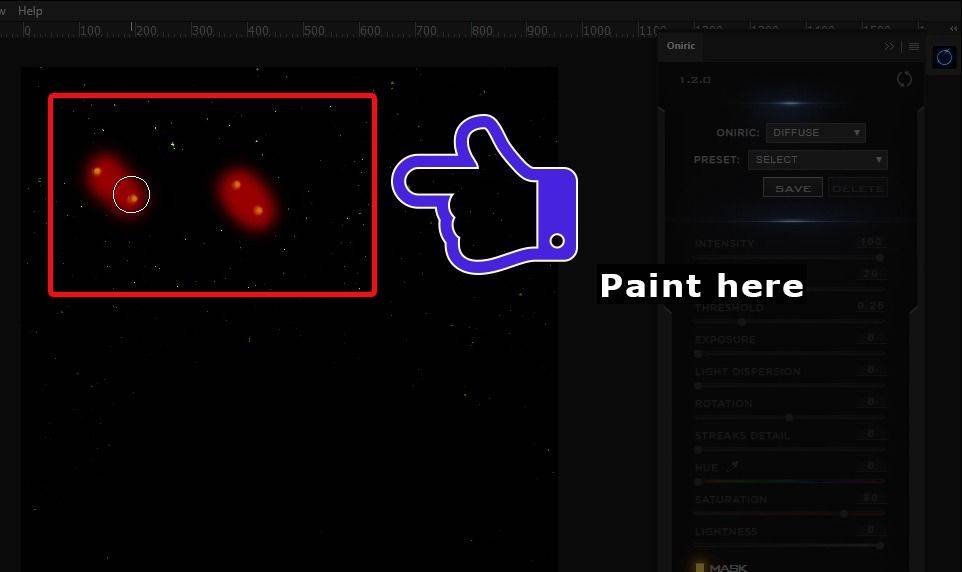

- I just want to include this spaceship light, so just start painting on this area, then click on apply
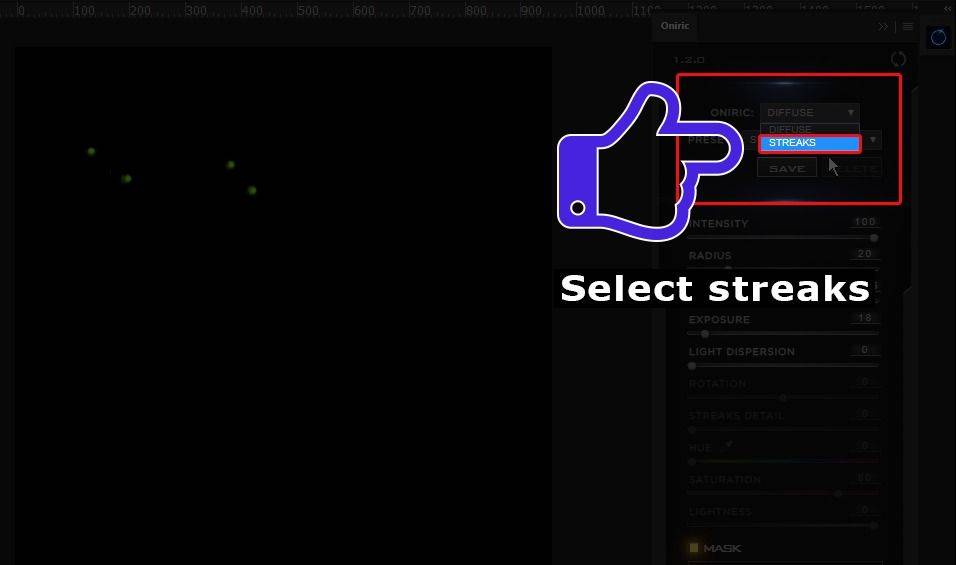
- once the specific areas are selected then change the oniric mode diffuse to streaks from the drop-down
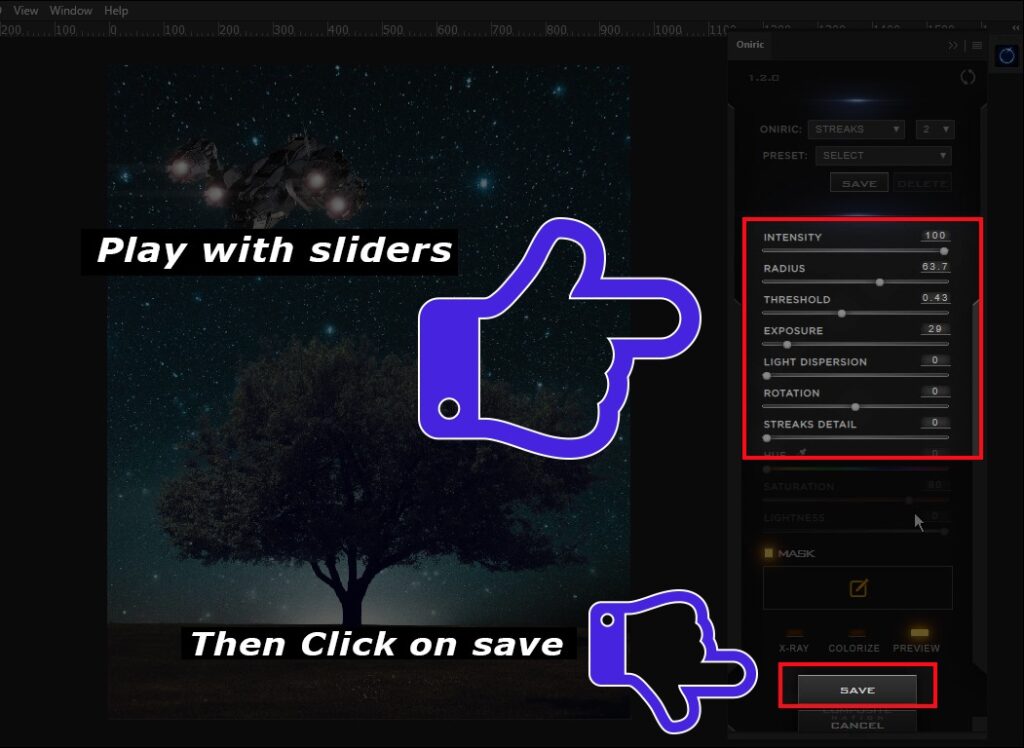
- you can play with sliders to get a much better result. then click on save
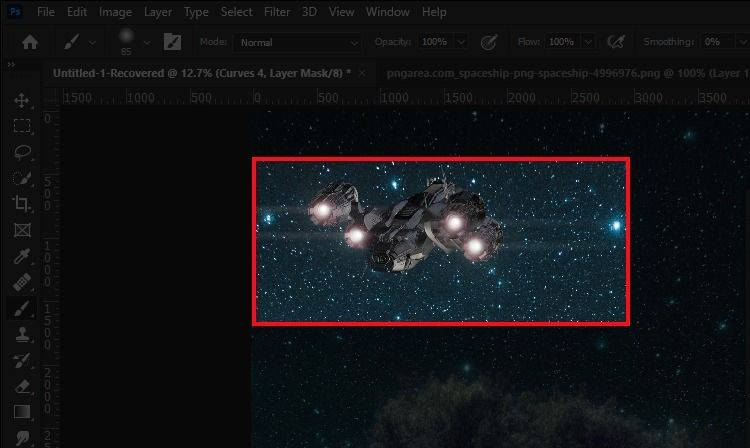
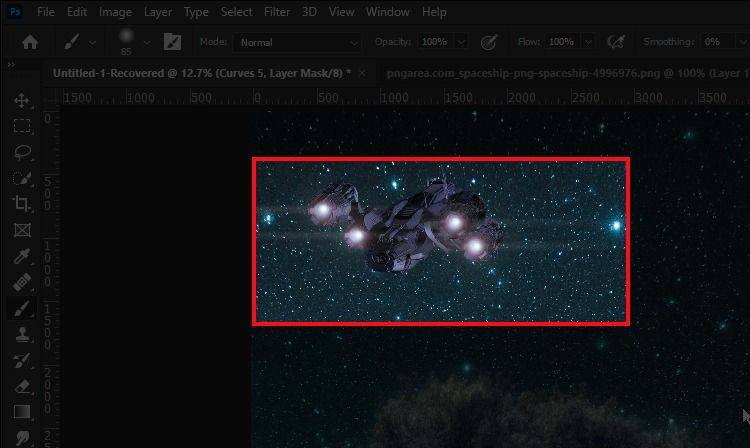
- then I match the spaceship colors with my background by using the same technique which I show you previously.
Second PNG
- to make this concept storytelling, I added this UFO png.
- then i did the same here, match the foreground with the background.
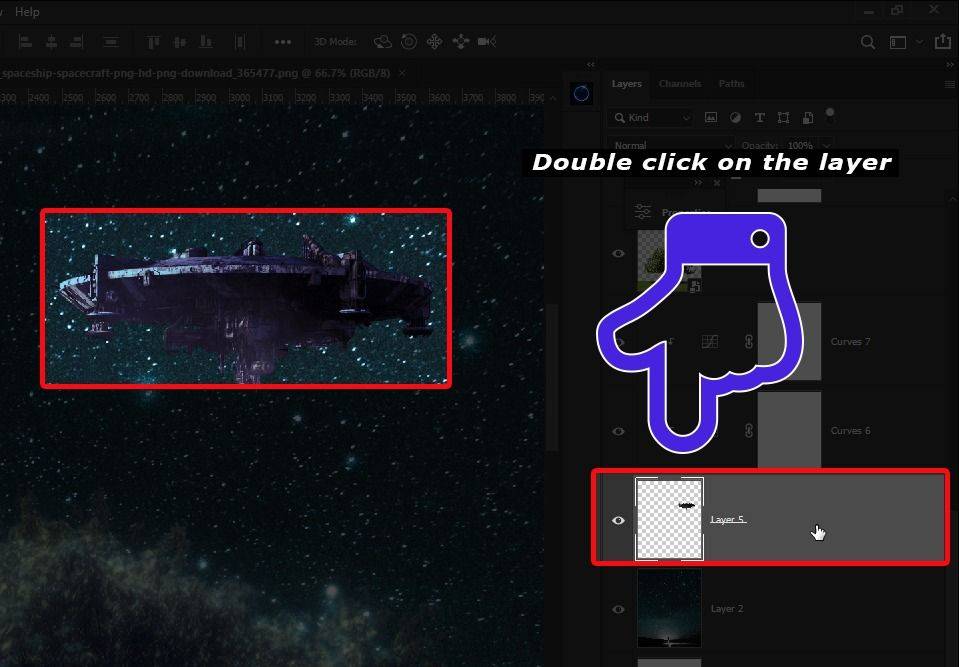
- now I double-click on the right side of the layer that opens up the layers style dialog box.

third PNG
- here I did some inner shadow effect on that png
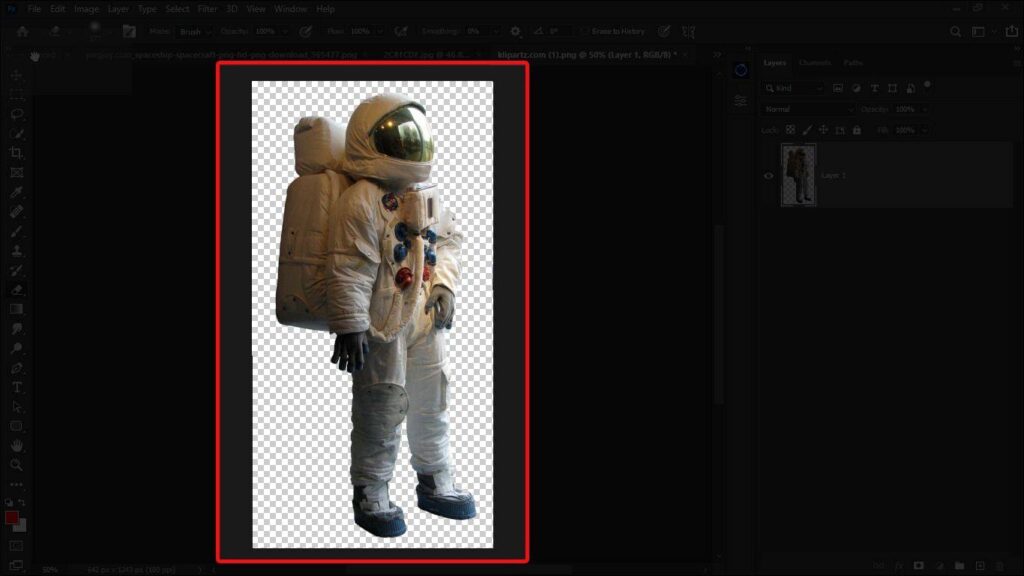
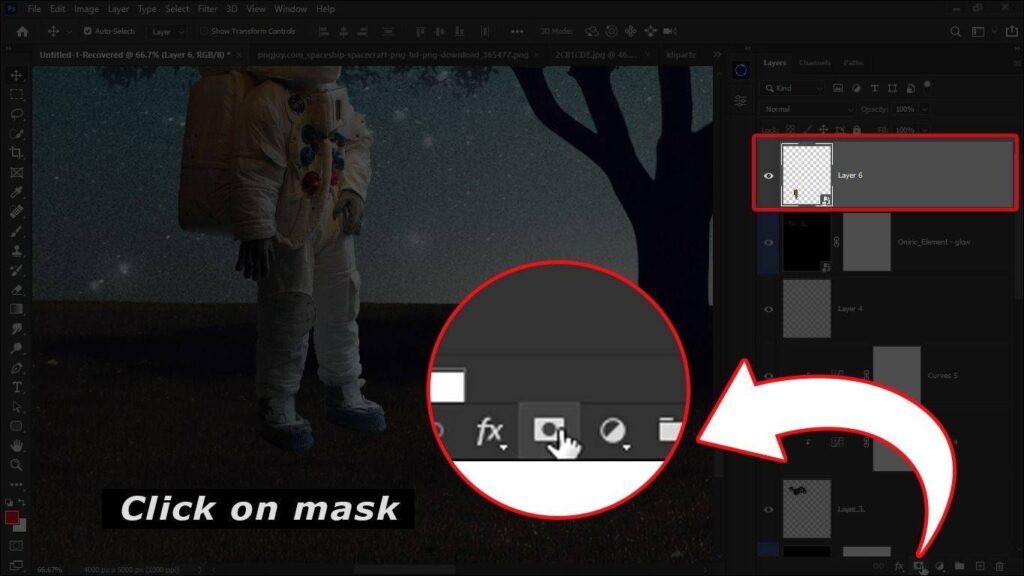
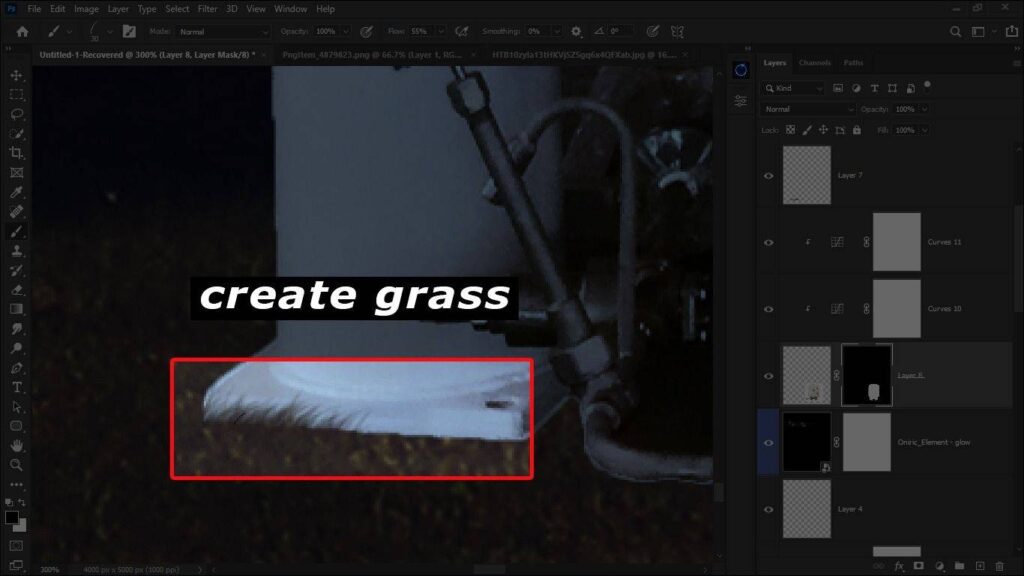
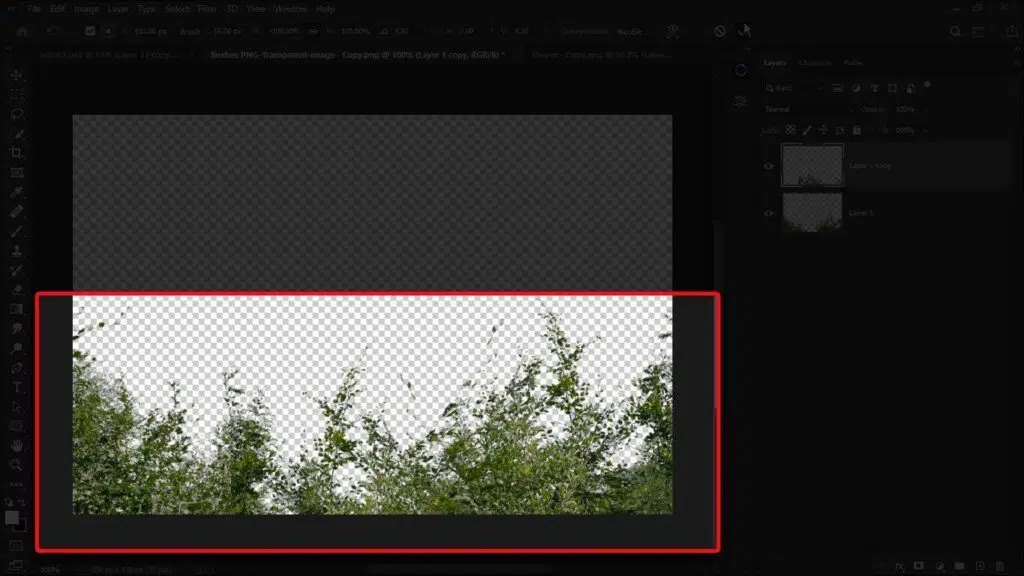
- and here I add another png, then I take a mask of this png
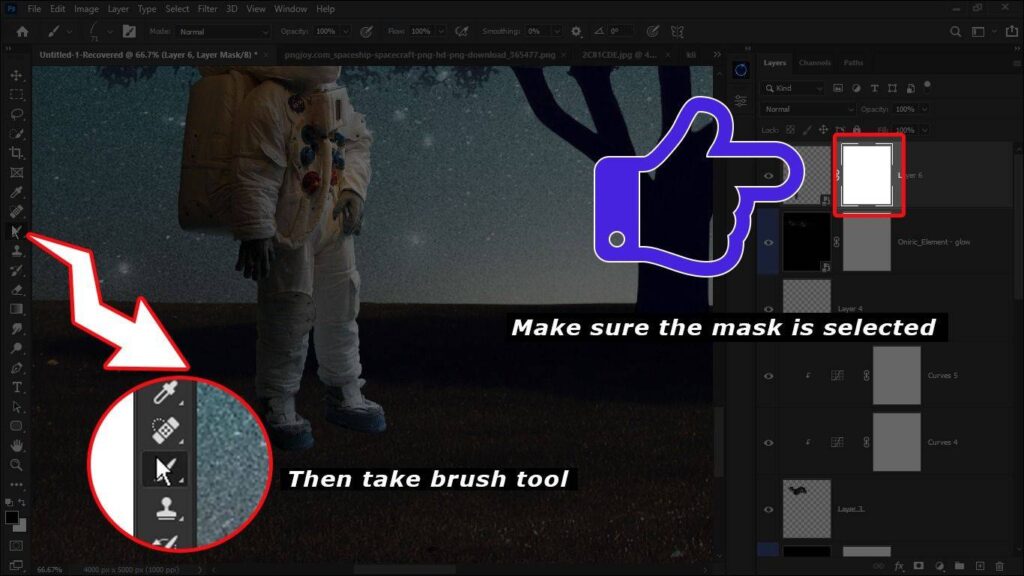

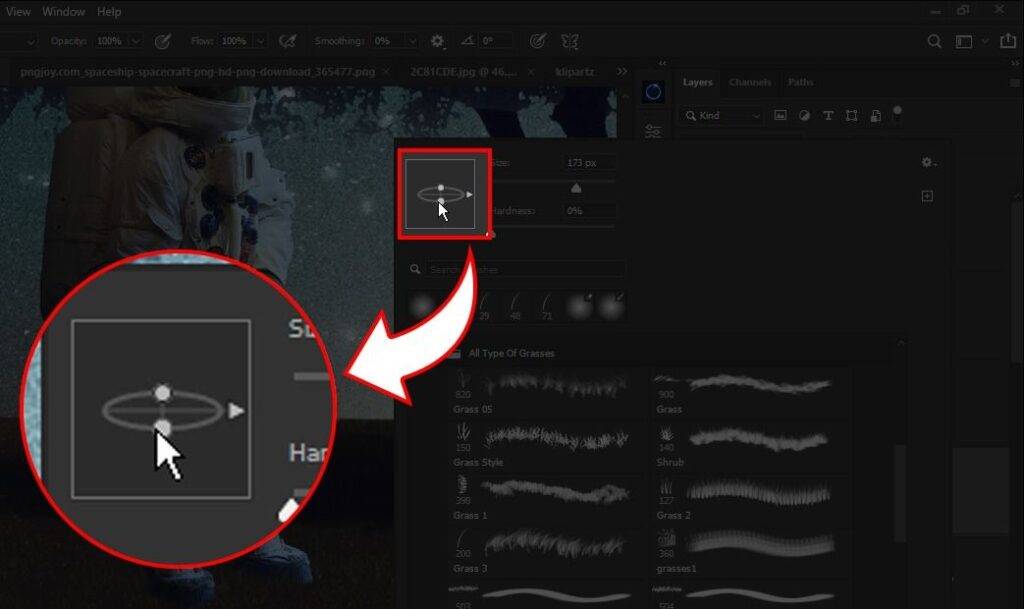
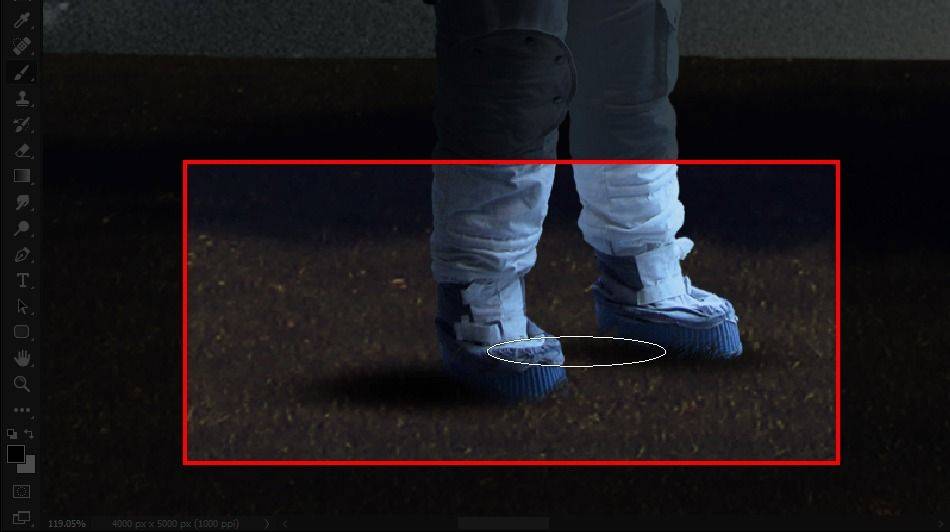
now I need to blend this png with the ground to look realistic, leme show you how I did this. once you take the mask of this png, then select the brush tool and this is not a regular brush this is a special brush to create grass, I have given the link down below of this brush you can download it for free, and make sure the foreground color is black.
Best Grasses Brushes
Feel free to use Grasses. that can be used to create your own photo-manipulation or anything else. In this pack, you will be seeing 34 sets of free Grasses Brushes.
- and start painting on his foot with this brush, remember you have to paint on the mask of the PNG.
- then again I match the color of the png with the background
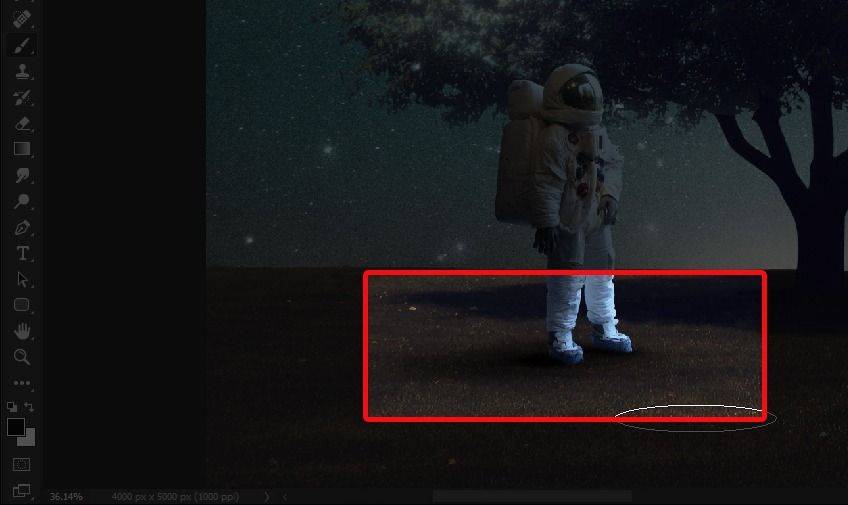
Creating shadow
In creating compelling photo manipulations, mastering the art of shadow and smoke effect generation is crucial. These elements add depth, dimension, and a touch of realism to your scenes. Let’s dive into the techniques for creating different types of shadows (soft, hard, directional) and achieving realistic smoke effects, utilizing custom brushes and opacity adjustments.
Soft Shadows:
- When to Use: Soft shadows are ideal for diffused light sources or objects that are not in direct, harsh light.
- How to Create: Select a soft round brush and reduce its opacity to between 10-30%. Gently brush underneath and around your object where shadows naturally occur. Use a Gaussian Blur filter to soften the edges further if needed.
Hard Shadows:
- When to Use: Hard shadows are perfect for bright, direct lighting conditions.
Directional Shadows:
- How to Create: Use a hard round brush with higher opacity (50-70%). Paint the shadow directly where the light source dictates it should fall. The distance and angle from the object will affect its length and orientation. Keep the edges relatively sharp to mimic the effect of direct light.
Tips for Enhanced Realism:
- Layering: Build shadows up in layers, starting with a broad, soft base and adding sharper details as you go. This technique adds complexity and depth.

Color: Shadows are not just black; they often contain colors from the environment. Sample surrounding colors and use them to tint your shadow layers slightly for a more integrated look.
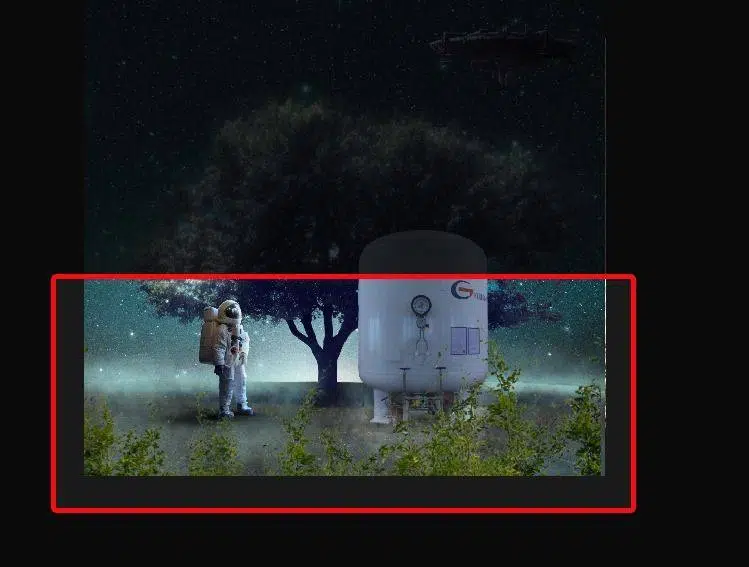
Fourth PNG
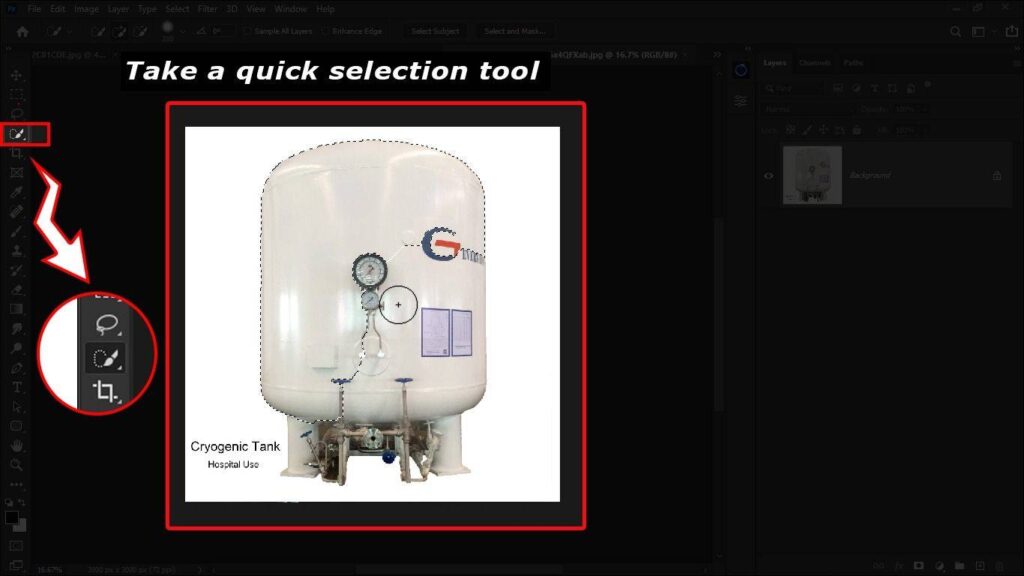
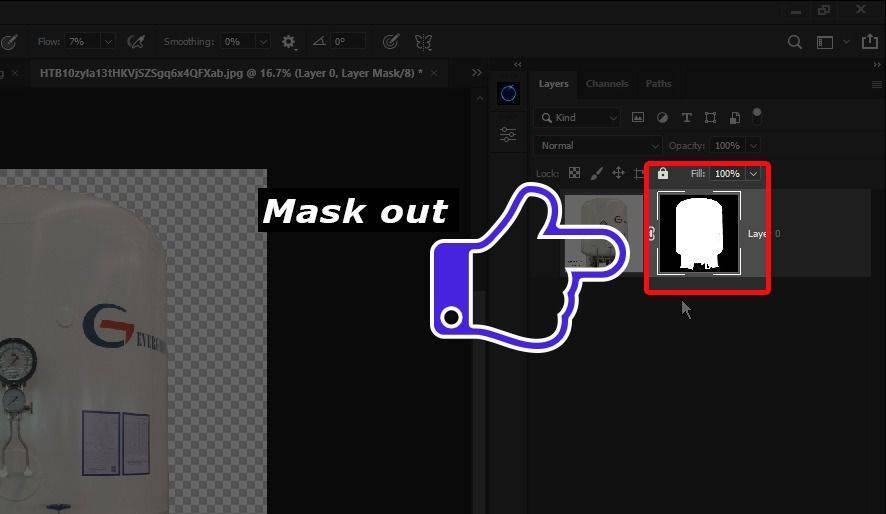
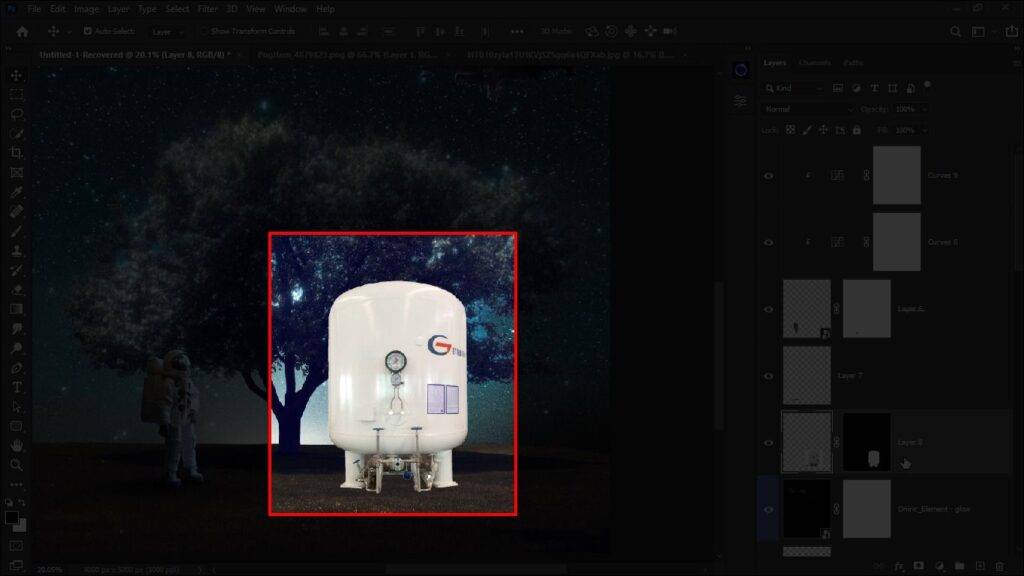
- then i took another PNG and masked out this png with the help of quick selection tool. and place it our main document
- then i match the colors of this png with the background
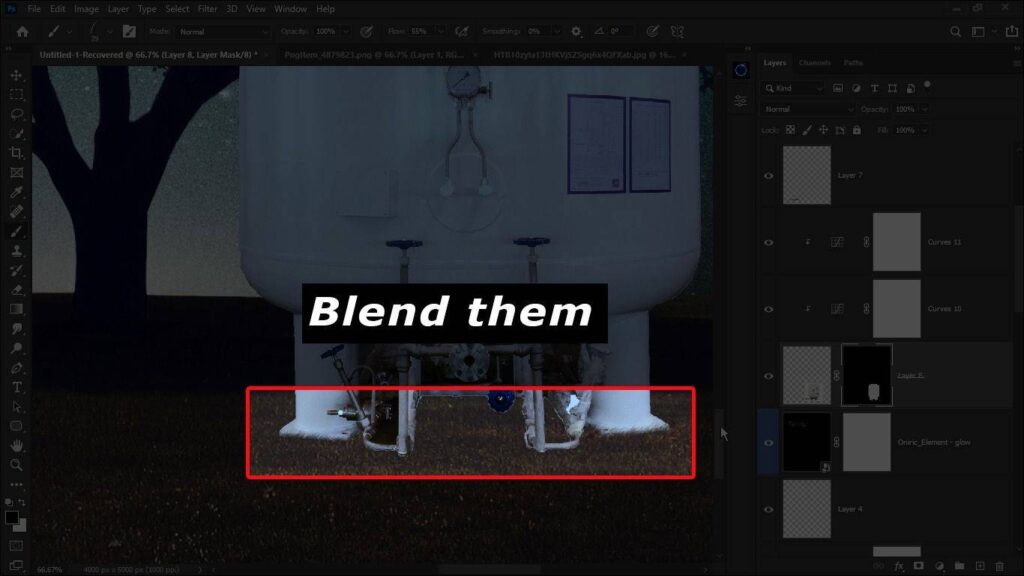
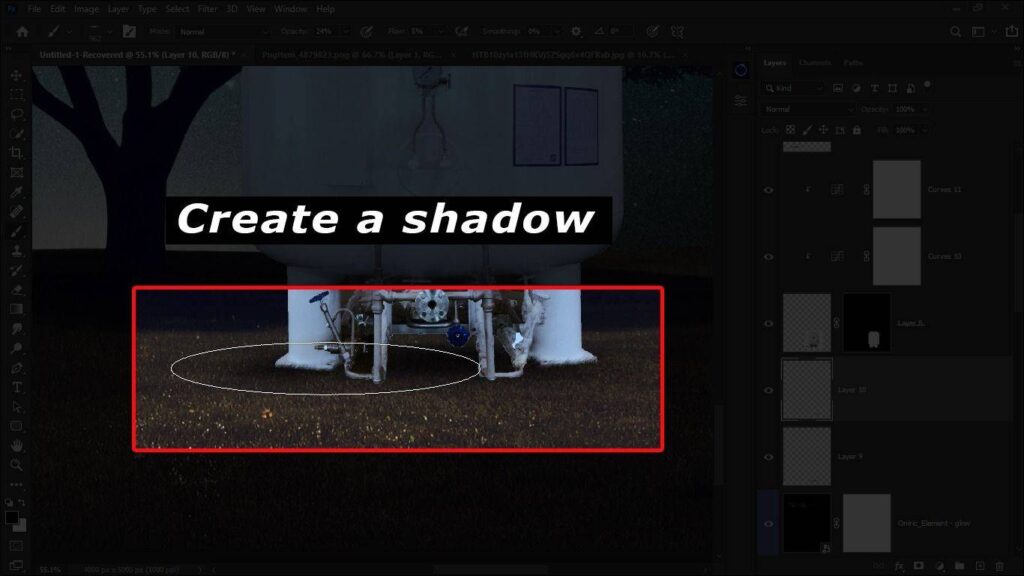
- after that I create a grass and shadow for this PNG, I already told you how I did this, remember what we did with the astronaut png, similarly, i create the grass and shadow for this oxygen tank png.
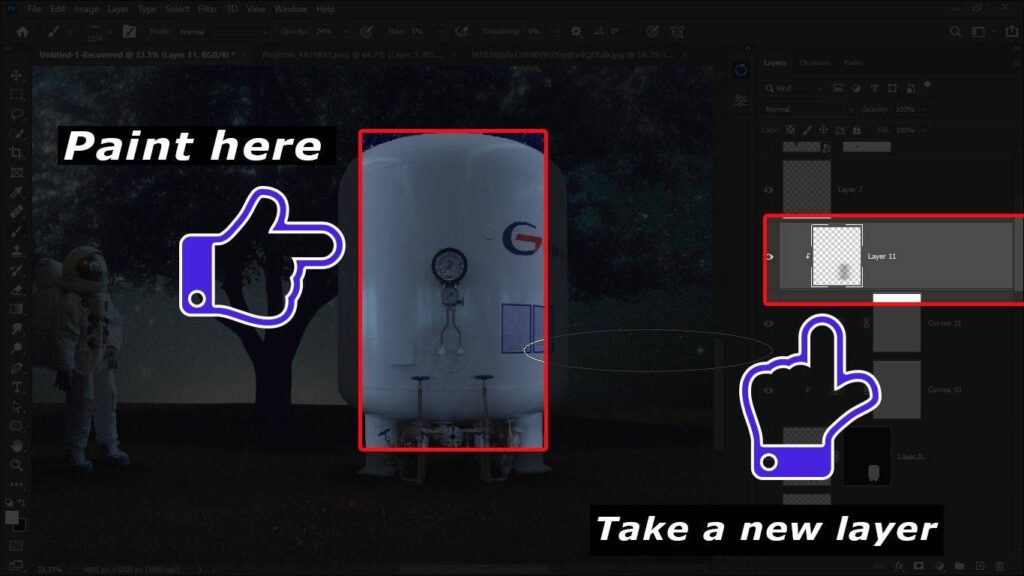
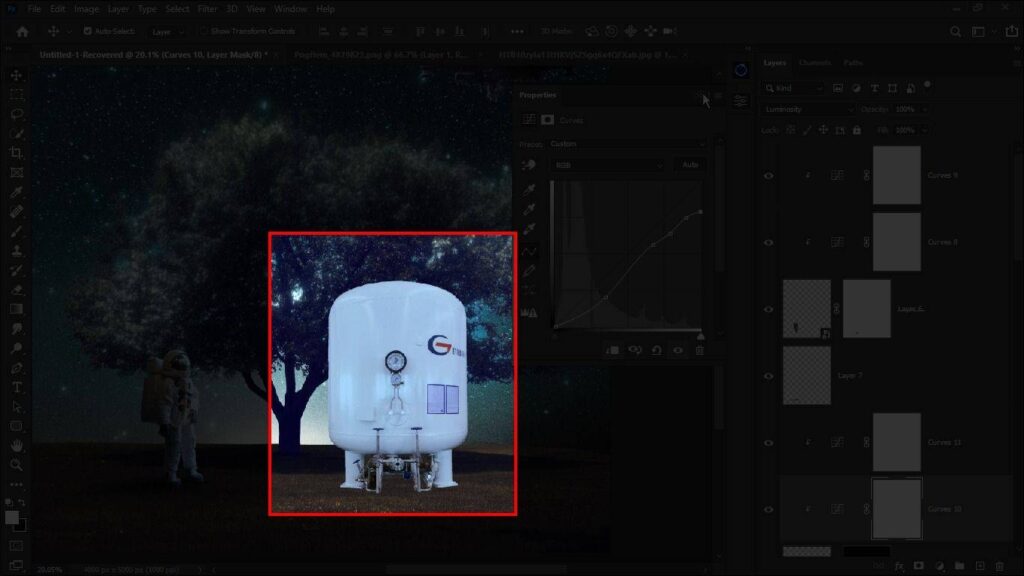
- I wanna show that the lights are coming from the tree and behind that, so for that, I need to darken the middle area of the tank, so I take a new layer just above the curves layer that I used to match the color of the tank.
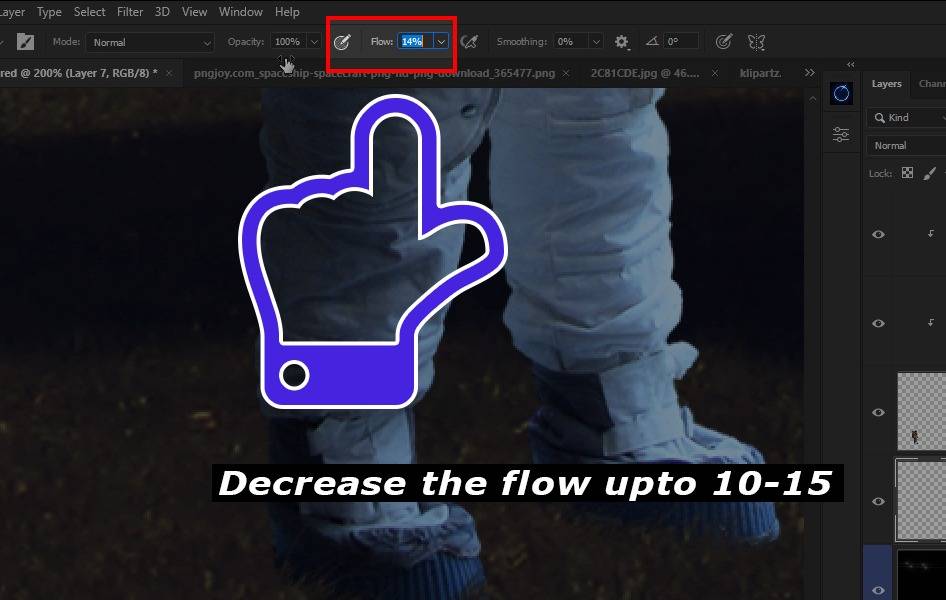
- then I take a regular brush with the black color, I also decrease the flow and opacity of the brush and just start painting on the middle areas of the tank, make sure that you clip this layer.
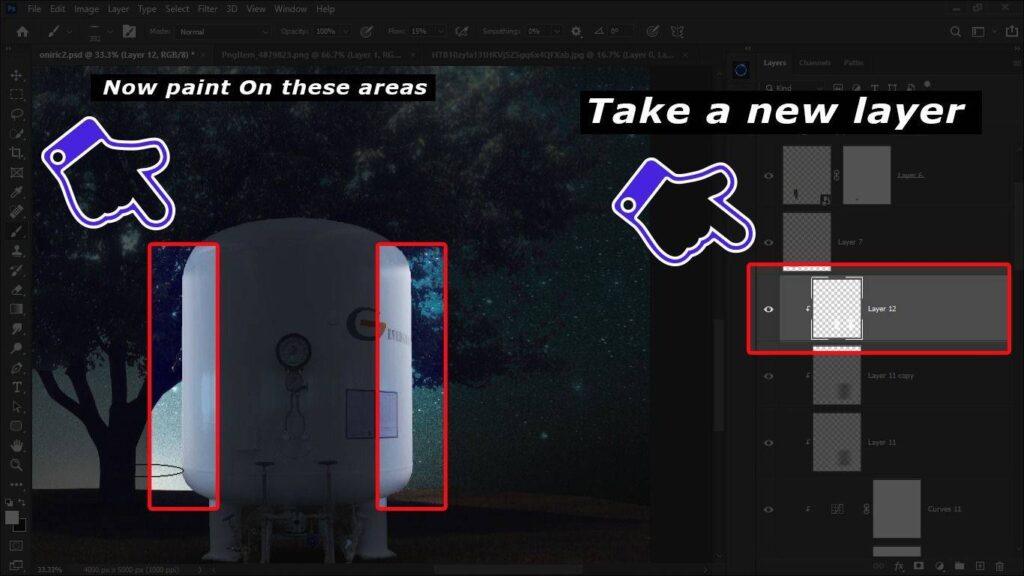
- Because light is coming from behind it. I need to brighten the edges of this tank, now again I take a new layer and clip it, and this time I take a white paint for the brush and start painting on the sides of the tank.
Create smoke
Smoke adds atmosphere and mood to your scenes, whether you’re depicting a misty morning or the aftermath of an action scene.
Custom Brushes:
- Download or create custom smoke brushes. Many free resources are available online that offer a variety of smoke patterns.
- Now select the smoke brush
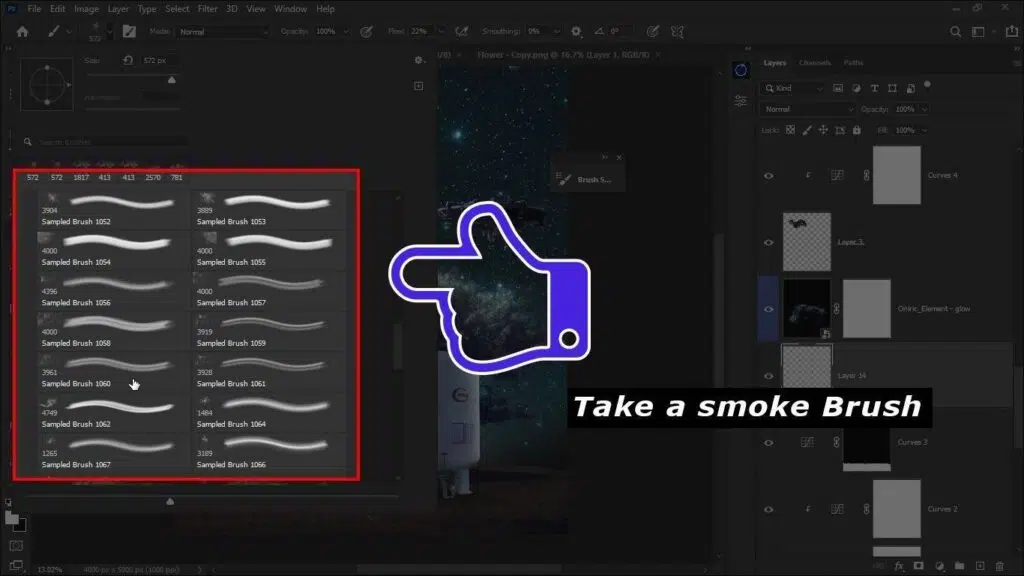
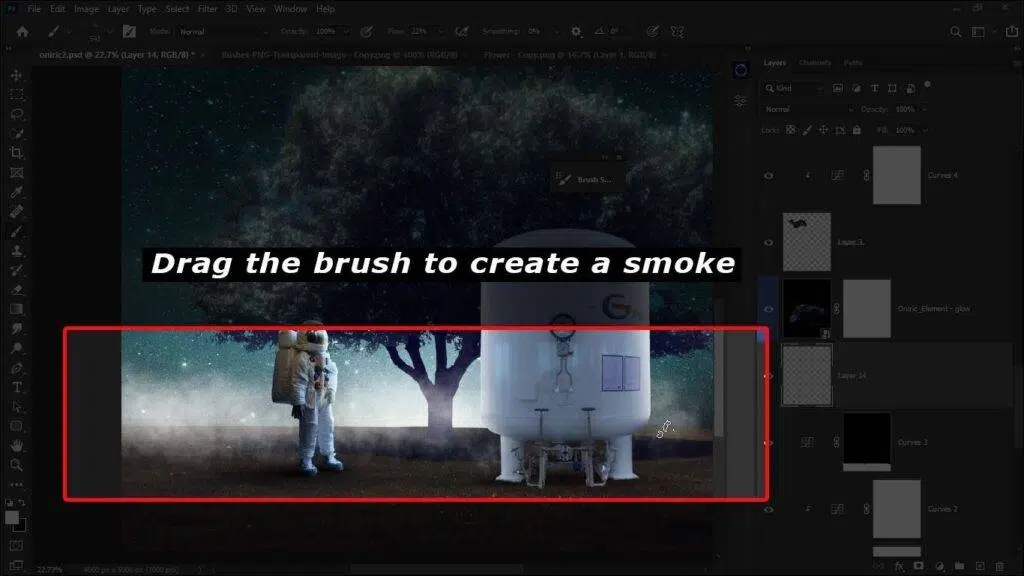
- Experiment with brush size, opacity, and flow to create dynamic smoke effects. Start with lower opacity (20-40%) and increase as needed.
Fifth PNG
- and this is our last element of this concept, so now here i wanna add some depth of field. for that i insert this png to it
- i match the colors of this png in with the background
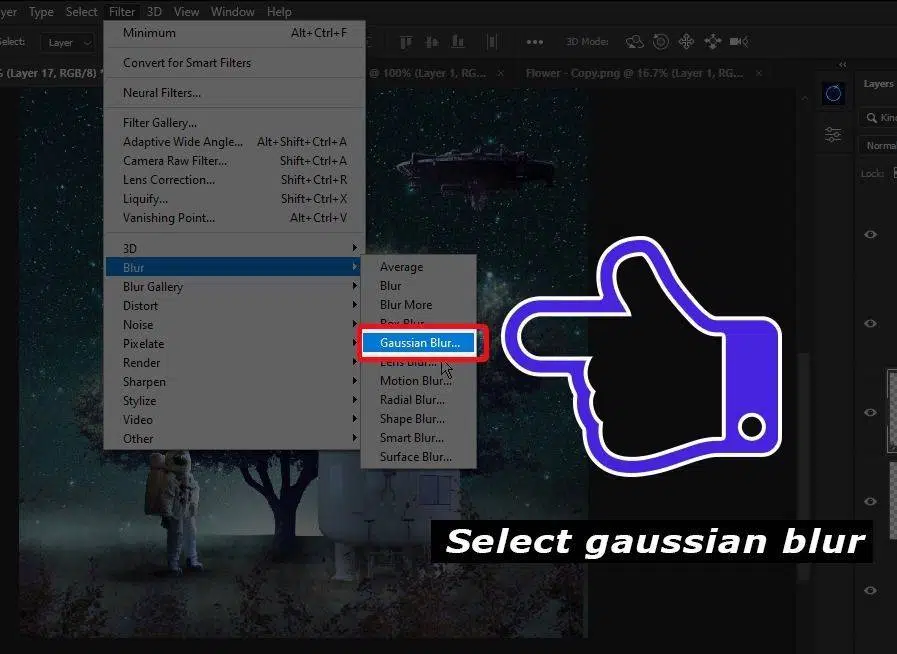
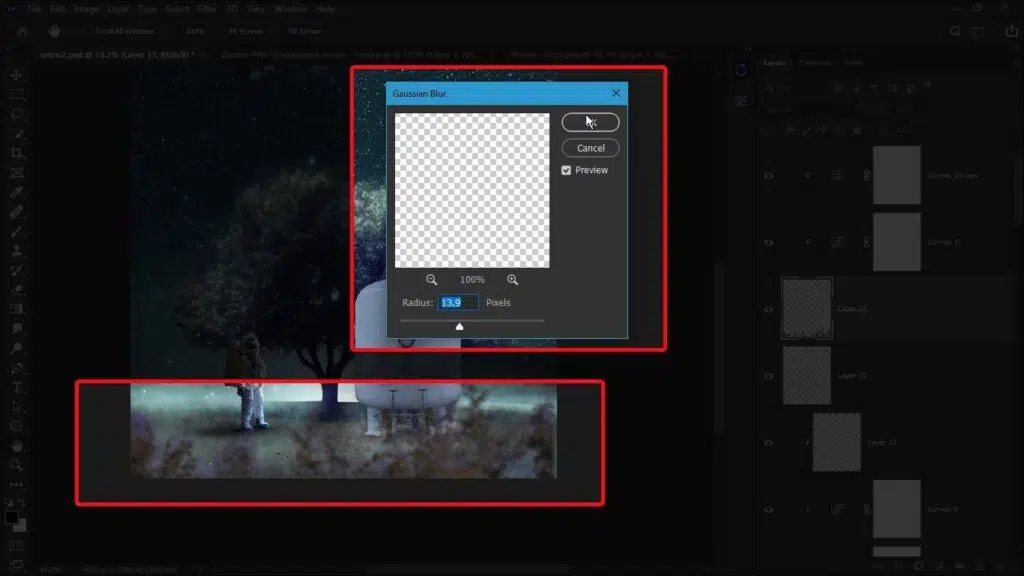
now I go to the filter, then blur, and select Gaussian
Camera raw filter
The Camera Raw Filter in Photoshop is a powerful tool for making comprehensive post-processing adjustments to your images. Here’s how to leverage its capabilities to fine-tune your photo manipulations:
Accessing Camera Raw Filter:
- With your composite image ready, merge all layers into a new layer on top (Ctrl+Shift+Alt+E on Windows or Cmd+Shift+Option+E on Mac). Then, go to
Filter > Camera Raw Filter.
Basic Adjustments:
- Exposure: Adjust the overall brightness of your image. A slight increase can lift the mood, while a decrease can add drama.
- Contrast: Enhance the difference between the light and dark areas to make your elements pop.
- Highlights/Shadows: Recover details in the brightest and darkest parts. Reducing highlights can bring back sky details, while increasing shadows can reveal more in darker areas.
- Whites/Blacks: Set the white and black points. Adjusting these can add depth and ensure your image utilizes the full tonal range.
- Clarity/Dehaze: Clarity adds mid-tone contrast, making details sharper. Dehaze removes or adds atmospheric haze, useful for adding depth or a mystical feel.
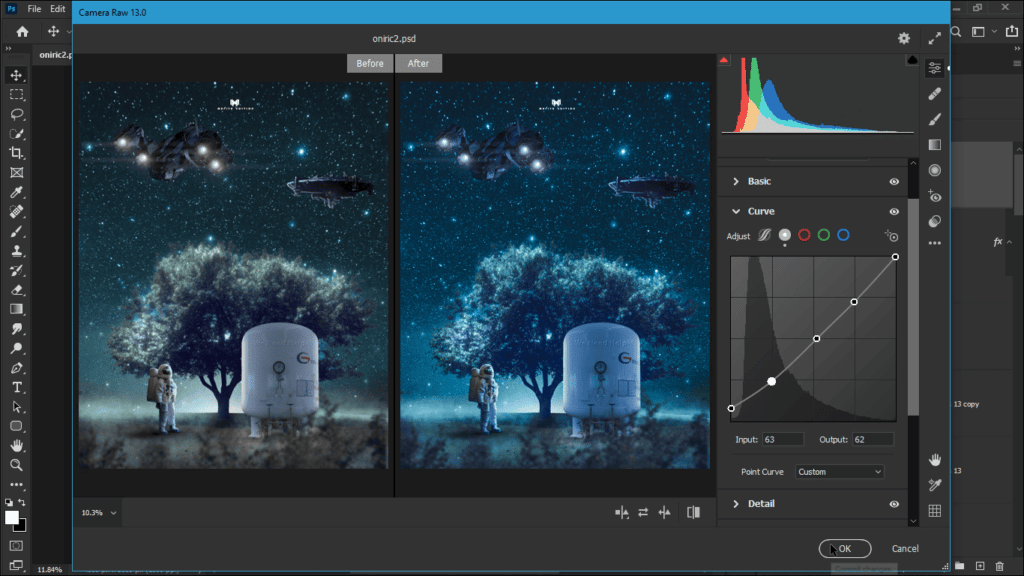
- Tonal Curve Adjustments:
- Use the Tone Curve to refine the contrast and tonality further. The S-curve is a popular technique for adding contrast, with a slight dip in the shadows and a boost in the highlights.
- Color Adjustments:
- Temperature/Tint: Adjust the overall color temperature and tint for mood alterations. Warmer tones can make an image feel more inviting, while cooler tones add a somber feel.
- Vibrance/Saturation: Vibrance subtly increases the intensity of more muted colors without oversaturating the image. Saturation uniformly increases the intensity of all colors.
- Detail Adjustments:
- Sharpen your image to enhance details subtly. Be cautious with sharpening; too much can introduce unwanted noise.
- Effects:
- Adding a vignette can focus attention on the center of the image, subtly darkening the edges.
Before-and-After Examples:
- Include comparative images to show the effect of these adjustments. For example, a photo manipulation that looks flat and disconnected in its “before” state becomes vibrant, cohesive, and mood-enhancing in its “after” state, with the adjustments detailed above.
Conclusion
This project was more than a mere exercise in photo manipulation; it was a journey into the heart of a global crisis, an attempt to capture the emotions, struggles, and resilience that have come to define our experience of the Covid-19 pandemic. Through the careful selection of imagery, the meticulous blending of elements, and the thoughtful application of effects, we’ve sought not just to create something visually striking but to evoke a deeper reflection on the impact of this unprecedented time in history. The intention behind this artwork is to remind viewers of the challenges we’ve faced, the lives we’ve lost, and the hope that guides us forward. It’s a tribute to human resilience, a call to empathy, and a reminder of the importance of community and solidarity in times of adversity.
Resources for Further Learning:
Below is a list of resources, including stock images, brushes, plugins, and tutorials, that will be invaluable as you continue your journey in photo manipulation:
- Stock Images:
- Unsplash (https://unsplash.com/): High-quality, free photos for all your creative needs.
- Pixabay (https://pixabay.com/): A vast library of public domain images, vectors, and illustrations.
- Pexels (https://www.pexels.com/): Free stock photos and videos shared by talented creators.
- Brushes:
- Brusheezy (https://www.brusheezy.com/): A wide variety of free Photoshop brushes, patterns, textures, and more.
- DeviantArt (https://www.deviantart.com/): Search for user-submitted Photoshop brushes under the Resources & Stock Images section.
- Plugins:
- Oniric (https://compositeplanet.com/oniric/): Generate realistic glow effects with ease.
- Nik Collection by DxO (https://nikcollection.dxo.com/): A suite of professional photo editing plugins for enhancing images in various ways.
- Tutorials:
- Phlearn (https://phlearn.com/): Photoshop tutorials ranging from beginner to advanced techniques.
- Photoshop Tutorials by Adobe (https://helpx.adobe.com/photoshop/tutorials.html): Official tutorials covering a broad spectrum of topics.
- YouTube: Channels like PixImperfect and Photoshop Training Channel offer countless video tutorials for all skill levels.
Remember, the journey of learning and creation is ongoing. Each project offers new challenges and opportunities for growth. By leveraging these resources and continuing to practice and experiment, you’ll further develop your skills and unique voice as an artist. Here’s to your next masterpiece!


Pretty! This was an incredibly wonderful article. Many thanks for supplying these details.
What i don’t understood is in fact how you are no longer really much more smartly-appreciated than you may be right now.
You’re so intelligent. You realize thus considerably in terms of
this subject, made me individually believe it
from numerous numerous angles. Its like women and men aren’t fascinated until
it is something to accomplish with Woman gaga! Your personal stuffs great.
Always deal with it up!
Wow that was odd. I just wrote an extremely long comment but after I clicked submit my comment didn’t
show up. Grrrr… well I’m not writing all that over again.
Anyhow, just wanted to say superb blog!
Whats up this is kind of of off topic but I was wondering if
blogs use WYSIWYG editors or if you have to
manually code with HTML. I’m starting a blog soon but have no
coding know-how so I wanted to get guidance from someone with experience.
Any help would be enormously appreciated!
Hi! This is my first visit to your blog! We are a
collection of volunteers and starting a new initiative in a
community in the same niche. Your blog provided us valuable information to work on. You have done a extraordinary job!
Appreciate the recommendation. Will try it out.
I’m really enjoying the theme/design of your blog. Do you ever run into any web browser compatibility problems?
A handful of my blog visitors have complained about my site not working correctly in Explorer
but looks great in Chrome. Do you have any suggestions to help fix this problem?
Normally I do not learn post on blogs, but I would like to say that this write-up very pressured me to try
and do it! Your writing style has been amazed me.
Thanks, very great article.
Very descriptive blog, I enjoyed that a lot. Will there be a part 2?
Write more, thats all I have to say. Literally,
it seems as though you relied on the video to make your point.
You clearly know what youre talking about, why waste your intelligence on just posting
videos to your site when you could be giving us
something informative to read?