Benny Productions Optics+ 250 Overlay Pack Free Download


Hey there! I’m Roshan, and I’m a Photoshop junkie who’s always on the lookout for quality resources to spice up my edits. In fact, Photoshop is such a powerhouse that over 90% of the world’s creative professionals use it in their work. With such a huge community, you’d think finding great free overlays would be easy—but trust me, it’s often a challenge. I remember spending hours combing through forums and websites for that perfect lens flare or dust effect (preferably free and high-quality).
My quest for awesome overlays led me to discover the Benny Productions Optics+ Pack, and it felt like I struck gold. In this post, I’ll share how I stumbled upon Optics+, give you a full overview of what’s inside, and explain why it has become my go-to for adding breathtaking effects to photos. By the end, you’ll know exactly what Optics+ is, why it’s a game-changer, and how to get your hands on it (free download available below!). So, let’s dive in and level up your Photoshop game!
PiXimperfect Photoshop Easy Course 77.48GB zip File Free Download
What Is Benny Productions Optics+?
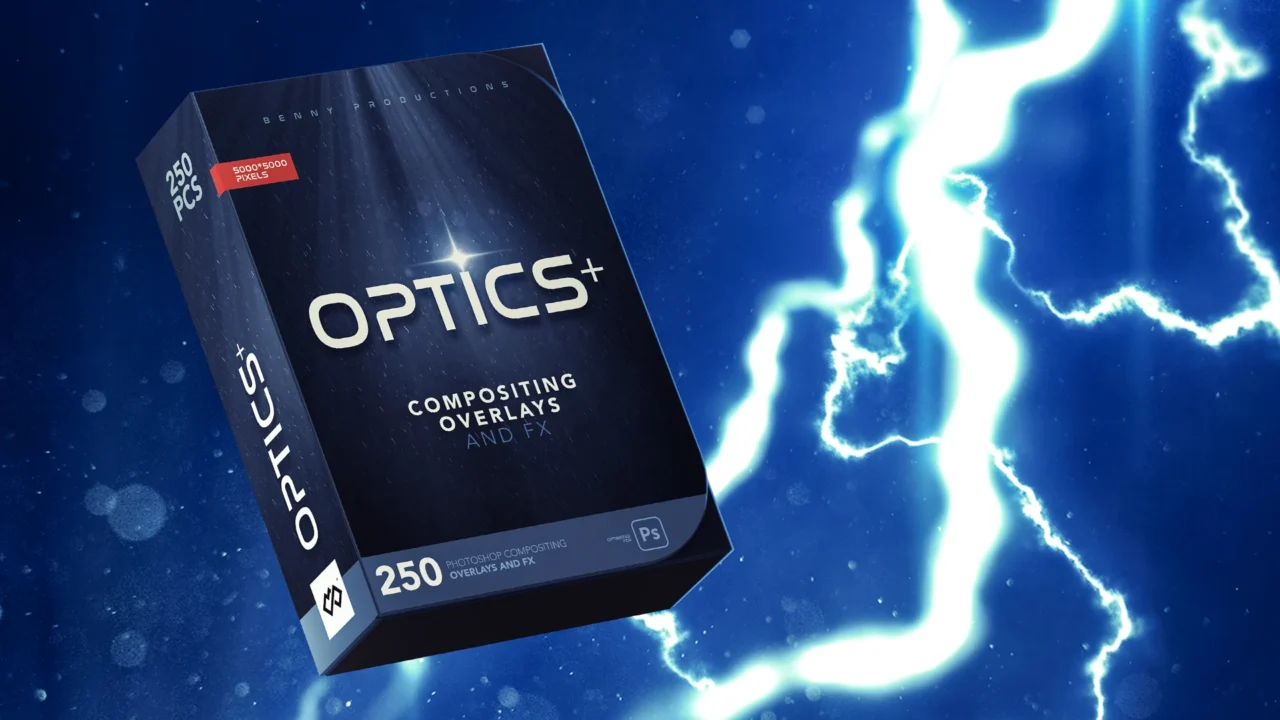
Benny Productions Optics+ is a comprehensive overlay pack for Photoshop (and other image editors) created by the popular digital artist Benny Productions. (If you haven’t heard of him, Benny – aka Benny van Valen – is a renowned Photoshop wizard with a YouTube channel boasting over 2 million subscribers, known for his mind-blowing photo manipulations.) Optics+ is essentially a library of atmospheric and optical overlays – think of things like lens flares, light rays, rain, snow, dust, and other cool effects you can layer on top of your images.
In simple terms, an overlay is just an image (often with a transparent background) that you can place onto your photo to add a special effect. The Optics+ pack bundles hundreds of these overlay images into one convenient package. Benny originally released Optics+ as a premium resource on his website (it launched around early 2023), aiming to give fellow creators an easy way to add professional-grade effects to their artwork. The pack’s name “Optics+” hints at its focus on light and optical effects – it’s all about those finishing touches that make an image pop. Whether you want to simulate a sun flare in a portrait or add floating dust particles to a fantasy scene, this pack has you covered.
What’s really neat: All overlays in Optics+ come in high resolution (5000×5000 pixels) PNG format. That means they’re large and crisp, with transparent backgrounds for easy use. You don’t need any special plugin to use them – just a few clicks in Photoshop. I was immediately intrigued because finding free overlays at this quality is rare. And since Benny is a respected creator, I knew the pack would likely be top-notch.
What’s Included in the Optics+ Pack?
One of the first questions I had was “What exactly do I get with Optics+?” Let me tell you – this pack is absolutely loaded. It contains a total of 250 overlay elements spanning a wide range of categories. Basically, if there’s a visual effect you want, it’s probably in here. Here’s a quick breakdown of what’s included in the Benny Productions Optics+ pack:
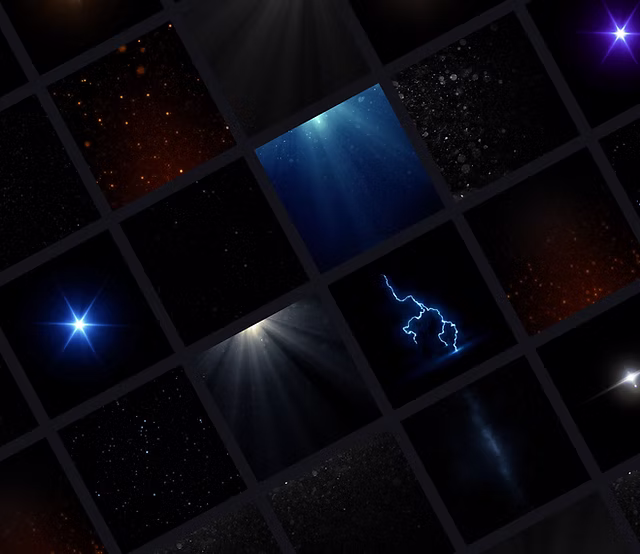
- Lens Flares – 62 overlays (gorgeous bursts of light, great for enhancing suns or bright light sources)
- Light Rays – 32 overlays (natural-looking light beams to add dramatic lighting through clouds, windows, etc.)
- Underwater Particles – 42 overlays (tiny floating particles perfect for underwater scenes or dusty atmospheres)
- Dust Particles – 12 overlays (specks of dust that add depth and realism to indoor shots or antique looks)
- Snow – 25 overlays (various snowflake and snowstorm effects for wintery scenes)
- Rain – 25 overlays (raindrops and rain streaks to transform a dry scene into a rainy one)
- Lightning – 14 overlays (electrifying lightning bolts to crackle in your stormy skies)
- Artificial Embers – 16 overlays (glowing embers and sparks, great for fire effects or a magical atmosphere)
- Stars – 12 overlays (little star fields you can add to night skies for extra sparkle)
- Combo Presets – 10 overlays (pre-made combinations of effects; these mix multiple elements like light + particles, so you can apply a complex look with one file)
PiXimperfect Preset Power Free Download 155MB Zip File
That’s a whopping 250 overlays in total! Each category is neatly organized, so you can easily find the type of effect you need. For example, if I’m working on a sci-fi artwork and need some futuristic glow, I can jump right into the Lens Flares or Light Rays folder. Planning a fantasy winter landscape? The Snow and Stars overlays are your friends. I was like a kid in a candy store seeing all these options.
And remember, all these overlay files are high-res PNGs (5000×5000 pixels). In practice, that means you can use them on large images (even print projects or big canvas sizes) without losing quality. No ugly pixelation, no weird artifacts – just clean and sharp effects. The transparent background on each PNG makes it super simple to drag and drop onto your work without any extra tweaking. Having this many ready-made effects at your fingertips is incredibly handy. (If you love Photoshop assets, you might also enjoy checking out our other resource collections – it’s always smart to have a well-stocked toolbox!)
Why Optics+ Is a Game-Changer for Your Photoshop Edits
You might be wondering, “Okay, 250 overlays is cool, but what makes Optics+ so special? Can’t I find similar overlays online?” As someone who has tried countless free overlays from random corners of the internet, I can confidently say Optics+ is a game-changer for a few big reasons:
- All-in-One Convenience: Before Optics+, I used to download overlays one by one – a lens flare from here, a dust texture from there. It was time-consuming and often the styles didn’t match. With Optics+, you get everything in one pack, curated by the same creator. The effects have a consistent high quality and style, so they work well together. It’s like having an entire effects toolkit compiled by a pro, which saves you from hunting down assets all over the web.
- Professional Quality: Many free overlays out there are low resolution or watermarked. In contrast, the Optics+ overlays are exceptionally high-quality. They were made by Benny (who’s known for top-tier Photoshop work), so each overlay looks realistic and polished. For example, the lens flares in Optics+ have beautiful gradients and subtle glows – they look like they came straight out of a high-end camera. When I first used an Optics+ light ray on a portrait, it blended so naturally that it seemed like I’d actually shot the photo with sunbeams coming through the window. That level of realism can be hard to get with random free assets.
- High Resolution & Flexibility: Because each overlay is 5000×5000 pixels, you have a lot of flexibility. You can resize or crop them to fit your image without worrying about quality loss. I’ve taken a single dust particle overlay and scaled it up to cover a 4K photo – it still looked crisp. Also, the large size means you can rotate or position effects creatively (e.g., use just a part of a lightning bolt) and still maintain detail. This is a game-changer especially if you print your work or work on large compositions.
- Creative Possibilities: Optics+ sparks creativity. Having such a variety of effects at hand encouraged me to try things I wouldn’t have before. I found myself adding multiple overlays to one image to create unique atmospheres. In one of my projects, I combined a rain overlay with a lightning overlay to turn a bland sky into a dramatic thunderstorm scene – it was super convincing! In another, I layered underwater particles over a portrait to give it a dreamy, fairytale vibe (even though it wasn’t an underwater photo at all). The pack invites you to experiment, because you have so many ingredients to play with. It’s like being a chef with a full spice rack – you can mix and match flavors (or in this case, overlays) to get an amazing result.
- Beginner-Friendly & Time-Saving: You don’t have to be a Photoshop expert to use Optics+. Overlays are one of the easiest ways to enhance an image: just drag, drop, and adjust. If you’re a beginner, this pack can instantly elevate your work without needing to learn complex effects from scratch. And if you’re experienced, it saves you time – no need to manually paint snow or fiddle with lens flare filters for ages. For example, I remember trying to create a dust effect manually with brushes and noise filters; it took me an hour and it still didn’t look right. With Optics+, I dropped in a dust overlay and got a perfect result in seconds. That kind of time save is huge, especially if you’re working on a deadline or doing client work.
Shadowify 1 & 2 Free Download | Create Realistic Shadows
In short, Optics+ brings together quality, quantity, and ease of use. It has quickly become one of those must-have packs in my toolbox. Whether you’re doing casual photo edits, digital art, or professional design work, having these overlays on hand can give your visuals that extra wow factor with minimal effort. It’s honestly a game-changer, and it’s hard to go back once you see the difference it makes!
How to Use the Overlays
One of the best things about the Benny Productions Optics+ Pack is how simple it is to use. You don’t need any special software aside from Photoshop (or any image editor that supports layers, really), and you don’t need to be a technical wizard. Let’s go through a quick step-by-step guide on using these overlays in Photoshop:
- Download and Unzip the Pack: First, download the Optics+ pack (details on that in the next section) and save the ZIP file to your computer. The file is about 1.4 GB, so it might take a bit. Once downloaded, right-click the
.zipfile and choose “Extract” or “Unzip” to unpack all the overlay images into a folder. You’ll see organized subfolders for Flares, Rain, Snow, etc., each filled with PNG images. - Open Your Image in Photoshop: Launch Adobe Photoshop and open the photo or project you want to edit. For example, let’s say I have a portrait that I think would look cooler with some lens flare. Make sure your image is on a layer (if it’s the background layer, you can leave it or unlock it – either is fine for adding overlays).
- Choose and Place an Overlay: Now, find an overlay from the Optics+ folder that you want to add. You can use Finder/Explorer to navigate to the folder (e.g., go to the “Lens Flares” folder if you need a flare). Drag and drop the PNG file from the folder straight into your Photoshop workspace, or use the menu: go to File > Place Embedded… and select the PNG. Photoshop will import the overlay as a new layer on top of your image. You should see the effect appear immediately. For instance, if you dragged in a Light Ray overlay, you’ll now see a beam of light on your photo, which you can move around.
- Position and Adjust the Overlay: With the overlay layer selected, you can now resize or rotate it as needed. Press
Ctrl+T(orCmd+Ton Mac) to enter Free Transform mode, and drag the corners to scale the overlay, or hover near a corner to rotate. Since these overlays are large (5000px), you might need to scale down for smaller photos. Position the overlay where it looks best. You can also add multiple overlays by repeating the drag-and-drop for different files (maybe add Snow and Stars together for a winter night scene!). The PNGs have transparent backgrounds, so they should blend in nicely by default. If an overlay comes with any black background (some lightning or flare effects in other packs often do), just change the overlay layer’s Blending Mode to “Screen” – this makes black areas disappear and keeps the light effect visible. In Optics+, most overlays are already pre-cut, but experimenting with blending modes like Screen or Add (Linear Dodge) can sometimes intensify the effect, so feel free to try that for creative results. Also, you can adjust the opacity of the overlay layer (the opacity slider in the Layers panel) to make the effect more subtle if it’s too strong. - Fine-Tune and Save: This is where you make the effect truly yours. You can tweak the color of the overlay using adjustment layers (for example, a Hue/Saturation adjustment can change a lens flare’s color to match your scene’s lighting). You can also use the eraser or layer mask on the overlay layer to remove parts of the overlay if needed (maybe you want a light ray to fade out in a certain spot). Arrange the layer order if you have multiple overlays (e.g., put the Lightning overlay behind the Rain overlay layer if you want the lightning to look like it’s further away). Once everything looks perfect, you can save your edited image. If you want to keep the ability to tweak overlays later, save it as a PSD (which preserves layers). Otherwise, if you’re done, you can flatten and export to JPG or PNG as usual. That’s it – you’ve successfully used an Optics+ overlay!
Using these overlays is pretty straightforward, even if you’re new to Photoshop. After one or two tries, you’ll get the hang of it. The key is to play around with positioning and maybe blending modes until the effect looks natural in your image. And don’t be afraid to layer multiple overlays – some of the coolest results come from combining, say, a Lens Flare + Dust + a touch of Rain to create an epic atmosphere. The possibilities are endless, and it’s a ton of fun once you see your plain image transform into something cinematic with just a few drag-and-drops.
Unlimited Photoshop Custom Shapes Free Downloads
Download Benny Productions Optics+ Pack
Alright, now for the part you’ve been waiting for: how to download the Benny Productions Optics+ Pack for free. Benny originally offers this pack on his official website (and possibly via Gumroad) as a paid product – after all, it’s a premium collection of overlays. However, I understand that not everyone can afford to buy every Photoshop asset they want. The good news is the Optics+ pack is available below for free download on this page. 🎉
Just scroll down a bit and you’ll find the download link (or a big download button). Click that, and your browser will start downloading a ZIP file containing the entire Optics+ pack. As mentioned before, the file is around 1.4 GB in size, so make sure you have a stable internet connection and a bit of patience while it downloads. Once the download is complete, you can extract the zip and dive right into using the overlays as described in the steps above.
A couple of tips for downloading: If your download is slow or gets interrupted, you might want to use a download manager, but generally clicking the link should work fine. Ensure you have enough disk space for the file and the extracted overlays (1.4 GB zip might expand to slightly more when uncompressed). If you’re on a metered connection, keep an eye on the data since it’s a large download.
By providing this free download, we want to help out fellow creators who are eager to try Optics+ without any barriers. The link here is direct and safe – no sketchy surveys or ad redirects. Just hit the download and you’re good to go. After grabbing it, you’ll have the same overlays that I’ve been raving about, ready to use in your own projects. Enjoy! (And remember to check the next section for an important disclaimer before you start using the pack.)
Important Disclaimer
Before you jump into using the Optics+ pack, there are a few important points I want to highlight out of respect for the original creator:
- Original Creator Credit: The Benny Productions Optics+ Pack was created by Benny Productions (Benny van Valen). All the overlays, the organization, and the concept of this pack are his original work. Full credit goes to Benny for putting together this fantastic resource. My overview here is just to help users understand and use the pack better.
- Support the Creator: If you find this pack useful and you have the means, please consider supporting Benny by purchasing the pack from his official website or store. Getting it free here is a great opportunity to try it out, especially for those who can’t afford it, but creators like Benny make a living through their work. Supporting them ensures they can continue to produce high-quality resources and tutorials for the community. Think of it like this: if Optics+ ends up becoming a staple in your editing workflow, showing some love by buying it or even just subscribing to Benny’s YouTube channel is a wonderful way to give back.
- Personal Use Recommendation: The free download provided here should be used for personal and educational purposes. That means you can practice, build your skills, and even use the overlays in personal projects or for learning. However, be mindful if you plan to use the overlays in commercial projects (for a client or something you’ll sell). Technically, the license for these overlays comes from Benny’s original terms. When you haven’t purchased the pack, you haven’t officially obtained a commercial license. While we’re sharing this for learning and creative exploration, it’s best to purchase a license from the official source if you intend to use Optics+ assets in paid work or broadly published projects. It’s about respecting the effort Benny put into creating this pack.
- No Redistribution: Please do not redistribute or resell the Optics+ pack files. We’re offering it here to help individuals, but it wouldn’t be fair (or legal) to package it and share it elsewhere. If someone you know is interested, feel free to send them to this page to download. Let’s make sure we’re not undermining Benny’s work by spreading the files improperly.
In summary, enjoy the Optics+ pack and have fun with it! Just keep in mind the hard work that went into making these overlays. By respecting the creator’s rights and supporting them when you can, you help foster a community where more awesome resources like this can be made. Now, with that said, let’s address a few common questions you might have about the pack.
FAQ: Benny Productions Optics+ Pack
Q: Is the Benny Productions Optics+ Pack really free to download here?
A: Yes! On this page, we’ve provided a free download link for the Optics+ pack. Benny originally sells this as a premium product, but we’re sharing it for free so that enthusiasts and learners can access these great overlays. It’s a full version of the pack with all 250 overlays included. However, remember that “free” here doesn’t mean it’s free to use without conditions – it’s more like a try-before-you-buy or a help for those who can’t purchase. We always recommend buying the pack if you can, to support Benny’s work. But there’s no catch to the download provided – just click and enjoy.
Q: How do I add the Optics+ overlays to my photos in Photoshop?
A: It’s pretty straightforward. After downloading and unzipping the pack, open your photo in Photoshop. Then simply drag a PNG overlay (for example, a lens flare) from the Optics+ folder onto your photo in Photoshop. It will appear as a new layer. From there, you can resize or move it to the desired position. Most overlays will blend in naturally since they have transparent backgrounds.
If an overlay has a black background (which is uncommon in this pack since they’re PNGs), set the layer’s blending mode to “Screen” to make the black go away. You can add more than one overlay by repeating the process with different files – each will come in on its own layer. Adjust opacity or use layer masks if you need to fine-tune how an overlay looks. That’s it! No special plugins needed. (For a detailed guide, see the How to Use section above where I walk through the steps.)
Q: Can I use these overlays with any version of Photoshop or even other editing software?
A: Absolutely. One big advantage of Optics+ overlays is that they are just image files (PNG format). This means they are not limited to a specific Photoshop version or any Adobe-exclusive feature. Whether you’re on Photoshop CC 2025, an older CS6, or even Photoshop Elements, you can use these overlays as long as your software supports layers and PNG images (which virtually all do).
In fact, you can use them in other programs too – for example, free editors like GIMP or Paint.NET, or alternatives like Affinity Photo, all support importing PNG overlays. The process would be similar: import or drag the overlay onto your image as a new layer. I’ve even used these overlays on my iPad using Procreate – just had to transfer the PNG file over. So, you’re not tied to Photoshop if that’s a concern. Basically, any program that lets you work with multiple layers can work with Optics+ overlays, making them quite versatile across different platforms.
Q: What makes the Optics+ pack different from other free overlays I can find online?
A: The Optics+ pack stands out in several ways. Firstly, it’s curated by a professional – Benny created these overlays himself, ensuring they are high quality and artistically sound. Random free overlays online can be hit or miss; some might be low-res, poorly cut out, or just not realistic. With Optics+, each overlay has been crafted and tested by someone who actually uses them in real art projects. Secondly, the sheer variety and quantity in one pack is hard to find elsewhere.
You get 250 overlays covering all sorts of effects in a single download, instead of piecemeal downloads from various sites (which may not match in style or quality). This pack is like a one-stop shop. Thirdly, the resolution and quality of Optics+ are top-tier – 5000×5000 px PNGs, which means even if you have a very high-resolution photo or you’re doing a large print, these overlays will hold up.
Many free overlays out there are much smaller, which limits their use. Lastly, having the combo presets and the coherent style across the pack gives your edits a more uniform look, as opposed to using a hodgepodge of different assets. In short, Optics+ is a reliable, high-quality resource, whereas other free finds can be a gamble. It’s the difference between using a toolset from a known brand versus a bunch of random bits – you kind of know what you’re getting with Benny’s pack, and it delivers on its promises.
Q: Do I need to credit Benny Productions or this site when I use the overlays from Optics+?
A: There’s no formal requirement to credit anyone when you use the overlays in your artwork – using overlays is just like using any resource or tool in Photoshop. If you create an image using Optics+ assets, you don’t have to label it or shout out the source. That said, it’s good etiquette and a nice gesture to credit or mention the source if you share your work online, especially if you’re posting in communities or groups that might be interested.
For example, you could caption your image with something like “Effects added with the Optics+ overlay pack by Benny Productions.” This isn’t mandatory, but it gives a nod to the creator of the overlays and can help others discover the pack too. If you’re a content creator (like a YouTuber or blogger) demonstrating the overlays, then definitely it’s polite to mention where they came from. And of course, if someone asks how you achieved a certain effect, you can point them to Benny Productions Optics+.
In any case, you should not claim the overlays themselves as your own creation – they are Benny’s work. Giving credit is more about community respect than legal necessity in this scenario. And as we mentioned in the disclaimer, if you plan to use the overlays commercially or in a product, you should purchase them officially, which then also covers you license-wise. For personal and creative use, enjoy them freely and share the love by crediting if you feel inclined!
I hope this full overview has been helpful and that you’re excited to try out the Optics+ pack. It truly is one of my favorite overlay collections for Photoshop. With everything from glimmering lens flares to dynamic weather effects at your fingertips, you can transform ordinary photos into something straight out of a movie poster. The fact that you can get it here as a free download is the cherry on top. Just remember to use the pack responsibly and support the original creator whenever possible. Now go ahead – download the pack below, fire up Photoshop, and let your creativity run wild. Happy editing, and I can’t wait to see what magical images you create with Benny Productions Optics+!