Studio Photo editing In Photoshop Tutorial


there is another photoshop Manipulation by piximfix. and in this post, i will be showing you, step by step, how i turn this place into a photoshoot studio. and with that, i also share with you all the stock images. So lets get into it
making selections around the subject

- Firstly I quickly mask ‘it out him by using pen tool. i always use a pen tool, and also prefer you use a pen tools when you are creating a path around the subject. Because with the Pen tool, you can do the selection more accurately, that you cannot do it with any other selection tools.

and there is a background which i use for this concept

- when I insert the background with the subject, the background looks more brighter then the subject. so for the adjust the brightness, i create a curves adjustment layer, just above the background layer. and adjust the brightness of the background.
creating shadows
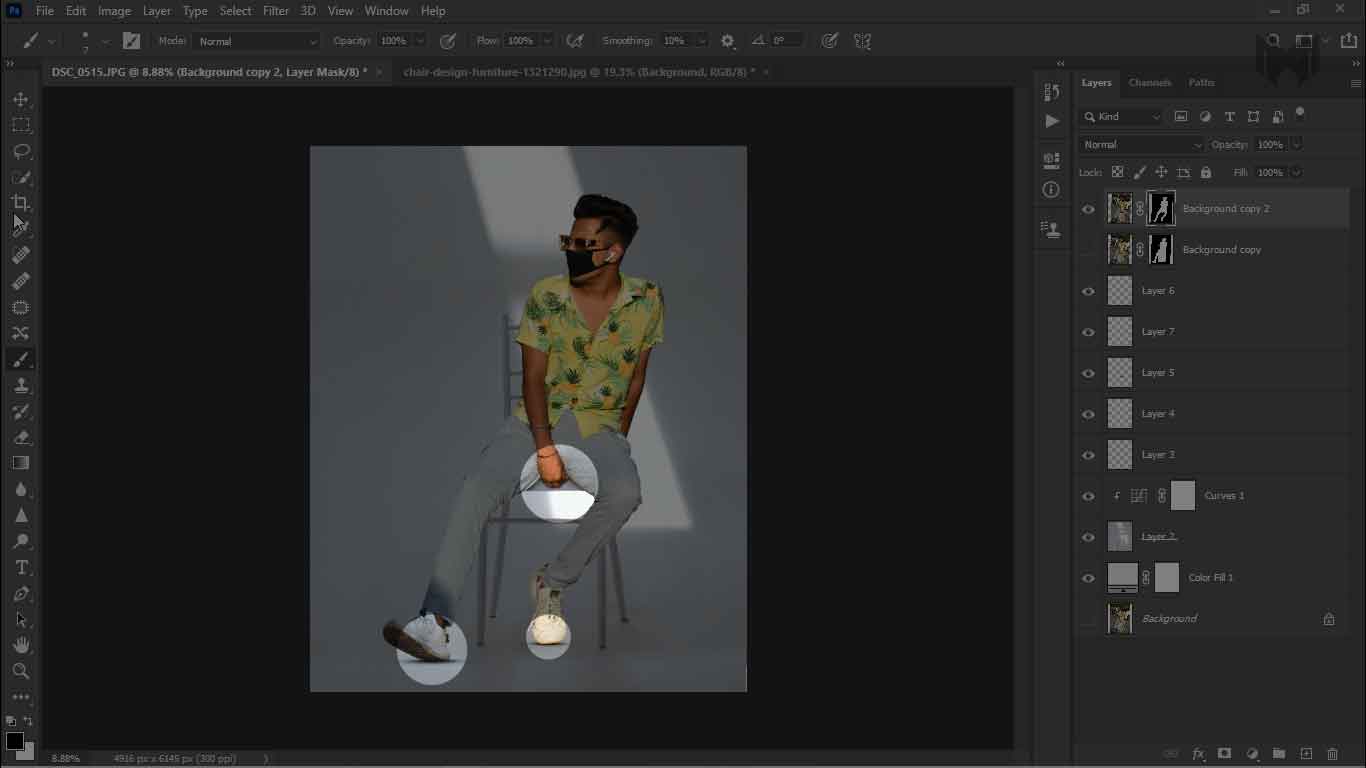
- after that, i add some shadows around his shoes and chair. to create a shadow, I’m using regular soft brush.

- then I brightened his skin. for that, i need the selection of his skin. to create selection of his skin I use color range. (menu bar-select-color range)

- once your selection is active, go to the adjustment, and create a curves adjustment layer. and increase the brightness.

- one thing that I don’t want to miss in this concept, which is the reflection on his sunglasses

- first I make a selection around the sunglasses by using again pen tool. when the selection in active choose any solid color

- So this is the image which i use for the sunglasses reflection, to Add his image into the sunglasses, bring the image just above the solid color adjustment layer

- and clips into the solid color adjustment layer. then decrease the opacity, just a little bit
skin retouching
Skin Brushes
Feel free to use Skin Brushes. that can be used to create your own photo manipulation or anything else. In this pack, you will be seeing 3 sets of free Skin Brushes
then i merge everything together by pressing (crtl+alt+shift+e). and now its time to retouch his skin. to retouch his skin select the mixer brush tool. round and soft one
to make the skin smooth, you can do some settings. once you do these settings on your mixer brush then slowly vibrate your brush into the skin.
Match the background with the subject

- this is one of the most essential things to learn in Photoshop, especially, if you’re in compositing. if you want to leran in detail you can check out my this blog post
for now I create curves adjustment layer just above the subject layer and clips in to the subject and press the auto button which is given in craves right hand side this will automatically match the background
I added this PNG in the right hand side corner. when I’m creating this concept I am not sure how its look like with this PNG. but I’m happy with the end result.

- then I add some filed blur on this PNG

- then i pomp his hair by using liquify (menu bar- filte- liquify)

now I merge everything in one layer and go to the camera raw. to give this a final color creation