Indian Wedding Invitation Photoshop Template: A Lifesaver for My DIY Design


I’ll be honest: finding a good Indian wedding invitation Photoshop template online was harder than I expected. There are plenty of designs out there, but not many that capture the vibrant, traditional-yet-modern vibe of an Indian wedding. I wanted something special – colors, motifs, and a feel that would make my family go “wow!” when they opened the invite.
This challenge became very real when I offered to design the invitation for my cousin’s wedding. I thought it would be easy to find a premade template and tweak it, but hour after hour I clicked through generic designs that just didn’t feel right. Some were too Western and plain, others were overly gaudy, and I was getting pretty frustrated.
Just when I was about to give up, I stumbled upon the Indian – Wedding Invitation template on Envato Elements. The preview stopped me in my tracks – it was like the designer read my mind. In that moment, I knew I had found the Indian wedding invitation Photoshop template I’d been searching for. I quickly downloaded it and felt a surge of relief and excitement.
What This Indian Wedding Invitation Photoshop Template Offers
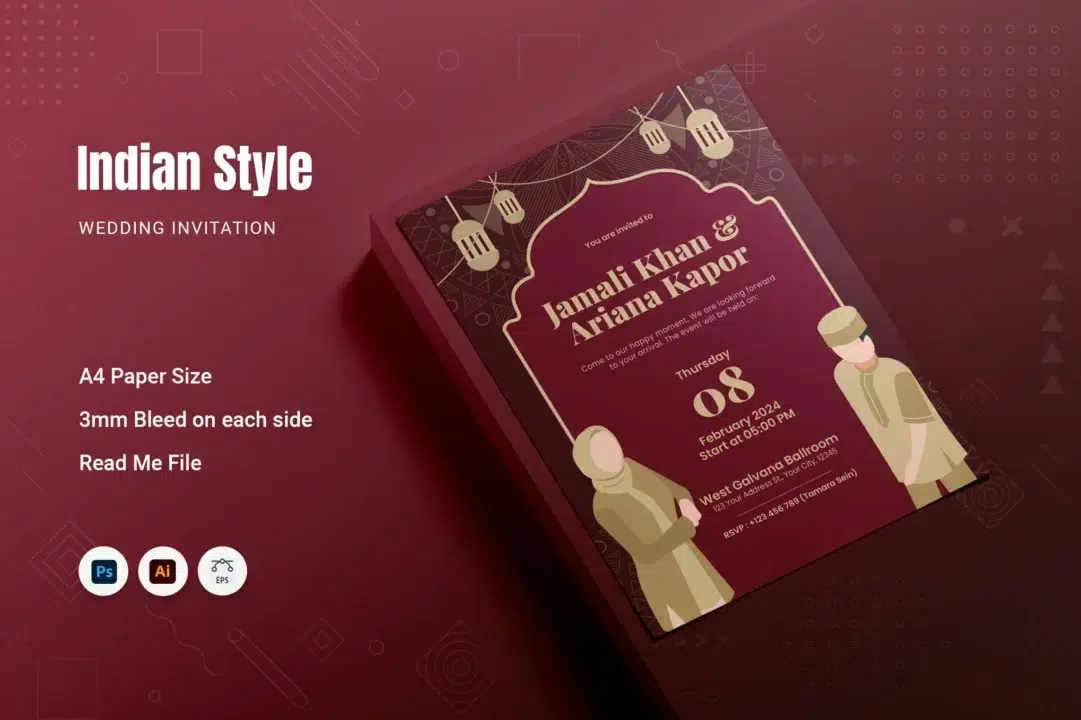
My first look at the template had me nodding in approval. It was gorgeous – a perfect blend of traditional Indian aesthetics and modern simplicity. The design features intricate patterns (think along the lines of mandalas or henna-inspired motifs) arranged in a clean, uncluttered layout. The default color scheme was rich and celebratory (deep maroon-reds and golden accents, in my case), yet nothing felt over-the-top. In short, it immediately felt like an Indian wedding invite, but with a contemporary touch that made it stand out.
What impressed me even more was how flexible the template is. It isn’t just a pretty picture – every element is editable and customizable to my needs. Want to change the colors to match your wedding theme? Easy. Need to tweak the text or move things around? No problem. This template was clearly made by a pro, and you can tell: each layer is neatly organized and named (the text, images, and decorative shapes are all well-grouped and even highlighted for clarity. That meant I could focus on personalizing the invitation, rather than wrestling with the design software.
Template Specifications (Print-Ready & Fully Editable)
Now, let’s talk specs – but I’ll keep it simple. Here’s what you get with this Indian wedding invitation template:

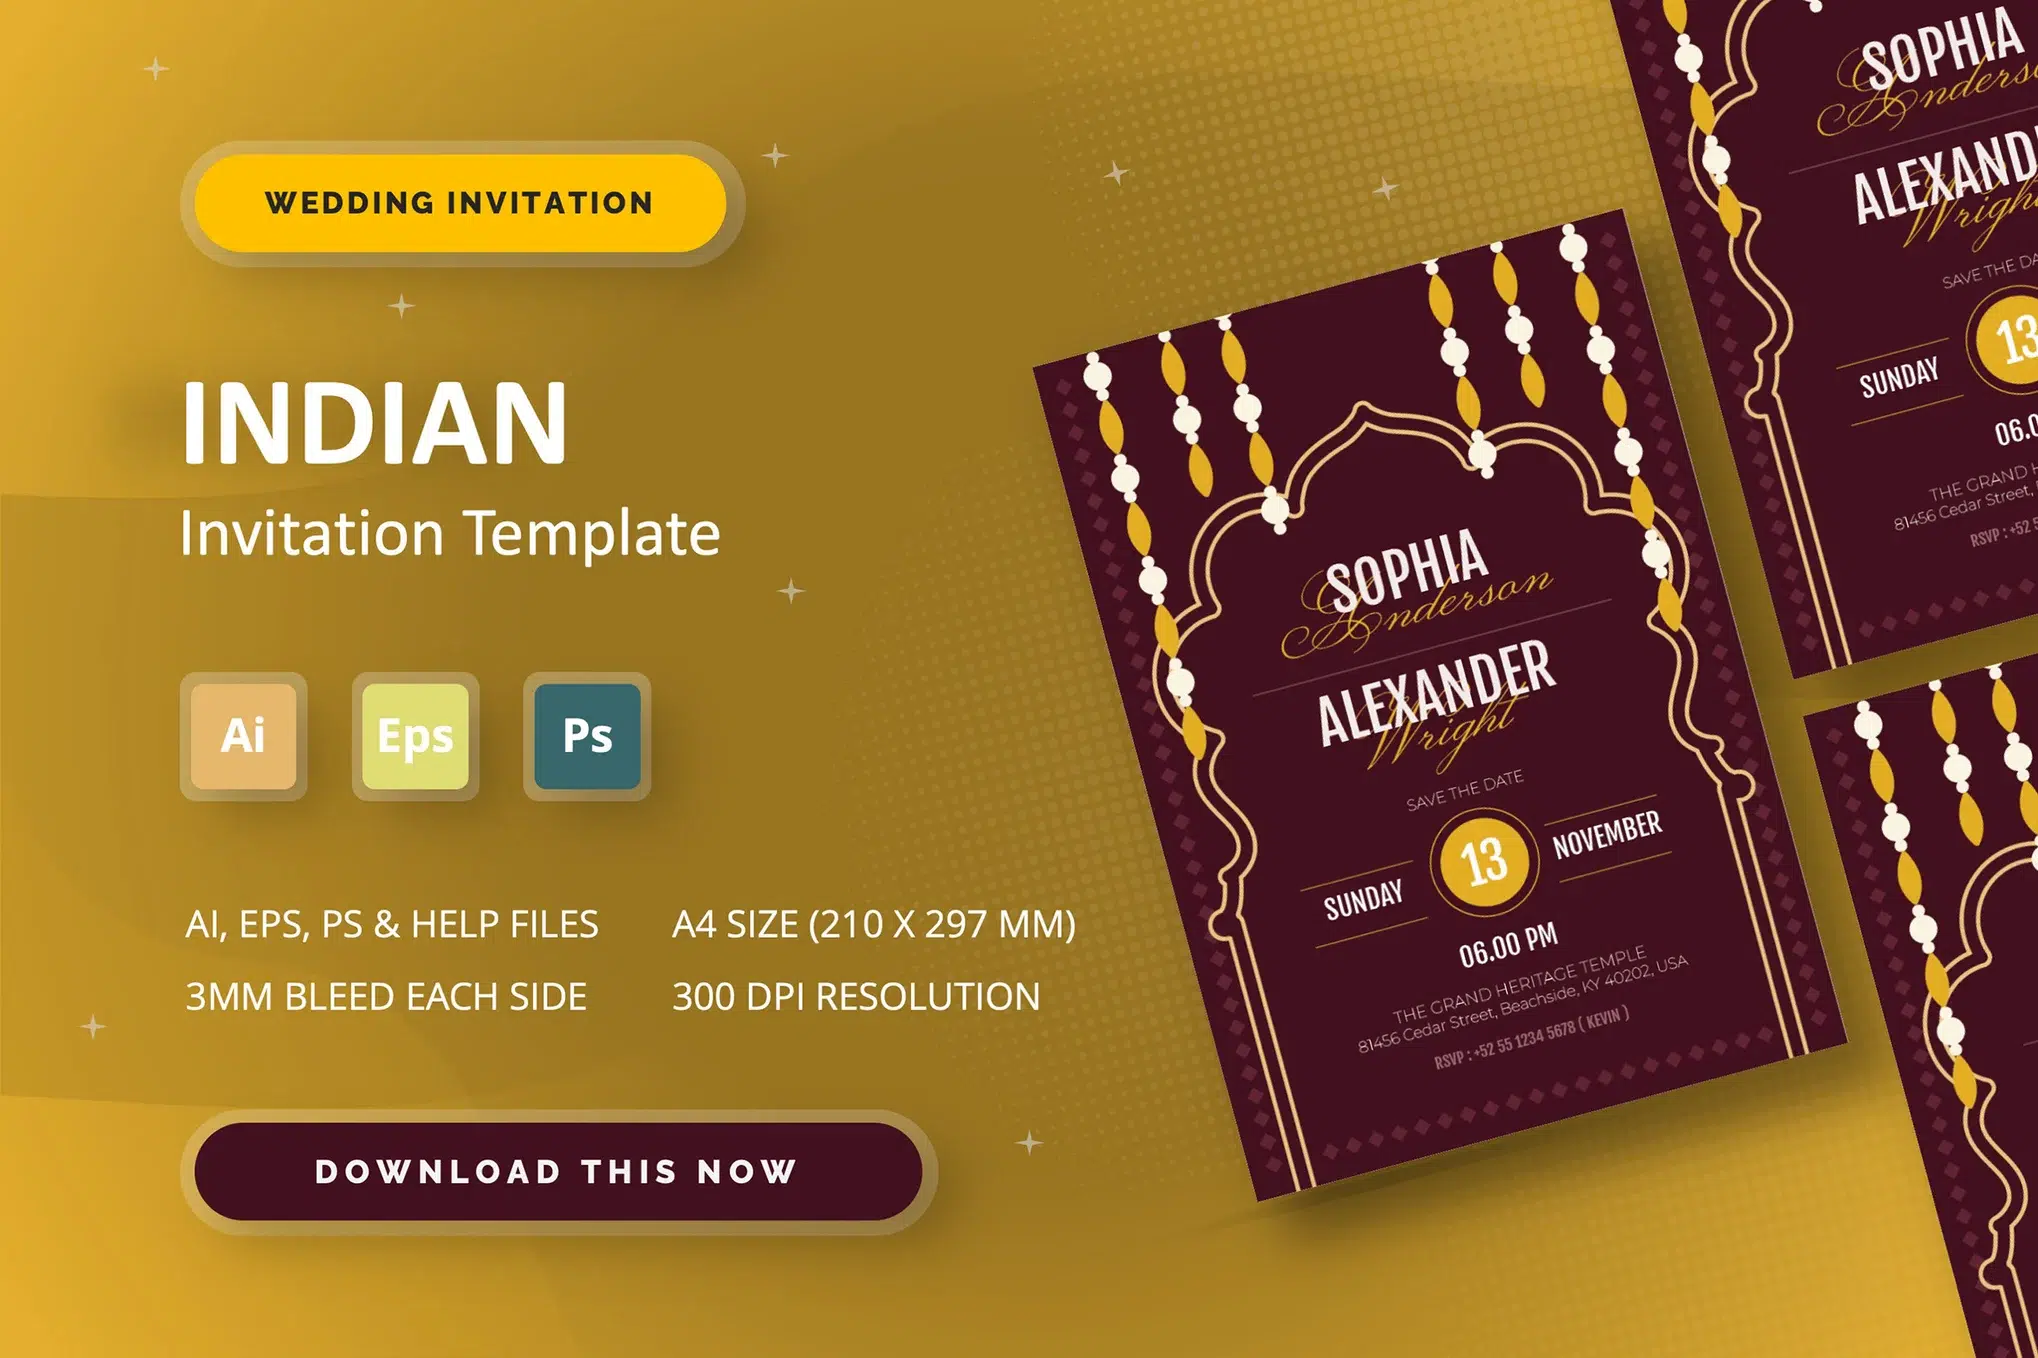
- Size: A4 size, 8.2 × 11.7 inches (portrait orientation). This is a standard paper size, so you can print easily at home or at a print shop. It even includes a 3 mm bleed for edge-to-edge printing without any ugly borders.
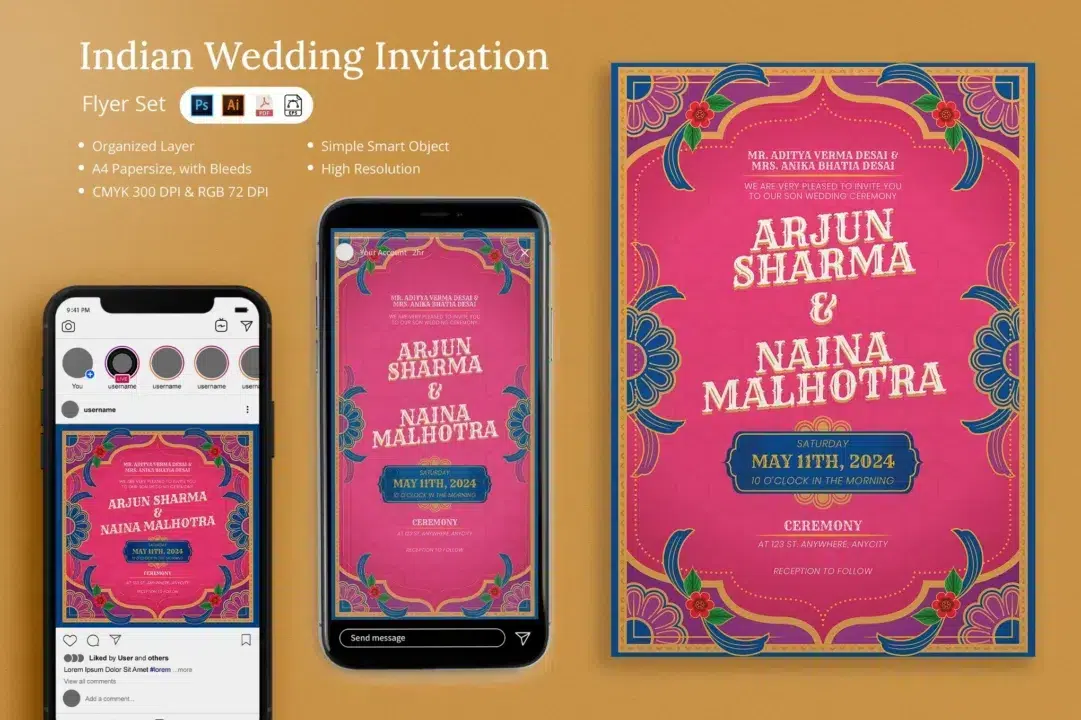
- Color & Resolution: CMYK color mode at 300 DPI (high resolution). In plain terms, that’s the optimal setting for crisp, vibrant prints – your invite will look just as beautiful on paper as it does on screen.
- Formats: Comes in multiple file formats – Adobe Photoshop (PSD) and Adobe Illustrator (AI and EPS). So whether you’re comfortable in Photoshop or Illustrator, you can work with it. (I used the Photoshop version, since we’re talking Photoshop template here.)
- Editable Layers: Fully layered and fully editable design. Every element (text, backgrounds, graphics) is on its own layer, which means you can adjust, recolor, or replace anything to make the invitation truly yours.
- Help File: The download even includes a small help file for guidance. If you’re new to editing templates, this is super handy – though I found the template intuitive enough that I didn’t really need to crack open the help doc.
Pretty neat, right? If you’re already excited to try it out, you can grab the template below.
Editing the Template: Step by Step
Now for the fun part – editing the template to make it truly yours. I’m not a hardcore designer, so I felt a mix of excitement and nerves when I first opened the file. But it turned out to be a smooth ride. Let me walk you through how I customized this template for my cousin’s invite:

- Open the template in Photoshop and review the layers. I opened the PSD file in Adobe Photoshop and took a minute to examine the layers. Everything was organized into groups (background, text, graphics, etc.), and each layer had a clear name. In fact, the designer had even noted how each layer corresponds to text, images, or shapes, making it super easy to navigate. This immediately put me at ease – I knew exactly where to find what I needed to edit.

- Replace the placeholder text with your details. Next, I updated the placeholder text to reflect the actual wedding details. The template came with sample names (like SOPHIA & ALEXANDER Name) and filler text for the date and venue. I simply grabbed the Type tool, clicked on each placeholder text box, and typed in the real names, date, time, and venue information. The elegant fonts and styling were already set up, so as soon as I entered our details, the invite looked personal and polished without any extra effort.

- Customize the colors to match your theme. Then came the colors. Indian weddings often revolve around vibrant color themes, and for this invite we wanted a royal purple and gold combo instead of the default reds. Changing colors in the template was a breeze: I clicked on one of the shape layers (which controlled a decorative motif) and simply changed its fill to the purple we wanted. In seconds, the main accents transformed to a rich violet hue – and because the design elements are vector-based, everything stayed perfectly sharp and print-ready.
- Tweak the background (optional). I also looked at the background of the invitation, which had a subtle pattern by default. It featured a delicate motif (a faint floral/paisley design) that gave the invite an unmistakably Indian touch without overpowering the text. I loved it as-is, so I left it in place. (Of course, if it doesn’t fit your taste, you can easily swap it out or hide it – the background is on its own layer, so it’s totally up to you.) I did toy with adjusting its color tone slightly, just to see how a different shade would look, but in the end I stuck with the original because it already looked great.
- Save and export for print. Finally, I saved my edited invite and got it ready for printing. I exported the file as a high-resolution JPEG (and also a PDF) in CMYK mode, since that’s what most print shops prefer. Because the template was already 300 DPI and had that small bleed margin, the printed cards came out absolutely crisp and nothing important got cut off at the edges. When I held the finished invitation in my hands, I couldn’t help but smile – it looked professional and it perfectly reflected the joyous, desi vibe we were going for.
Believe it or not, I managed to do all of this in just an afternoon. Not bad for someone who’s not a professional designer!
Final Impressions: From Screen to Print
I was thrilled with how the final invitations turned out. On screen, the design looked vibrant and authentic, and the printed version lived up to that promise. The colors came out rich and true to what I saw on my monitor, and every fine detail (from the intricate motifs to the neat typography) printed sharply without a hitch. You wouldn’t guess it was made from a template – it truly looked like a professionally crafted invite.
The best part was sharing the finished invites with my family. My cousin (the bride-to-be) was absolutely delighted, and even the older relatives – who usually prefer very traditional designs – were impressed by how it captured an Indian feel while still looking fresh and modern. Seeing everyone admire the invitation, and knowing I had a hand in creating it, was such a proud moment for me. It set the perfect tone for the wedding celebrations to come.
Using this template turned out to be a win-win for me. I got to be creative and add personal touches to the invite, but I also saved a ton of time (and stress) by not designing from scratch at the last minute. The invitation felt uniquely ours, yet I didn’t have to reinvent the wheel to achieve that. Honestly, I’m so glad I went this route – the end result was a beautiful invite and a much more relaxed design process for me.
A Heartfelt Send-Off
Looking back on this little design journey, I realize how much of a difference the right template can make. I went from feeling stuck and stressed to actually enjoying the process of creating an invitation. This Indian wedding invitation Photoshop template didn’t just save me time – it also inspired me to be creative with its customization. I learned that using a template isn’t about cutting corners; it’s about having a solid starting point so you can focus on the fun parts of design.
If you’re on a similar quest for the perfect wedding invite, I wholeheartedly recommend giving this template a try. Whether you’re a design newbie or a seasoned pro, it makes it easy to get started right away. You can pour your personal touch into it without getting bogged down by technicalities (the dimensions, color settings, and layout are all taken care of for you). In the end, you get a gorgeous, custom-feel invitation for a fraction of the effort.
For me, the biggest reward was seeing the joy it brought – both to me as the creator and to my family as the recipients. And knowing that I could pull it off without tearing my hair out was a huge relief! If you haven’t already, go ahead and download this Indian wedding invitation Photoshop template for your own project – it might just save you the same hassle I went through, and help you create something truly special for the big day. Happy designing, and even happier celebrating!