Indian Style Wedding Invitation Template – Free Download
Planning a shaadi (wedding) involves blending age-old traditions with today’s trends, and nowhere is that more visible than in the invitation card. As someone who’s helped design a fair share of wedding invites, I know the wedding card isn’t just paper – it’s a sneak peek into the big day’s vibe. When it comes to Indian weddings, you want that card to scream tradition and celebration (think vibrant colors, cultural motifs) while still feeling modern and clean. It’s a delicate balance, but the Indian Style Wedding Invitation template I’m sharing today manages to pull it off beautifully.
Let me introduce you to this gorgeous Indian wedding invitation template. It’s a pre-designed print-ready wedding invite that you can download for free and customize to your heart’s content. I was honestly impressed when I first opened it – the design has a luxurious feel (deep colors and elegant motifs) yet remains uncluttered and easy to read. In this post, I’ll walk you through what this template offers, who it’s perfect for, and some tips to make the most of it. Grab a cutting chai ☕, sit back, and let’s dive in!
Design overview
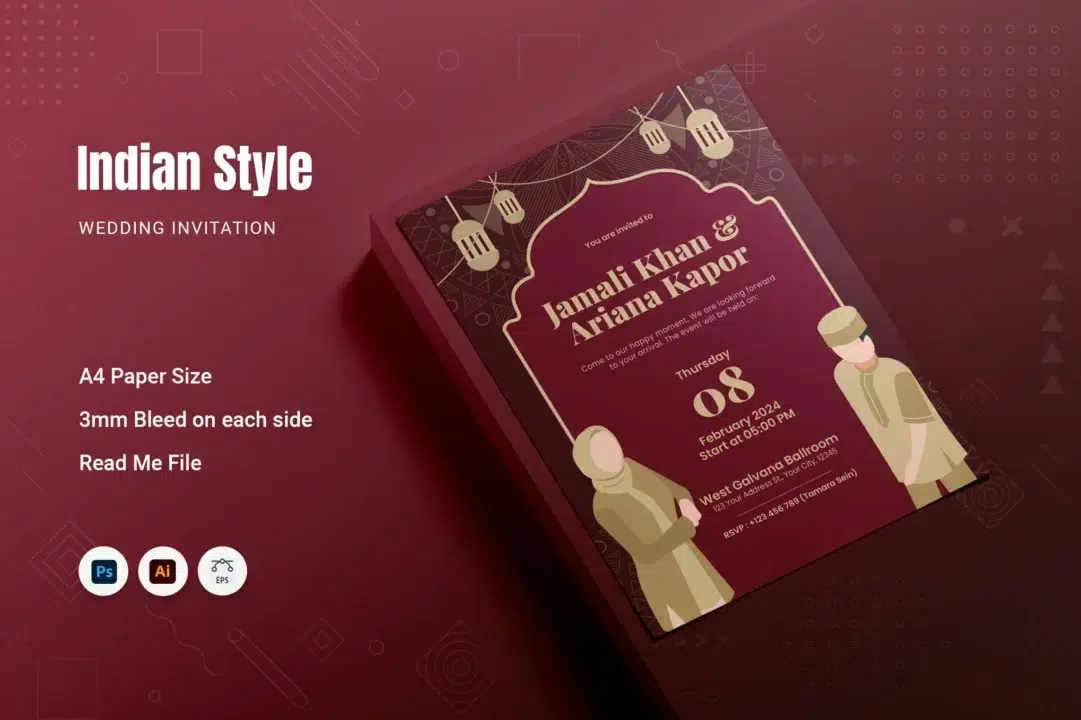
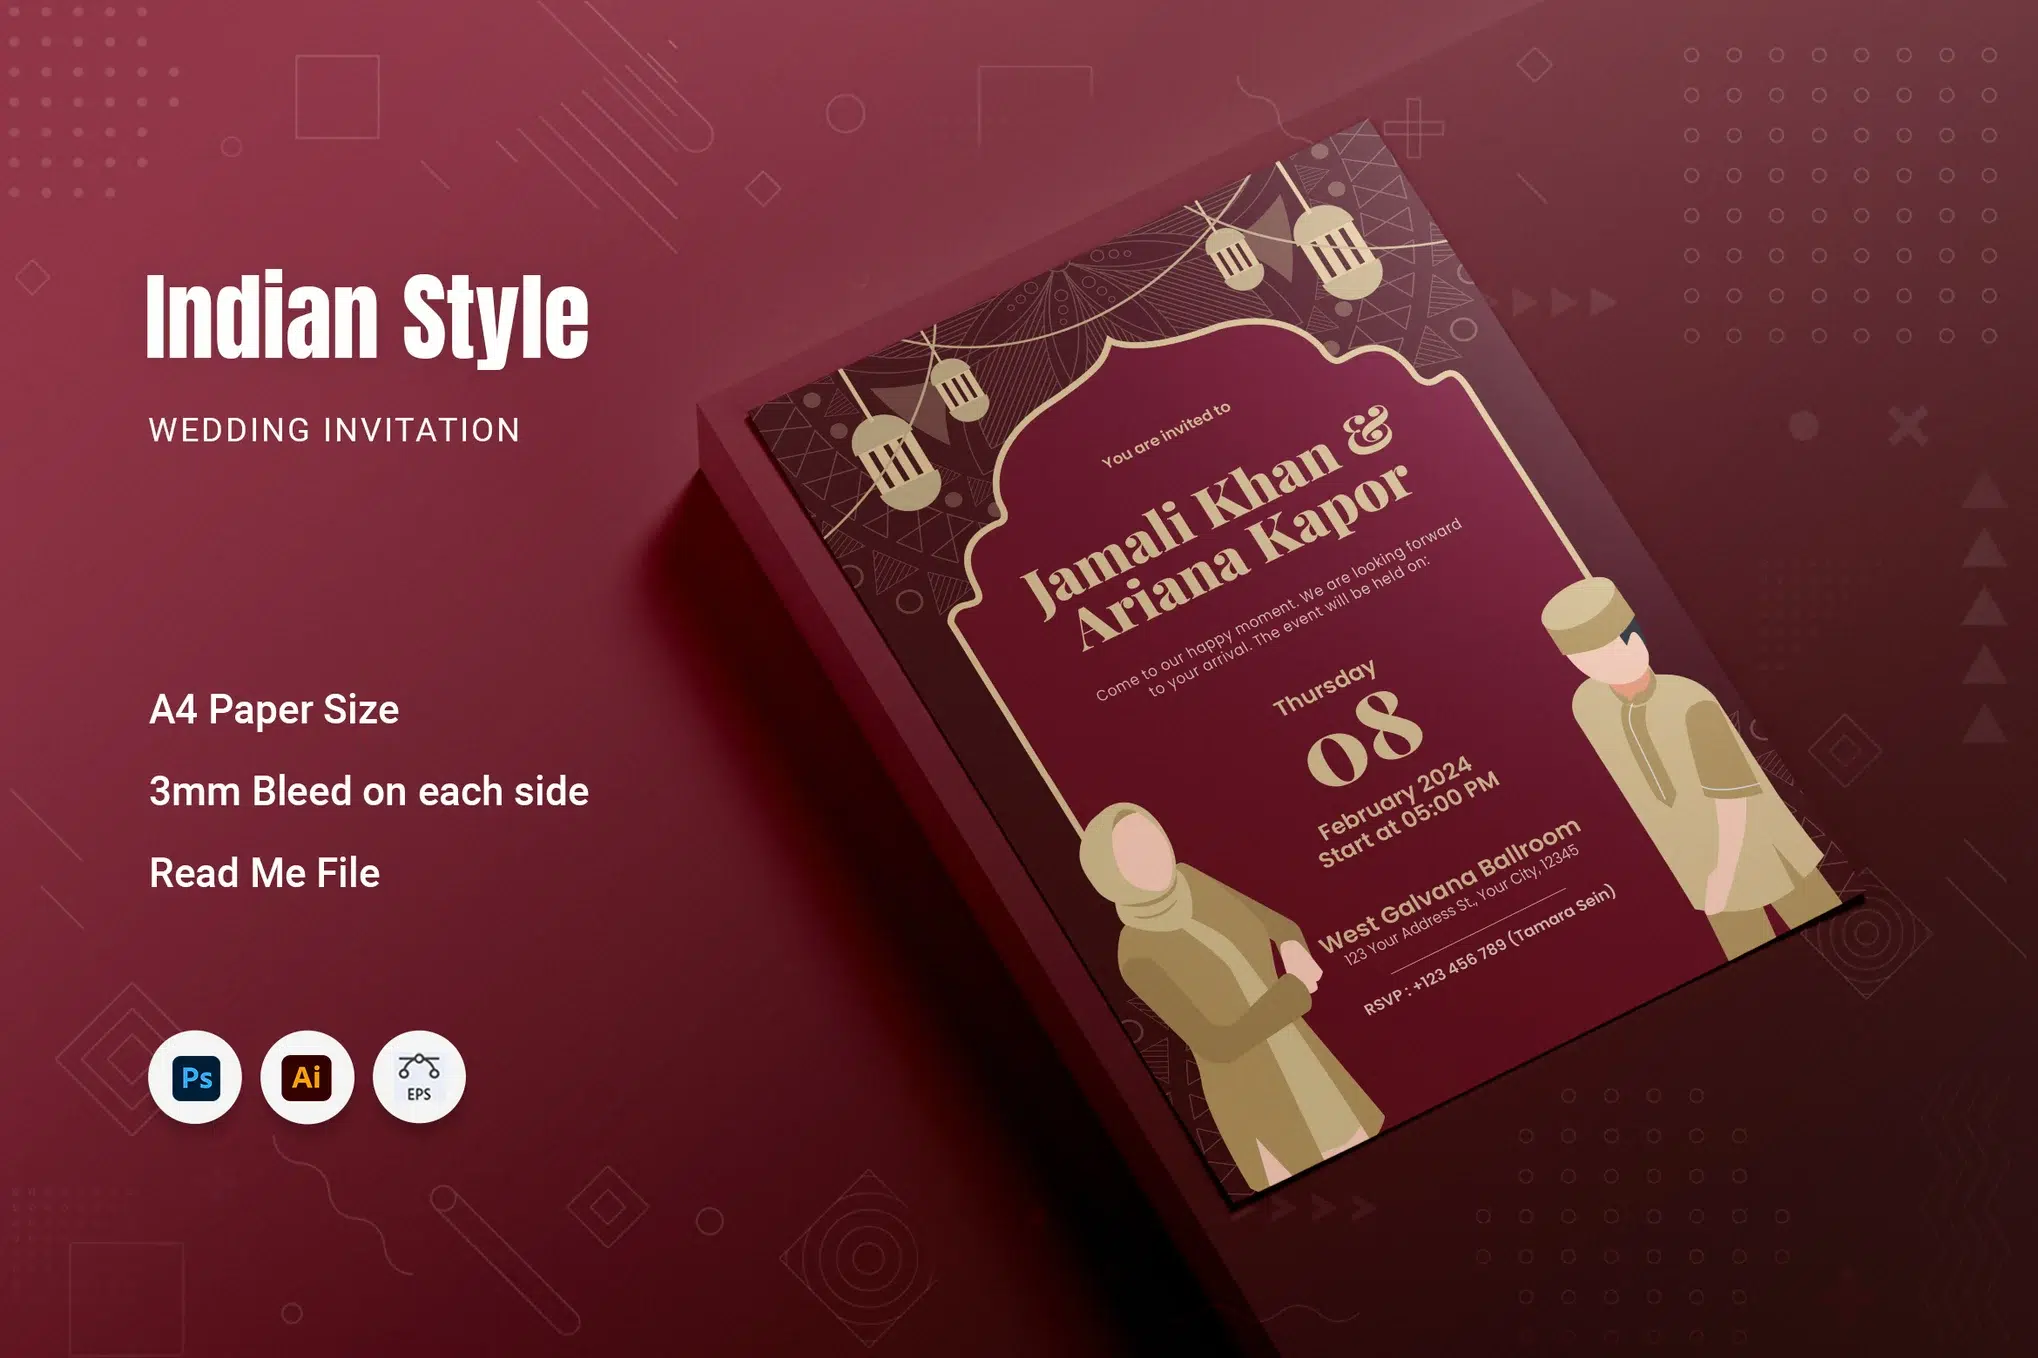
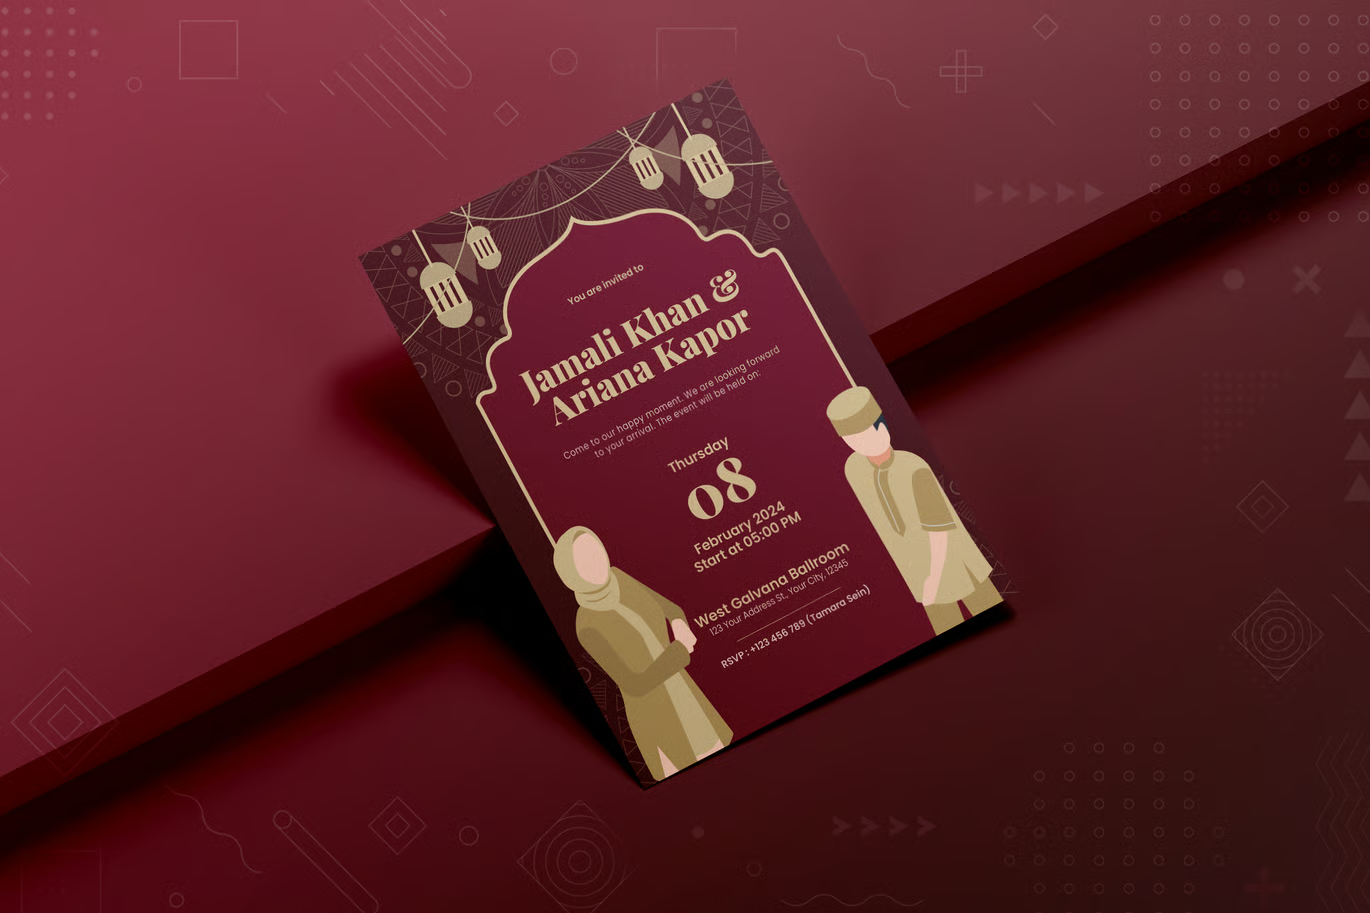
Indian Style Wedding Invitation blends traditional Indian elegance with a clean, modern layout. It captures the warmth of cultural motifs without feeling heavy or crowded. Overall, it’s a graceful balance of heritage and simplicity, perfect for anyone who loves modern design with an Indian touch.
Who is it for? Honestly, anyone involved in creating wedding invites can use this:
- Wedding planners: If you’re coordinating a wedding, you can use this template to quickly generate a beautiful invite for your clients without hiring a separate designer. It’s a lifesaver when you need something fab on a tight timeline.
- Graphic designers & creative freelancers: This template can be a base for your project – saving you hours. You can tweak the colors or fonts to match the couple’s theme. It’s great for freelancers who want to deliver quality design fast (and hey, since it’s free here, it helps your project budget too).
- DIY brides/grooms or family members: Even if you’re not a pro designer, if you’re a bit tech-savvy you can edit this wedding card PSD yourself. It’s beginner-friendly; I’ll explain technical bits in simple terms as we go. So if you want to personalize your wedding card without spending big bucks, this is for you.
In short, Indian Style Wedding Invitation is a print-ready invitation template that caters to a hybrid audience – whether you’re doing it yourself or using it for a client, it provides a culturally rich yet contemporary design ready to be filled in with your wedding details.
Key Features
Let’s talk about what makes this template special. After playing around with it, here are the key features that stood out to me:

Fully Editable & Layered – This isn’t a flattened image; it’s a proper layered template. That means every element (text, colors, graphics) can be adjusted. Not a fan of the default color scheme? You can change the background color or swap the accent colors to match your wedding theme. All the text – names, dates, venue – is just placeholder text in the file, ready for you to click and edit. The layers are well-organized (named logically), so even if you’re new to Photoshop or Illustrator, you won’t feel lost. I found it pretty intuitive to locate text and graphics layers.

Elegant Indian-inspired Design – The template incorporates beautiful desi motifs (like mandala-style patterns and maybe even paisley or rangoli elements) into a clean layout. The rich maroon/red background with golden-yellow accents gives it a luxurious, festive vibe without feeling gaudy. It instantly says “Indian wedding” but in a refined, modern way.

Modern, Easy-to-Read Layout – Despite all the decorative elements, the text layout remains clean and clear. The names of the couple, the date (formatted with day, month, year), venue details, info are all laid out logically. The typography is stylish yet readable (no overly frilly fonts that you can’t decipher). Important details like the date and names are emphasized in the design so they stand out at a glance. This balance of decorative and modern design is perfect for appealing to both the older folks (who might want something traditional) and the younger crowd (who prefer something sleek).
These features make the template stand out. It’s not just another template; it genuinely feels like the designer put thought into balancing aesthetics and practicality (the matching set is proof of that). Now, let’s get into the nitty-gritty: what formats it comes in and how you can work with it.
File Details & Compatibility

- File Formats Provided – You’ll get the invitation templates in three formats: Adobe Photoshop (.PSD), Adobe Illustrator (.AI), and .EPS (Encapsulated PostScript). The PSD is great if you prefer Photoshop or want to edit pixel-based details; the AI/EPS formats are ideal if you’re comfortable with vector editing in Illustrator. Having both means maximum flexibility – use whatever software you’re most familiar with.

- Software Needed – The template is designed for Adobe Photoshop and Illustrator specifically (these are the industry standards and what the files are built for). If you have Adobe Creative Cloud, any recent version of Photoshop/Illustrator will open these files. I opened the PSD in Photoshop CC 2023 and it worked like a charm. That said, you’re not strictly limited to Adobe paid software. If you don’t have Photoshop, you can try using Photopea (a free browser-based editor) to open and edit the PSD – Photopea supports PSD files quite well. For the AI/EPS, if you don’t have Illustrator, you might use free options like Inkscape or even import the EPS into Photoshop (it will rasterize it, but for minor edits that’s okay). Keep in mind, using the Adobe apps will give the smoothest experience, but it’s good to know you have alternatives.
- Compatibility – The files should be compatible with most versions of Adobe CS6 and above. Since they are in standard formats (PSD, AI, EPS), even older versions like Photoshop CS6 or Illustrator CS6 should open them (perhaps with a warning to update text layers if any). I always recommend using the latest version you have for best results. The template is provided in A4 size (more on that below), which means it can be used on either Windows or Mac without any issue – just a standard file. There are no special plugins or fonts embedded that would make it incompatible (though you will need the fonts installed, see Troubleshooting). Basically, if you have a halfway decent computer that can run image editing software, you should be able to use this template.

- Layer Organization – Just a note on this: in the PSD and AI, layers are neatly grouped (background, ornaments, text, etc.). This makes editing easier. For instance, in Photoshop, you’ll see folders for Background, Text, Graphics, etc. So you can toggle visibility or lock certain layers as needed. This logical setup reflects the author’s professionalism and it helps newbies navigate the file with less confusion.
Print-Readiness
One of the strongest aspects of this template is that it’s truly print-ready. You won’t have to worry about setting up color profiles or resolution – it’s all done for you:

- CMYK Color Mode – The files are in CMYK (Cyan, Magenta, Yellow, Black) color mode, which is the standard for printing. Why does this matter? Well, designs in RGB (which is for screens) can print with colors looking off. But CMYK ensures the colors on your invite come out accurately when printed at a professional print shop or even on a good home printer. I checked the file and it’s already in CMYK, so you’re good to go.

- High Resolution (300 DPI) – The template is designed at 300 DPI (dots per inch). This basically means the resolution is high enough for crisp printing. Text and graphics will look sharp, not pixelated. 300 DPI is the print industry standard for high-quality prints, so your invitation will look clear and professional, even if you use a fancy textured cardstock to print on.

- Bleed Included – There is a 3mm bleed on each side of the design*. In simple terms, bleed is extra margin beyond the final trim size of the card. It’s there so that when the printer cuts the cards to size, any background color or design goes all the way to the edge (no white borders peeking out). In this template, the A4 layout actually has that little extra on each side, which is awesome. It means when you or your print shop trims the printed invitations, they’ll have perfect edge-to-edge color. Just be mindful not to put any important text or photos right at the very edge – keep them within the safe area (usually about 5mm inside from the trim edge), but the template likely already accounts for that with guides.

- A4 Size, Portrait Orientation – The invite is set up at A4 size (8.2 × 11.7 inches) in portrait orientation. A4 is a common paper size internationally, and portrait (vertical) is typical for wedding invitations. You can print these on A4 sheets. If you’re in a region where “Letter” size (8.5×11 inches) is standard, don’t worry – A4 is just slightly taller and narrower. Most print shops can handle A4, or you can print on letter and trim a tiny bit. Since it’s all vector shapes and text, adjusting size is possible if absolutely needed, but I’d stick to the default if you can.

- Print Formats – When you’re ready to print, I suggest exporting the finalized invitation as PDF files (PDF is great for printing). In Photoshop or Illustrator, you can go to File → Save As/Export → PDF, and choose a high-quality print preset (with bleed marks). Since the file is already CMYK/300DPI with bleed, exporting to PDF/X-1a (a common print PDF standard) would preserve those settings. If you give that PDF to a professional printer, they’ll know exactly what to do. If printing at home, you can also print directly from the PSD/AI or use the PDF – just make sure your printer settings are not scaling the design (print at 100% size) and that you use good quality paper.
In summary, everything about this template screams print-ready – just edit the text, and you can confidently send it off for printing without tinkering with technical settings. I’ve been delighted with how hassle-free it is on this front.
What You Get
Here’s a quick rundown of the files and items included when you download this free template:
- Invitation Card Design (Front) – 1 page A4 size layout (8.2×11.7 inches) with bleed, featuring the main invitation design (for the wedding details). This is the star of the show – the beautifully designed invite where you’ll put names, date, venue, etc.
- Formats: PSD, AI & EPS – You will receive each of the above designs in Photoshop (.PSD), Illustrator (.AI), and EPS formats. So that’s essentially six files for the templates. Use whichever format/software you prefer. All are editable and high quality.
- Layered & Editable Files – All template files are fully layered for easy editing (texts, colors, and graphics can be modified). Nothing is flattened. If you open the PSD, for example, you’ll be able to select and edit each text box, each shape, etc. Same for the AI/EPS in Illustrator.
- Help Documentation – A “Read Me” file is included. Make sure to open that! It likely contains instructions from the designer – possibly a quick guide on editing, and importantly, probably the list of fonts used and where to download them. Since fonts cannot be bundled due to licensing, the documentation will tell you which fonts you need to install to make the invite look like the preview (more on fonts in Troubleshooting below). The documentation might also repeat some of the info I’m covering, like bleed and suggested print settings.
Everything comes in a neat package. Once you download the ZIP file, just unzip it to access all these goodies. Now, let’s get you that download link and then we’ll go over some tips to troubleshoot common issues.
Download
Download This Free Template
Includes PSD, AI & EPS files. File hosted on pclude servers.
(Click the button above to download the zip file containing all the template files. The download is quick – it’s just a couple of invitation files, nothing too huge.)
Note: After downloading, remember to extract/unzip the files first if they come in a ZIP archive. You can then open the files in Photoshop or Illustrator to start editing. I’ve hosted the files on my own pclude (cloud storage) server for a fast and safe download experience – no login or sign-up needed. Enjoy!
Troubleshooting Tips
Even with a well-made template, you might hit a few snags while editing or printing. Don’t worry – I’ve got you covered with some common issues and how to solve them:

- “Missing Font” Warnings: When you open the PSD or AI, you may see a message like “Font XYZ is missing” and the text might look weird. This happens because, as I mentioned, fonts aren’t included with the template. Check the documentation or readme file included – it usually lists the names of the fonts used (and often they are free fonts or Google Fonts). For example, if it says the font used for names is Playfair Display (just an example), you’ll need to download and install that font on your system. Install the recommended fonts, re-open the file, and the text will appear as intended. If for some reason the font isn’t free or you can’t find it, you can always substitute with a similar font you have. The template’s text boxes will adapt to any font you choose. The key is to match the style – e.g., use an elegant script or serif for names if the original had that, etc. But 99% of the time, the fonts used are free and links are provided by the author.

- Editing Text & Graphics: If you’re new to Photoshop/Illustrator, editing might seem daunting. Here’s a quick rundown: In Photoshop, select the Type (Text) Tool, then click on the text you want to change and simply type your names, dates, etc. The text may be on multiple layers (for example, the date numbers might be separate text boxes for day, month, year). Use the Move Tool to reposition things if needed. In Illustrator, use the Text Tool (T) to highlight and edit text similarly. All the decorative graphics (like that mandala or border artwork) are vector shapes – you can click them and change their color, scale them, or remove them if you want a cleaner look. If some layers are locked (to prevent accidental moves), you might need to unlock them: in Photoshop, click the lock icon in the Layers panel if present; in Illustrator, you might go to Object → Unlock All. Don’t be afraid to explore the layers panel – the names will guide you (e.g., “Bride Name”, “Groom Name”, “Background Pattern” etc.). And remember, Ctrl+Z / Cmd+Z is your undo friend!

- Color Looks Different on Screen vs Print: Because the file is in CMYK, you might notice the colors on your screen look a bit duller than you expect. CMYK is optimized for print, and some bright RGB colors can’t be displayed exactly the same in CMYK. Don’t fret – if the preview looks a bit muted, it’s likely intentional for accurate printing. When you print, the colors should come out rich and vibrant as per the design. If you need to send a digital invite or want to showcase the design online, consider converting a copy of the file to RGB for screen viewing (in Photoshop: Image → Mode → RGB, and save a JPEG). But do all your print editing in the original CMYK file for best results. Also, if your printed output looks off-color, double-check that your printer settings aren’t converting the file again or that you used the CMYK PDF to print. Professional print shops will handle this automatically if you give them a CMYK PDF.

- Ensuring Bleed and Safe Zone: When printing, make sure you or the print service use the bleed. This might mean selecting “use document bleed settings” in the PDF export or print dialog. If you’re printing at home, print on a slightly larger paper and trim down, or ensure the printer isn’t scaling down the design (which could add white borders). Use a ruler and X-acto knife or a paper cutter to trim along crop marks if provided. If you find the template doesn’t have crop marks, you can add them when exporting to PDF (there’s usually an option for crop marks/bleed marks). Keep all important text within the safe margins (usually the template has guides or just naturally places text away from edges). You wouldn’t want any names or dates accidentally cut off.

- File Won’t Open or Crashing: If you’re on an older computer or software version and the file is very slow or not opening, it could be due to size (though an invitation shouldn’t be too heavy). Make sure your system meets the requirements for Photoshop/Illustrator. If it’s crashing in Photoshop, try opening the EPS in Illustrator or vice versa. You can also try the free Photopea in your web browser which can sometimes handle PSDs when Photoshop fails. Another tip: close other heavy programs while editing to free up memory. The PSD might be a couple hundred MB after you add a photo, so ensure you have that RAM available.
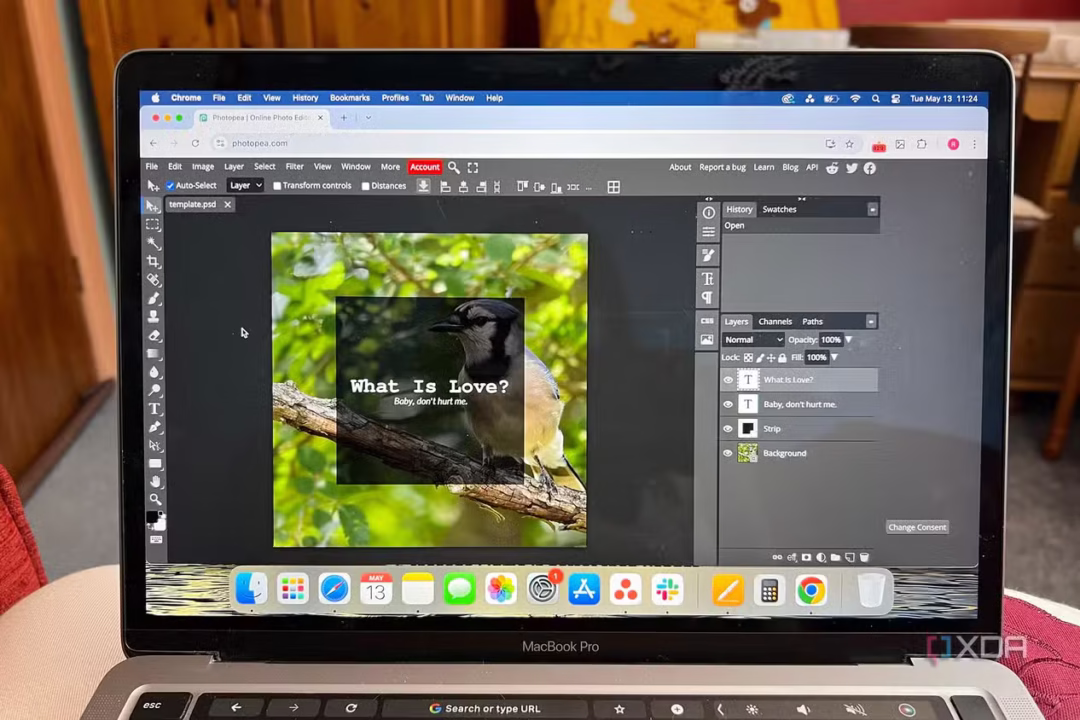
- No Photoshop or Illustrator at All: If you absolutely don’t have access to Adobe software, as I said, Photopea (photopea.com) is a solid free alternative for Photoshop files. Just go to the website, load the PSD, and you can do much of the same editing right in your browser. It even supports CMYK now in a beta capacity. For the Illustrator file, Inkscape can open AI/EPS. However, one caveat: advanced Illustrator features might not import perfectly in Inkscape. If the design uses special effects, Inkscape could mess up the look. In most cases, the safest route for non-Adobe users is to stick with the PSD in Photopea. You’ll still need to handle fonts (install them on your computer for Photopea to use, or it will substitute). Once edited, you can save a PDF or PNG from Photopea. It’s not as robust as Photoshop, but for basic text and minor color edits it does the job. I’ve tested Photopea with layered PSD invitations before and it works decently.

- Printing at Home Tips: If you plan to print these at home, use good quality cardstock paper (somewhere around 250-300gsm thickness works nicely for invites). Set your printer to high quality, and ensure color management isn’t doing something funny (you can usually trust the default if the file is CMYK). Print one test page first. Also, consider the dimensions – A4 invite might be large; you might instead decide to scale down the design to half size (A5) for a smaller card. You can do that by printing two pages per sheet, or by resizing the file (since it’s vector, it can scale). Just remember to also scale the text accordingly so it’s readable. If all this is too much, a local print shop or an online print service can save you a ton of hassle – they’ll get the colors right, cut the bleed nicely, and often can supply envelopes too that fit the size.
If you encounter any other issues, feel free to reach out in the comments or contact me – I’m happy to help troubleshoot so you get the perfect invitation in hand. Now, on to a few recommendations if you’d like to explore designs further.
Related Recommendations
I’ve curated a few similar invitation templates that you might find interesting. These aren’t included here, but if you like the Indian Style Wedding Invitation design, you might also love these (they have a similar vibe or complementary style):
(Feel free to search for these templates on creative marketplaces – some of them might even be available for free or under subscription services. They’re great for inspiration or if you need multiple designs to choose from.)
SEO Notes
If you’re on the hunt for an Indian wedding invitation template that’s both culturally vibrant and easy to use, this blog has you covered. We’ve discussed a free wedding invitation PSD download that offers a print-ready wedding invite design with professional specs (CMYK color, 300 DPI resolution, bleed included). The focus here is on an editable wedding card template with a modern Indian design – perfect for anyone looking to create stunning wedding invites without starting from scratch.
This free invitation download includes the template in PSD, AI, and EPS formats, making it a convenient wedding card PSD package for designers and DIYers alike. Whether you’re searching for a free invitation download to save costs, or specifically need a print-ready template that aligns with Indian wedding themes, you’ll find this resource ticks those boxes. Download the template, tweak the details, and you’ll have a gorgeous invitation ready to wow your guests – all with minimal fuss and at no cost. Happy designing, and wishing you a joyous wedding celebration!