Photoshop PSD script: 7 awesome ultimate hacks
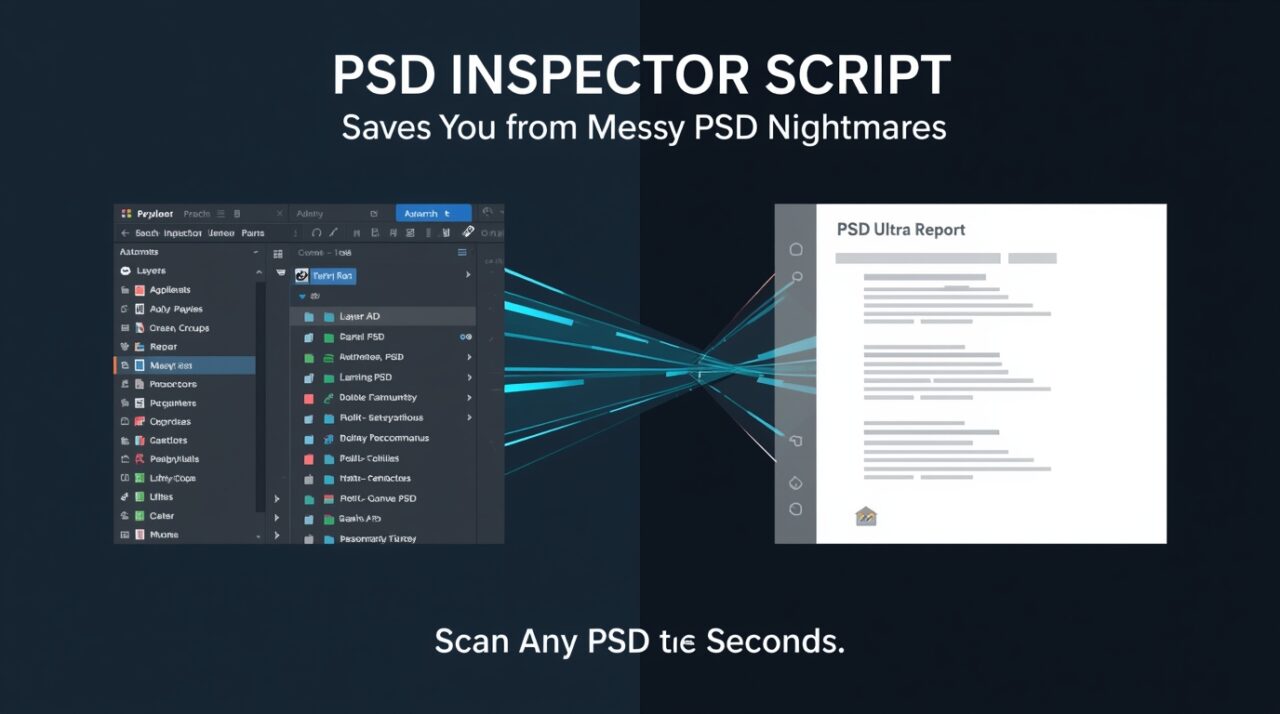
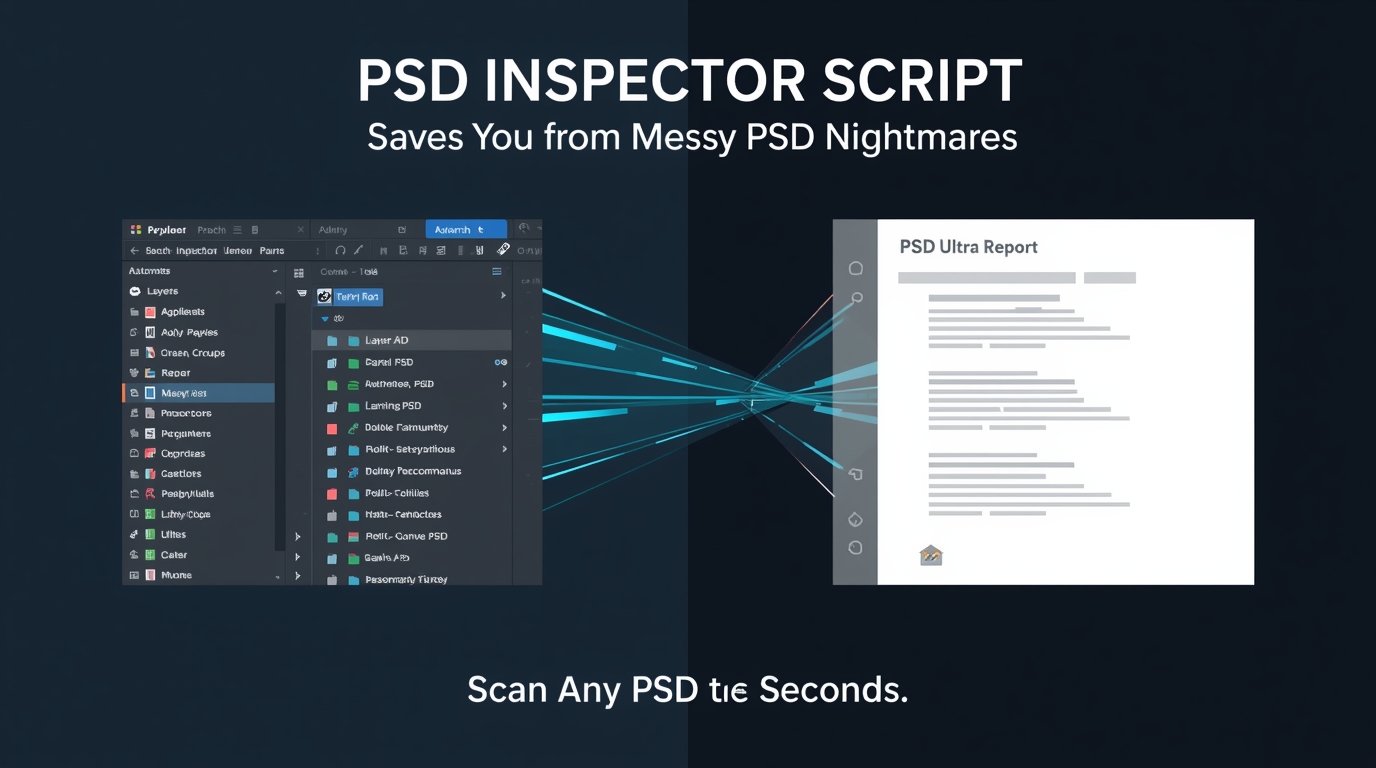
There’s a moment every Photoshop user goes through — you open a PSD from a client or a downloaded template, the layers panel stretches endlessly, and you just stare at it thinking, “How am I supposed to understand this mess?”
I’ve been there more times than I can count. I’ve worked on wedding cards, UI layouts, banner sets, and even PSDs that came from three different designers before reaching me. Some were clean… most were chaos. Fonts missing, groups unnamed, smart objects buried inside more smart objects — and I always ended up wasting time clicking each layer just to figure out what was going on.
After one particularly painful night working on a multi-layer wedding invitation PSD, I decided I needed a proper inspector — something that could scan the file the same way a doctor scans an X-ray. Not a plugin, not a third-party tool… just a simple, safe, script that runs inside Photoshop and tells me everything:
- Every font used
- Every color used
- Every effect applied
- Every smart object
- Which layers are hidden, locked, or clipped
- A clean outline of the entire structure
That’s how this Photoshop PSD-Inspector Script was born.
I built it piece by piece, testing it on real PSDs I use on PiximFix. The goal was simple: save time, work smarter, and make sure no important layer gets missed just because it’s hidden behind a group.
Now that it’s stable and actually helping me in my daily work, I’m sharing it openly — so you don’t have to go through the same long nights I did.
How to Reset Photoshop v26.x Preferences Without Losing Your Work
The real problems this PSD-Inspector Script solves
Before I show you what the script does, let’s be honest about why it exists.
If you work with PSD files regularly, you’ve probably hit at least a few of these problems.
1. You don’t really know what’s inside a complex PSD
PSD Layer Inspector
Visualize PSD layers & auto-generate structure report
- Header Group
- Logo
- Layer 15 copy 3
- Logo v2 (old)
- Content Area
- Group 4
- Main Image
- layer 5 copy 7
- Background
- Footer
- Rectangle 2 copy
FILE: Messy-Project.psd
---------------------------------

[GROUP] Header Group
   - Logo
   - Layer 15 copy 3 (Hidden)
   - Logo v2 (old) (Hidden)

[GROUP] Content Area
   - Group 4
        - Main Image
        - layer 5 copy 7
   - Background

[GROUP] Footer
   - Rectangle 2 copy (Hidden)

---------------------------------
SCAN COMPLETE: 11 Items
You see 20 groups, 150 layers, random names like Layer 5 copy 7, and your brain just checks out.
Normally, to understand the file, you would:
- Expand every group
- Click each layer one by one
- Guess where the important elements live
This script does that scanning for you and drops everything into a single TXT report:
- All layers
- All groups
- Their hierarchy
- Their visibility and basic properties
So instead of wandering inside the PSD, you read the report once and know exactly what you’re dealing with.
2. You need a full font list, but Photoshop doesn’t give you one

PSD Font Detector
Find every font used inside a PSD — instantly.
“List all fonts used in this PSD.”
When even one font goes missing, your whole design breaks — especially if you’re creating templates for clients or selling your work on Envato, Gumroad, or PiximFix.
Designers manually click every text layer hoping they don’t miss a hidden one. It’s slow, painful, and risky.
- Scans every editable text layer
- Extracts the exact font family
- Builds a clean “Fonts Used” report
- No guessing, no manual checking
- Perfect for PSD sellers & template creators
FONTS USED IN THIS PSD
-------------------------

1. Infinity27-Regular
2. Poppins-Regular
3. Poppins-Semibold
4. SHREE-DEV7-2335
5. SHREE-DEV7-0715
6. SHREE-DEV7-0709
7. SHREE-DEV7-2336
8. MyriadPro-Regular

-------------------------
SCAN COMPLETE: 8 Fonts
The script instantly tells you every font name — no more broken PSD text.
If even one font is missing, the design can break — especially for templates you plan to sell.
This script:
- Finds every editable text layer
- Reads its font family
- Creates a clean “Fonts Used” section
No guessing, no hunting. You immediately know which font files you need to include, mention, or replace.
3. Extracting a color palette is usually manual guesswork

PSD Color Palette Extractor
Automatically finds every color used in your PSD — with usage context.
Why You Need This
When reusing design styles for projects:
- Website headers
- YouTube thumbnails
- Instagram & social media
You need the exact original colors. Not guessed ones.
What This Script Detects
- Text fill color
- Shape fill color
-
Layer Style Colors:
- Stroke Color
- Color Overlay
- Drop Shadow Color
- Inner Glow Color
- Outer Glow Color
Deep scanning — includes styled, masked & hidden layers.
Extracted Color Palette
- Title Text
- Background Accent
- Decorative Stroke
- Body Text
- Shadow Color
- Overlay Highlight
Raw Script Output
#F4ECE9 → 5 uses
  - Title Text
  - Background Accent

#C39A63 → 3 uses
  - Decorative Stroke

#1A1A1A → 12 uses
  - Body Text
  - Shadow Color

#FFFFFF → 7 uses
  - Overlay Highlight

SCAN COMPLETE: 4 colors
4. Checking layer styles (FX) by hand is slow

PSD Layer Style Inspector
Deep FX scan — no dialogs, no guessing, full layer style breakdown.
Why This Matters
To understand how a PSD is designed, you normally open Layer Style again and again. This inspector reads FX directly from Photoshop’s engine and reveals every detail instantly.
What FX This Script Detects
- Drop Shadow
- Inner Shadow
- Outer Glow
- Inner Glow
- Bevel & Emboss
- Stroke
- Color Overlay
- Gradient Overlay
- Pattern Overlay
Smart objects, clipped layers, hidden FX — everything is scanned.
What Settings It Extracts
- Shadow size
- Glow strength
- Opacity
- Angle
- Distance
- Range
- Stroke thickness
- Overlay blending
Perfect for recreating styles in CSS, Figma, Canva, or any design system.
Sample FX Report
Layer: Title Text
  Drop Shadow:
      Size: 28
      Opacity: 62%
      Angle: 135°
      Distance: 14px

  Stroke:
      Size: 3px
      Color: #C39A63

  Outer Glow:
      Opacity: 42%
      Range: 35%

SCAN COMPLETE: 3 FX layers
So if you want to recreate the look in CSS, Figma, or another project, you already have the numbers.
5. The layer hierarchy is confusing or badly named

PSD Layer Structure Inspector
Readable plain-text hierarchy — no hunting, no guessing.
Why This Script Is Needed
Designers often deliver PSDs full of messy, random, or deeply nested layers. This script instantly reveals the full tree in a clean, readable plain-text format.
- Groups named grp1, grp2
- Layers named Layer 1 copy 10
- Text hidden inside deep folders
- Zero structure — complete chaos
This inspector fixes the chaos by printing a structured tree.
What the Script Outputs
- GROUP: Group 1
- LAYER: Layer 6
- LAYER: Group 1 / Layer 7
- LAYER: Group 1 / Free Download
- LAYER: Group 1 / Gradient Fill 1
Sample Hierarchy Report
LAYER  : Layer 6
GROUP  : Group 1
LAYER  : Group 1 / Layer 7
LAYER  : Group 1 / Free Download
LAYER  : Group 1 / Gradient Fill 1
LAYER  : Group 1 / Text
LAYER  : Group 1 / Shadow
LAYER  : Background
---
SCAN COMPLETE: 8 items
What It Helps You Do
- Rebuild design structure fast
- Find hidden or mislabeled layers
- Understand the PSD without opening folders
- Perfect for handoff, audits, or template cleanup
That means you can scroll the report and understand how the PSD is built without touching the mouse.
6. Hidden, clipped, or locked layers are easy to miss

PSD Layer Status Inspector
Visibility, locks, clips — everything clearly reported.
Why This Script Is Essential
PSDs often contain hidden layers, locked elements, clipping groups, and leftover items that cause confusion or break exports. This inspector exposes all of it instantly.
- Cleanup before selling PSD templates
- Detect hidden layers affecting the design
- See all clipping mask structures
- Identify locked layers blocking editing
This script shows what Photoshop hides behind tiny icons.
What the Report Includes
- Total visible layers
- Hidden layers
- Clipping masks
- Locked vs unlocked layers
Sample Layer Status Report
SCAN REPORT — Messy-Project.psd
--------------------------------

Visible Layers     : 12
Hidden Layers      : 5
Clipped Layers     : 3
Locked Layers      : 2
Unlocked Layers    : 15

DETAILS:
 - Layer: Header / Title Text        → Visible
 - Layer: Header / Subheadline       → Hidden
 - Layer: Hero / Main Image          → Visible
 - Layer: Hero / Color Overlay       → Clipped
 - Layer: Footer / Copyright         → Locked
 - Layer: BG                         → Visible

SCAN COMPLETE: 22 items
Why It’s Useful
- Clean PSDs before selling or publishing
- Find hidden mistakes instantly
- Prevent broken exports & stray elements
- Gain a complete file overview in one glance
So you can quickly see if the file is clean or if there are surprises hiding inside.
7. Smart objects stay mysterious

PSD Smart Object Inspector
Linked, embedded, placed type — completely transparent.
Why Smart Objects Are Confusing
Smart objects are powerful but can be a black box. When dealing with someone else’s PSD, you often wonder:
- Is this smart object linked or embedded?
- Does it come from an external file?
- What type of placed layer is it?
This script reveals everything Photoshop hides behind the layer icon.
What The Script Detects
- Linked or embedded state
- Original file path (if linked)
- Smart object placed type
Perfect for PSD packaging, troubleshooting, or client-ready handoffs.
Sample Smart Object Report
SMART OBJECT REPORT
-------------------

Layer: Hero Image
Type      : Linked
File Path : /assets/hero/hero-main.psb
Placed As : rasterizeContent

Layer: Product Badge
Type      : Embedded
Placed As : pixel

Layer: Texture Overlay
Type      : Linked
File Path : /textures/paper.psb
Placed As : preserve

SCAN COMPLETE: 3 Smart Objects
Why It Helps
- Spot broken/missing linked assets
- Know which files are external
- Package PSDs correctly
- Debug smart objects without opening each one
That’s helpful when you want to re-link assets, package files, or explain to a client what’s actually inside.
8. Text formatting across multiple layers is hard to check consistently
If your template uses multiple headings, subheadings, and captions, and you want them consistent, you usually click through them one by one.

PSD Text Style Inspector
Fonts, spacing, alignment — every text detail in one report.
Why This Script Helps
When a PSD contains multiple headings, subheadings, captions, and small labels, keeping typography consistent is hard. Normally you must click each text layer manually.
This script auto-collects all text layer settings in seconds.
What The Script Extracts
- Font Family
- Font Size
- Leading (Line Spacing)
- Tracking (Letter Spacing)
- Faux Bold / Faux Italic
- Alignment (Left / Center / Right)
- Text Color (HEX)
- Text Preview (first 20–30 chars)
Sample Typography Report
TEXT STYLE REPORT
-----------------

Layer: Heading 1
Font         : Poppins-SemiBold
Size         : 64 px
Leading      : 72 px
Tracking     : 0
Caps         : Normal
Alignment    : Center
Faux Bold    : No
Faux Italic  : No
Color        : #1A1A1A
Preview      : "THE GRAND WEDDING"

Layer: Subtitle
Font         : Poppins-Regular
Size         : 28 px
Leading      : 36 px
Tracking     : 10
Caps         : Normal
Alignment    : Center
Faux Bold    : No
Color        : #C39A63
Preview      : "Save the date —"

Layer: Small Caption
Font         : Shree-Dev7-0715
Size         : 18 px
Tracking     : 0
Alignment    : Left
Color        : #5C5C5C
Preview      : "Venue: Dream Palace"
Why Designers Love This
- Ensure consistent typography across templates
- Quickly rebuild styles in Figma or CSS
- Audit a PSD made by someone else
- Perfect for preparing files for sale
Perfect if you’re documenting a template, maintaining brand typography, or checking if someone broke your style guide.
9. Mask inspection is awkward in native Photoshop
The script also inspects:

PSD Mask Inspector
Layer masks, vector masks, density, feather — fully revealed.
Why Mask Details Matter
A PSD may contain complex masking: soft fades, clipped textures, hidden shapes, or subtle feathering. Checking them one-by-one inside Photoshop takes too long — this inspector makes the process instant.
What The Script Inspects
- Layer Mask (enabled/disabled)
- Vector Mask (enabled/disabled)
- Mask Active Status
- Mask Feather (pixels)
- Mask Density (%)
Sample Mask Report
MASK REPORT — Wedding.psd
-------------------------

Layer: Main Image
Layer Mask     : Enabled
Density        : 78%
Feather        : 12 px
Vector Mask    : Disabled

Layer: Golden Border
Layer Mask     : None
Vector Mask    : Enabled
Density        : 100%
Feather        : 0 px

Layer: Decorative Overlay
Layer Mask     : Enabled
Density        : 45%
Feather        : 22 px
Vector Mask    : None

SCAN COMPLETE: 3 masked layers
Why It’s Useful
- Reveal invisible fades and blends instantly
- Perfect for PSD auditing and packaging
- Find hidden vector masks quickly
- Understand masking without opening inspector panels
So if you’re debugging why something fades weirdly or prints strangely, you have a quick summary instead of guessing.
10. No true “PSD summary” exists inside Photoshop
There’s no native summary that tells you:

PSD File Info Inspector
Everything Photoshop hides across multiple panels — in one clean report.
Why This Script Exists
Photoshop shows file info in scattered dialogs. There’s no single summary panel for:
- Dimensions
- Resolution
- Bit depth
- Color profile
- Channels + alpha channels
- File size
- Metadata
This inspector script gathers all file-level properties and presents them in a clean, readable report.
What The Script Reports
- Canvas dimensions (width × height)
- Resolution (DPI)
- Bit depth (8 / 16 / 32-bit)
- Color profile (sRGB, Adobe RGB, CMYK…)
- Channels + Alpha channels
- File size (MB)
- Metadata (author, creation date, software)
Sample File Info Report
FILE INFO REPORT — Royal_Invite.psd
-----------------------------------

Dimensions     : 3500 × 5000 px
Resolution     : 300 DPI
Bit Depth      : 16-bit
Color Profile  : Adobe RGB (1998)
Channels       : R, G, B
Alpha Channels : 1
File Size      : 227 MB

METADATA
Author         : Roshan Kumar
Created On     : 2025-02-18
Modified On    : 2025-02-23
Software       : Adobe Photoshop 2024
Copyright      : PiximFix

SCAN COMPLETE.
Why It’s Useful
- Perfect for PSD auditing and template preparation
- Ensures correct print dimensions and color profiles
- Helps validate client files before editing
- Essential for professional file packaging
The PSD-Inspector Script takes all of that and puts it right at the top of the report as a clean technical summary.
In short, this script takes all the annoying, click-heavy, error-prone inspection work and compresses it into one TXT file on your desktop.
If that matches your daily struggle, you’re exactly the kind of person I built this for.
Who this Photoshop PSD-Inspector Script is really for
This isn’t a gimmick script you run once and forget. It’s built for people who live inside PSD files and actually care about structure, fonts, and real-world delivery.
Let me break down who will get the most value from it.
1. Graphic designers working with complex PSDs
If you regularly open:
- Client PSDs
- Downloaded templates
- Old project files you barely remember
…this script will feel like a relief.
You can:
- See all fonts used, in one place
- Get a text preview for each editable layer
- Check if a design is mostly text, shapes, or raster images
- Scan layer styles instead of clicking each one
It’s perfect when a client sends you a 300 MB PSD and writes:
“Just make a few small changes.” 🙂
2. Template creators (Envato, Creative Market, PiximFix, etc.)
If you sell PSD templates, this script doubles as your quality-check tool.
You can use it to:
- Confirm that important text is actually editable (not flattened)
- Detect missing or unexpected fonts before you ship the file
- See if you’ve accidentally left random hidden layers inside
- Ensure that your color usage is consistent
You can even copy parts of the report into your product description:
- Fonts used section
- Color palette summary
- Basic tech specs (size, resolution, mode)
That makes your product page look more professional and reduces support questions later.
3. UI/UX designers dealing with huge layout files
If you handle big UI files with artboards and tons of elements, this script helps you:
- Audit typography across multiple text layers
- Spot layers that are clipped or locked
- Understand which parts are smart objects vs flat pixels
- Extract a usable color palette from text, shapes, and FX
It’s also great when you inherit someone else’s UI PSD and need to understand their structure before converting to Figma or a design system.
4. Photoshop teachers, mentors, and course creators
If you teach Photoshop or run design tutorials, this script becomes a teaching tool.
You can:
- Show students how a real-world PSD is structured
- Explain the difference between text layers, shape layers, smart objects, and adjustments
- Demonstrate how layer styles are built (shadow, glow, stroke values)
- Walk them through masks, bit depth, color mode, and profiles using a real report
Instead of only screen-sharing the layers panel, you can scroll through a clean text report during lessons.
5. Developers working on PSD → HTML / app conversions
If your job is to turn PSDs into:
- HTML/CSS
- React components
- Mobile interfaces
- UI kits in another tool
This script gives you:
- Exact layer bounds (x, y, width, height in pixels)
- Colors in HEX
- Fonts used
- Text content previews
- A map of which layers are actually involved in the layout
So instead of constantly alt-tabbing between Photoshop and your editor, you can keep the TXT report open as a reference.
6. Agencies, studios, and freelancers handling client PSDs
If your workflow includes PSD handoffs from multiple designers or freelancers, the script helps you:
- Quickly understand someone else’s file
- Check if they followed your naming and grouping conventions
- Spot unnecessary hidden layers
- Confirm that smart objects are embedded or linked properly
It also helps when you need to audit a file before final delivery or archiving.
7. Print and pre-press professionals
If you prepare artwork for print, you’ll appreciate the top part of the report the most.
You can quickly verify:
- Resolution (e.g., 300 ppi)
- Dimensions in pixels
- Color mode (RGB / CMYK / others)
- Bit depth
- Color profile
- Channel count and alpha channels
It helps reduce surprises when something from a designer lands in your inbox and you need to know if it’s even suitable for printing.
Short version: who benefits?
- Designers
- Template sellers
- Agencies
- Developers
- Teachers
- Pre-press technicians
- Anyone who opens PSD files for serious work
If PSDs are part of your income, this script will save you time and protect you from mistakes.
What this PSD-Inspector Script Actually Does (Feature Breakdown)
This is the part I enjoy talking about because the script genuinely behaves like an X-ray scanner for PSD files. You run it once, and Photoshop instantly hands you a full report — clean, organized, and ready to read like a diagnostic sheet.
Let me walk you through everything it extracts.
🟦 1. Full PSD Summary (Technical Specs)
Right at the top of the report, you get the essential details:
- Document name
- Canvas size (px)
- Resolution (ppi)
- Color mode
- Bit depth
- Total channels
- Whether alpha channels exist
- Color profile
- File path (if saved)
- Approx file size
This is extremely helpful when you’re preparing print files, checking template requirements, or confirming whether a PSD meets platform guidelines.
🟩 2. Document Metadata (Hidden Photoshop Info)
Photoshop stores hidden metadata inside every document, but you normally never see it.
The script extracts things like:
- Author
- Copyright
- Caption
- Creation timestamp
- Modification timestamp
Good for documentation, client handovers, or template publishing.
🟧 3. Layer Statistics (Document Structure Overview)
Before diving into individual layers, the script shows a quick summary:
- Total art layers
- Total groups
- Total layers including sets
- Editable text layers
- Smart object layers
- Shape layers
- Adjustment layers
- Visible layers
- Hidden layers
- Locked layers
- Clipped layers
This is the “health check” part of the report — it tells you if your PSD is clean or messy.
🟥 4. Complete Fonts Report (Every Font Used)
Found across the entire PSD:
- Font family
- Font style
- Font count
- Which layers use which fonts
This is especially useful if:
- You sell templates
- A client needs missing fonts
- You want consistency across designs
- You’re preparing a documentation file
Photoshop cannot show this list natively — this script does.
🟪 5. Editable Text Layer Breakdown
Each editable text layer includes:
- Layer path
- Visibility
- Locked/unlocked
- Font name
- Size (pt)
- Line spacing / leading
- Tracking
- Caps style
- Alignment
- Faux bold / faux italic
- Color (HEX)
- Actual text preview
This is gold for developers converting PSD → HTML or for designers checking typography consistency.
🟨 6. Color Palette Extraction
The script extracts colors from:
- Text
- Shape fills
- Strokes
- Glow effects
- Shadows
- Color Overlays
- Gradient stops
Then it generates a deduplicated HEX color list with usage count and source layers.
No more guessing color codes manually.
🟫 7. Full Layer Hierarchy (Tree View)
The script prints the entire structure:
LAYER : Background
GROUP : Main Folder
LAYER : Main Folder / Title
LAYER : Main Folder / Button
GROUP : Decorations
LAYER : Decorations / Flower.png
Perfect when cleaning up a PSD or converting a design to a UI library.
🟦 8. Visual Layer Properties (Per-Layer Specs)
For each layer, you get:
- Layer type
- Visibility
- Locked state
- Blend mode
- Opacity
- Fill amount
- Bounds (x, y, width, height in px)
- Whether it’s clipped
Just scrolling this section helps you understand how the designer built the file.
🟥 9. Full Layer Styles (FX) Inspection
For each layer style, the script reveals key values:
Example:
- Stroke: size, opacity
- Drop Shadow: angle, distance, size, spread, opacity
- Outer Glow: size, range, noise, opacity
- Gradient Overlay: angle, stops, scale
- Bevel & Emboss: depth, size, softness
Instead of opening the Layer Styles window a hundred times, you get everything pre-written.
🟩 10. Smart Object Details
For every smart object, you get:
- Is it linked or embedded
- If linked → the file path
- Smart object type
- The layer kind
- Its bounds and visibility
Very handy when you need to replace linked assets or check if a designer embedded everything correctly.
🟧 11. Mask Detection
The script tells you whether each layer has:
- Layer mask
- Vector mask
- Mask feather
- Mask density
- Whether it’s enabled
This saves time when debugging why something is fading or clipping oddly.
🟪 12. Hidden / Locked / Clipped Layer Tracking
Every layer gets flagged so you can see:
- Which layers are hidden
- Which ones are clipping masks
- Which ones are locked
This is useful for cleanup and handing off clean PSD files to other designers.
🟨 13. Export Output as Clean TXT File
The script automatically creates a TXT report on your desktop.
This makes it:
- Easy to share with clients
- Easy to include as documentation
- Easy to keep as a reference during development
- Easy to attach in template downloads
You can keep the TXT file open side-by-side with Photoshop while working.
How to Install and Run the PSD-Inspector Script (Beginner-Friendly Steps)
Even though the script is powerful, running it is very simple.
If you’ve never used Photoshop scripts before, don’t worry — these are the exact steps I personally follow while testing my scripts on PiximFix.
Let’s walk through it slowly and cleanly.
🟦 Step 1 — Download the Script File
You’ll get the .jsx file in the download section below.
Save it anywhere you like — Desktop, Documents, a “Scripts” folder — anything is fine.
(If you prefer keeping things organized, create a folder called PiximFix Scripts.)
🟩 Step 2 — Open Photoshop and Load Any PSD File
The script works only when a document is open.
So:
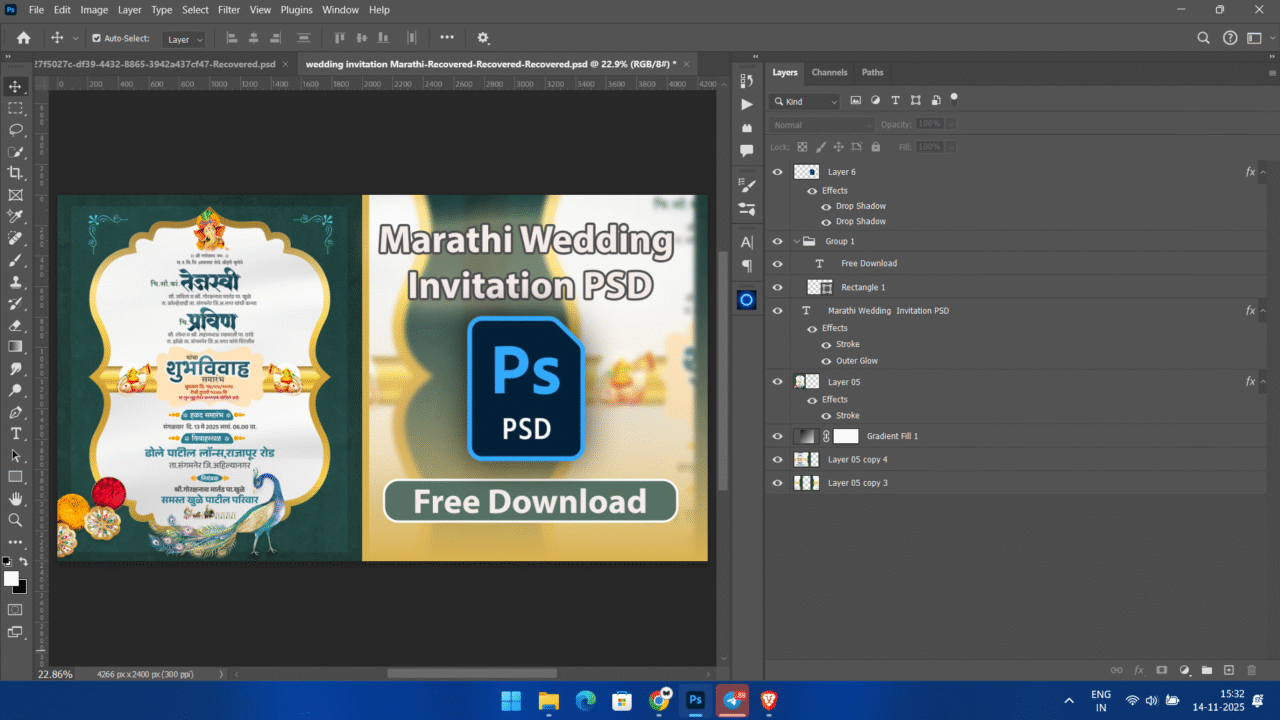
- Launch Photoshop
- Open the PSD you want to inspect
- Make sure it’s active
Doesn’t matter if your PSD is small, big, messy, clean — the script handles everything.
🟧 Step 3 — Run the Script Inside Photoshop
Now go to:
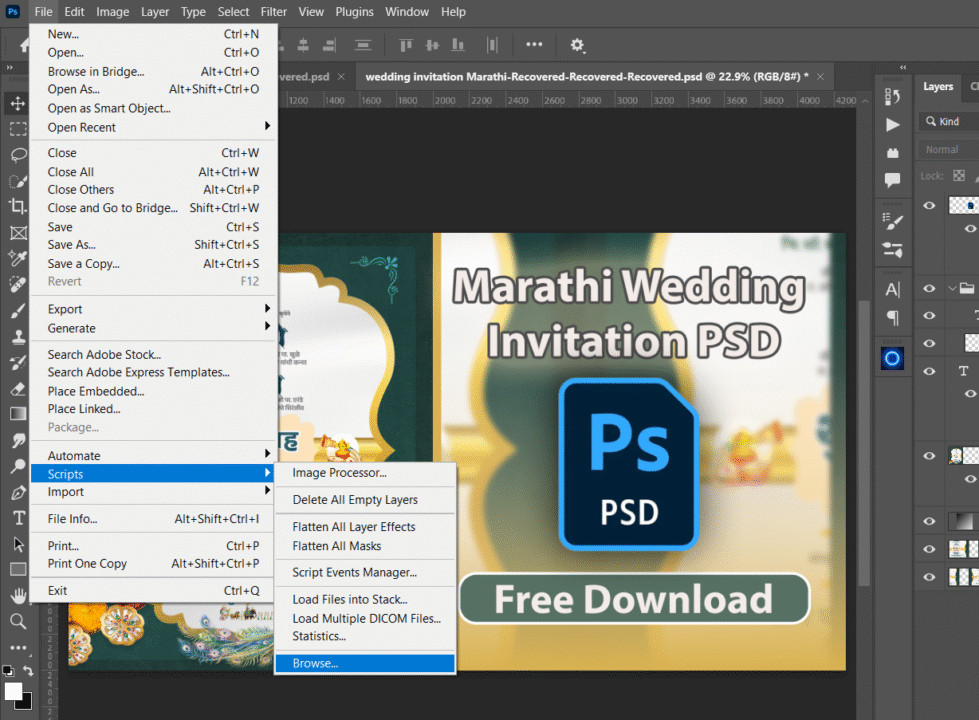
File → Scripts → Browse…
A file dialog will appear.
Select the downloaded .jsx file and hit Open.
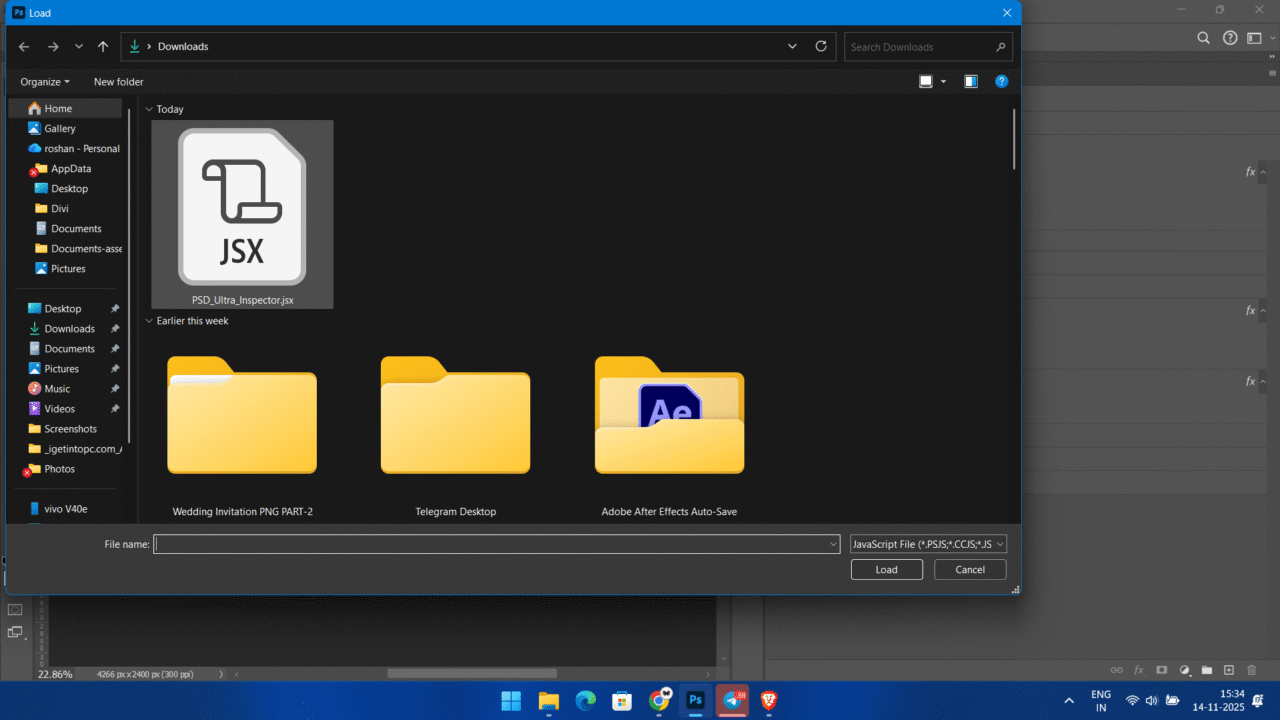
Photoshop will instantly start scanning the PSD layer-by-layer.
You don’t need to touch anything — the script handles all the logic on its own.
🟥 Step 4 — Wait a Few Seconds (Depends on Your PSD Complexity)
- Small PSD → 1–2 seconds
- Medium PSD → 4–5 seconds
- Heavy multi-group template → 10–15 seconds
If your PSD is massive, Photoshop may freeze for a moment — this is normal.
It’s simply reading metadata, styles, masks, smart object details, pixel bounds, and color values.
🟪 Step 5 — Your Full PSD Report Appears on the Desktop
As soon as the scan is complete, the script creates a text report:

📄 PSD-ULTRA-REPORT.txt
Inside you’ll find everything:
- Fonts
- Colors
- Layer styles
- Text previews
- Masks
- Smart objects
- Hierarchy
- Document metadata
- Tech specs
- And every other detail we talked about earlier
I always keep this TXT file open next to Photoshop while working.
It feels like having a personal assistant telling you everything inside the PSD.
🟨 Step 6 — Read, Save, or Share the Report
You can:
- Save it
- Share it with clients
- Attach it to your template download
- Use it as documentation
- Compare before/after versions of a PSD
It’s your clean, human-readable “X-ray scan” of the file.
How I Personally Use This PSD-Inspector Script (Real-World Workflow)
Let me show you where this script actually earns its place in a real workflow.
These are the exact situations where I run it without thinking twice.
🧪 Example 1 — Checking a Wedding Invitation PSD Before Publishing
I used this script on the “Royal Indian Wedding Invitation” PSD you saw earlier.
Here’s what I wanted to know quickly:
- Is the main heading text editable?
- Which font is used?
- What color is used for the title and subtitle?
- How is the glow and border around the title created?
- Is there any hidden junk layer inside?
The report told me:
- Fonts Used →
MyriadPro-Boldonly - Two editable text layers:
- Main title
- “Free Download” label
- Both using the same cream color →
#F4ECE9 - Main title has:
- Outer Glow → size 226 px, opacity 34%
- Stroke → 15 px, opacity 100%
- A smart object layer is used for the background artwork
- No hidden layers, no masks, no adjustment layers
This helped me:
- Confirm the headline is fully editable
- Write accurate specs and font info on the blog
- Describe the visual look (glow + stroke) in words
- Know that the template is clean enough to share
If I had to do that manually, I’d be clicking for at least 10–15 minutes.
The script did it in a few seconds.
🧪 Example 2 — Inspecting a Client’s Messy PSD
When a client sends a PSD that someone else designed, this is my usual process:
- I open the PSD
- I run the PSD-Inspector Script
- I read the report before touching the design
From the TXT report, I can see:
- How many text layers exist
- Whether any text is still rasterized
- How many smart objects are inside
- Whether there are any hidden layers that might still affect export
- If some layers are clipped or locked
- If the fonts used match the brand fonts they told me about
That way I can respond confidently:
“Your file uses
MontserratandPoppins, and your main headings are editable.
Two layers are flattened, so I can’t change that text unless we rebuild it.”
Clients trust you more when you speak based on data, not assumptions.
This script gives you that data.
🧪 Example 3 — Creating Documentation for a PSD Template
If I’m preparing a template for PiximFix or any other marketplace, I want the product page to feel complete.
So I use parts of the report as documentation:
- Fonts Used → I copy the font list into the “Fonts” section
- Color Palette → I pick 3–6 main colors and show them as swatches
- Tech Specs → Size, Resolution, Color Mode, Bit Depth
- Editable Text Info → I mention which areas are editable vs baked into the background
This not only makes the product listing stronger, but also reduces support mail like:
- “Which font is this?”
- “Why can’t I edit that text?”
- “Is this CMYK or RGB?”
One script run helps you answer all of those before someone even asks.
🧪 Example 4 — Converting a Design into Web Layout
If I’m planning to turn a PSD into a web layout or a WordPress section, I need:
- Exact colors in HEX
- Font sizes for headings and subheadings
- Spacing and layout bounds (x, y, width, height)
- Information about shadows and glows for CSS translation
From the report, I can pick:
- Title → font size, color, glow, shadow, stroke
- Button → rectangle layer bounds + text formatting
- Background elements → which are shapes, which are raster images
Then I build the layout in CSS/HTML or Elementor with confidence because I’m copying actual values, not eyeballing them.
🧪 Example 5 — Teaching Someone How a PSD Is Built
If I’m guiding a beginner or teammate, I might:
- Open the PSD
- Run the script
- Share the TXT report on screen
Then I go layer by layer:
- “Here’s the background smart object.”
- “Here’s the rectangle that acts as a button.”
- “These are the only two editable text layers.”
- “These are the colors used throughout the design.”
- “Here’s what layer styles are active on the title.”
The report becomes a teaching aid.
Instead of just saying “this PSD has many layers,” I can show them exactly how it is built.
For me, that’s the real power of this script.
It doesn’t just show off technical data — it makes real work easier:
- Cleaning files
- Selling templates
- Building layouts
- Teaching others
- Avoiding silly mistakes
Safety, Limitations & Best Practices (So You Use the Script Confidently)
I always try to build tools that are safe, predictable, and beginner-friendly. This PSD-Inspector script also follows that same mindset. Let me walk you through the parts that matter in real work — not in theory.
🟢 Safety: What the Script Never Touches
The script is 100% read-only.
It does not:
- change layers
- edit text
- modify colors
- apply styles
- save the PSD
- duplicate anything
- remove anything
- rasterize anything
All it does is scan the document and extract information.
You can run it on your client’s original PSD without worrying about corruption or accidental edits.
Think of it like “Open → Read → Report → Exit”.
🟡 Performance Considerations (Large PSD Files)
The script can handle:
- Heavy artworks
- Template bundles
- UI/UX PSDs with hundreds of layers
- Wedding invitations
- Multi-page layouts
But here’s the natural behavior you should expect:
Small PSDs
Ideal for lightweight designs, icons, thumbnails, logos.
Feels instant — perfect workflow experience.
Medium PSDs
Standard templates, posters, banners, invite designs.
Smooth and predictable performance.
Large PSDs
Heavy files: 300MB+, 500+ layers, complex effects.
The script doesn’t “hang” Photoshop — it’s just reading data that Adobe normally hides deep inside.
🔵 Limitations (Honest & Realistic)
Even though the script is extremely detailed, Photoshop still has a few internal restrictions:
1. Some gradient details are limited
Photoshop scripting API doesn’t expose:
- Exact gradient stops with position
- Intermediate color transitions
- Layer effects with multi-stop overlays (rare but possible)
You still get:
- Gradient angle
- Scale
- Style
- Type
…just not the full stop map.
2. Smart Object layer type names vary
Embedded vs Linked → works perfectly
But internal “placedLayer” subtypes aren’t always readable.
3. No previews for raster images
You’ll see:
- Bounds
- Blend mode
- Visibility
- FX
…but not a rendered thumbnail.
Photoshop doesn’t allow scripting access to thumbnails for security reasons.
4. Some masks don’t expose feather values
Older PSDs or masks imported from Illustrator sometimes don’t return numeric values.
The script still reports:
- Whether a mask exists
- If it’s enabled
- Mask density
- Mask type
5. Adjustment layers don’t expose detailed settings
You’ll know:
- Which adjustment layers exist
- Their names
- Their visibility
—but not the exact curve points, hue shifts, or level thresholds.
This is a Photoshop limitation, not a script limitation.
🟣 Best Practices for Smooth Usage
Here are a few simple things I personally follow:
PSD Workflow Optimizer
Everything you should do before scanning your PSD.
Save the PSD before running
Unsaved PSDs return “Unknown” file size.
Close heavy PSDs
Multiple large files slow down scanning performance.
Keep TXT report open
Quick access to fonts, colors & spacing while editing.
Attach report for clients
Professional documentation reduces questions.
Unlock layers before rescanning
Locked layers may hide FX and color values.
RECOMMENDED WORKFLOW
-------------------------
✔ Save PSD
✔ Close heavy files
✔ Keep TXT open
✔ Attach report to client
✔ Unlock layers before scan
-------------------------
Download the PSD-Inspector Script (ZIP Package)
To keep things clean and user-friendly, I’m not pasting the full code inside this blog post. Instead, you’ll get it as a ready-to-use ZIP file — just download, unzip, and run.
🗂 What You Get Inside the ZIP
Your ZIP will contain:
PSD_Ultra_Inspector.jsx
This is the main script file you’ll run inside Photoshop.
You don’t need to install any plugin, extension, or external app.
It’s just one .jsx file that runs directly inside Photoshop.
📦 How to Use the ZIP (Quick Recap)
- Download the ZIP from the button/link below.
- Extract it anywhere on your system
- For example: Desktop →
PiximFix Scriptsfolder
- For example: Desktop →
- Open Photoshop
- Open the PSD you want to inspect
- Go to: File → Scripts → Browse…
- Select
PSD_Ultra_Inspector.jsx - Let it run → your full PSD report will appear as a TXT file on your desktop.
Frequently Asked Questions (FAQ)
These are the questions people usually ask me whenever I share a Photoshop script.
I’ve answered everything in a straightforward way so you know exactly what to expect before downloading.
Q1. Will this script modify or damage my PSD?
No.
The script is completely read-only.
It doesn’t edit, remove, rename, flatten, or save anything.
It only scans the file and creates a text report.
Q2. Do I need to install anything in Photoshop?
Nothing at all.
Just run the .jsx file through:
File → Scripts → Browse…
Q3. Which Photoshop versions does it support?
Anything that supports .jsx scripting:
- Photoshop CS6
- Photoshop CC (all versions)
- Photoshop 2020 / 2021 / 2022 / 2023 / 2024
If Photoshop can run a JSX script, this will work.
Q4. Is this script useful for beginners?
Yes, very.
If you don’t understand layers, masks, or smart objects properly, the report becomes a learning guide.
It explains what your PSD is made of without overwhelming you.
Q5. Will this help me find missing fonts in a PSD?
Absolutely.
It lists every font used in editable text layers.
If a PSD is using a font you don’t have installed, the report helps you identify it immediately.
Q6. Can it detect hidden or clipped layers?
Yes.
The script flags:
- Hidden layers
- Locked layers
- Clipping masks
- Visible/non-visible states
Ideal for cleaning messy PSDs.
Q7. Does it extract colors automatically?
Yes.
You get a clean “Color Palette” section which includes:
- Text colors
- Shape fill colors
- Layer FX colors
- Usage count
- Where each color appears
This saves a lot of manual picking with the eyedropper.
Q8. Can I include the TXT report in my template files?
Definitely.
Most template marketplaces love clean documentation.
You can add the generated TXT report as part of your product ZIP file to help customers.
Q9. Does it support CMYK or print-based PSDs?
Yes.
The report shows:
- Color mode
- Bit depth
- Resolution
- Channels
- Profile (if available)
So whether your file is RGB or CMYK, you’ll get a proper technical summary.
Q10. Can I modify the script for my own needs?
Yes.
Feel free to tweak:
- What data it reports
- How the text file is formatted
- Which sections appear
The script is clean and commented, so editing it is simple.
Q11. Where will the final TXT report be saved?
Automatically on your Desktop.
You don’t need to choose a folder — the script handles it.
Q12. Can this script detect if text is rasterized?
Yes.
Only true editable text layers appear in the “Editable Text Layers” section.
Rasterized text will show up as normal art layers, not text layers.
Q13. Does it support huge PSDs?
Yes, but large PSDs may take a few seconds to scan.
Photoshop may freeze briefly during the scan — this is normal.
Q14. Can I share this script with my students or team?
Of course.
Feel free to distribute it.
It’s made for designers, teachers, developers, and teams who want cleaner workflows.


