How To Create Lightning Power Effect In Photoshop


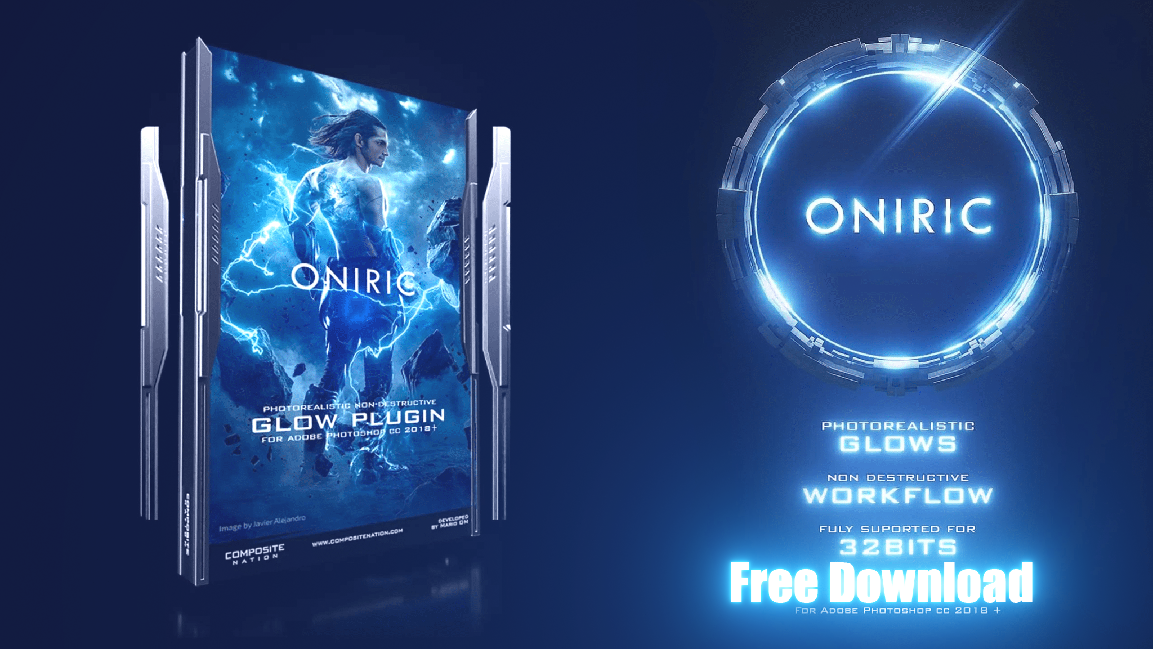
In today’s lesson, I will demonstrate how to create a lightning effect by utilising a Photoshop action on your computer called Lightning Power. It is possible to make your photographs appear as though they were taken by a professional photographer by using this Photoshop feature. Utilising strong techniques, it is possible to give your photographs an electric appearance with just a few clicks of the mouse.
It is possible to add lighting effects to your photographs in a variety of methods; however, for the purpose of expediency, we will adhere to the most straightforward method, which is to use a Photoshop action. Before we start, please take a moment to familiarise yourself with the tasks that may be done in Photoshop.
What is Photoshop action
Actions are one of the most powerful tools in Photoshop, and you might be losing out on using them. To put it another way, a Photoshop action is a collection of actions that may be saved and used repeatedly on a photo while it is being modified. These actions can be used to edit the photo. It is possible to utilise actions to edit multiple files at the same time, save multiple files at the same time, or perform virtually any other job that can be simplified by recording it and performing it repeatedly from time to time.
The term “actions” can refer to a series of procedures that enable you to complete tasks that cannot be written down, such as “using a painting tool.” Modal controls are another option that may be added to actions. These controls allow you to enter values into a box while the action is being played.
In Photoshop, droplets are miniature applications that are capable of managing any files that are dragged into their workspace window. They are constructed to be built upon activities.
Both Photoshop and Illustrator come equipped with a comprehensive set of actions that can assist you in completing basic tasks. You are free to utilise these methods in their current form, modify them to meet your requirements, or come up with your own. In order to make it simpler for you to plan your moves, they are distributed in groups.
With the help of Action Sets, you may record, edit, and customise a large number of tasks simultaneously. Action groups are another option that you have.
Panel overview

You can get to the action panel by going to the window menu and selecting “action” from the drop-down menu. In the action panel, you can record, play, change, and delete actions. You can also save and load your own action files from this panel.
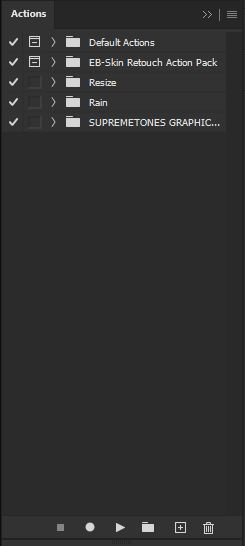
Select the set, action, or order and click the triangle to the left of it in the Actions panel. Alt-click (Windows) or Option-click (Mac OS) the triangle to show or hide all the actions in a set or all the orders in an action.
How to install the action
- From the bottom of the page, you will find a “download button” for the action file in zip format, which you have to download and extract.
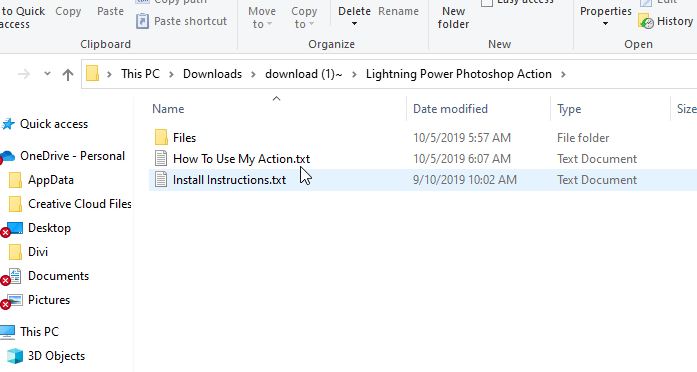
- inside the folder, you will get another folder called file, open it.
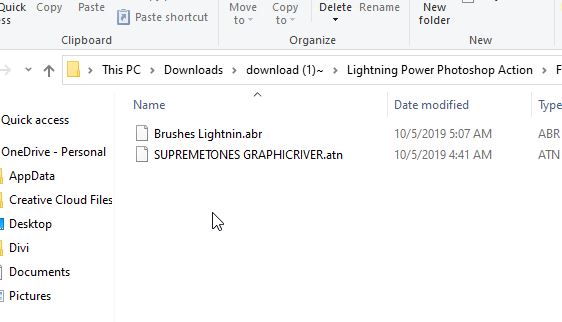
- Here you’ll find the action and the brush that will help you create the lighting effect.
You must now install both of them in the brush panel and the action panel one by one. Let’s start by installing the brushes. To do so,
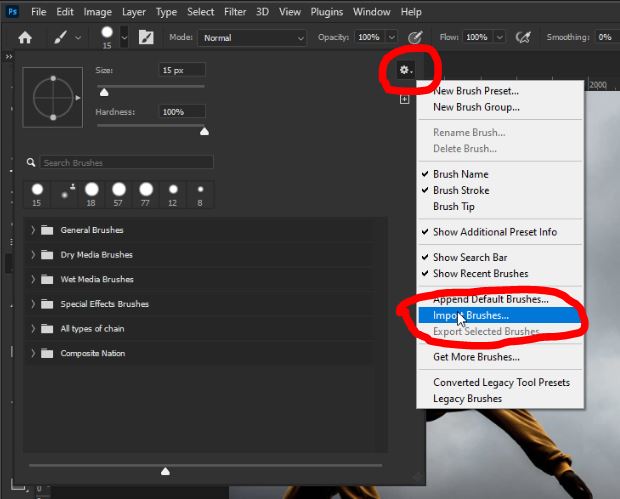
- open the photoshop, and go to the “brush panel”. then click on the “gear icon” and select the “import brushes” option.
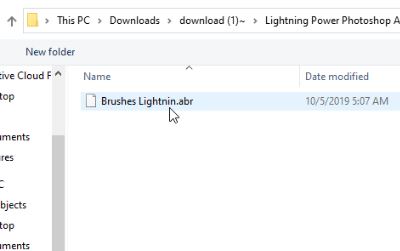
- locate the brushes
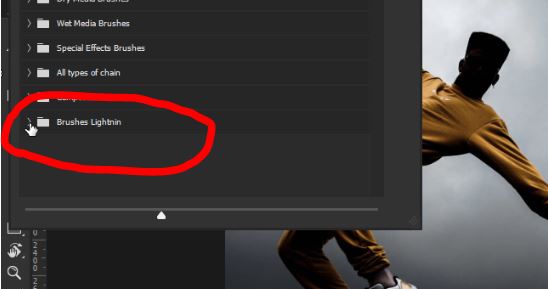
- Once you’ve located the brushes, simply click on them to see them appear in the “Brushes panel”.
Similarly, you can put the action in place.
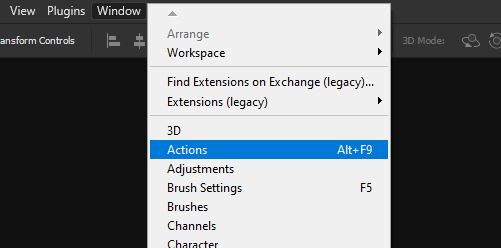
You can access the action panel by going to “Window” and selecting “Action”.
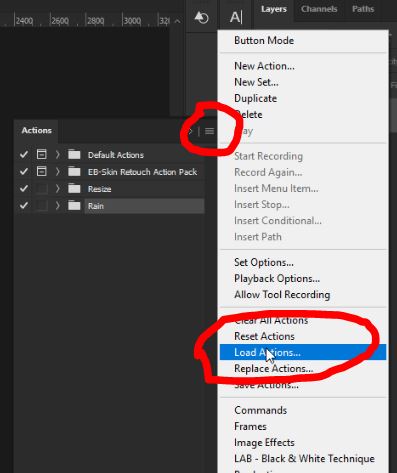
- When the action panel is open, click on the “three lines” to bring up a menu of options. now Simply choose “load actions”.
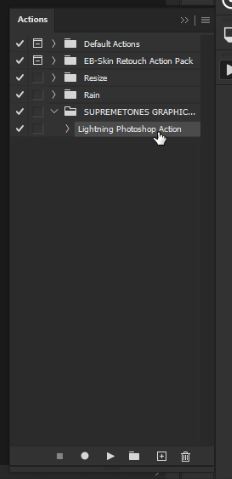
- then locate the action
requirements
To use this action, you must meet the following requirements:
- Your photo is in RGB color mode
- Your photo is in 8bit color mode
- Your photo must be at least 3000 pixels in size.
how to use Lightning Power action
Now let’s look at how to use this action to add lighting effects to your images.
- open the image you want to work with.
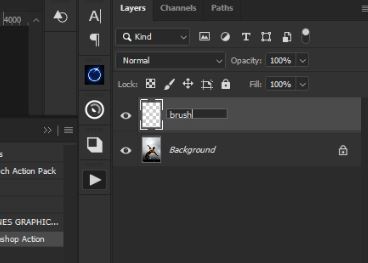
- Make a new layer and name it “brush”.
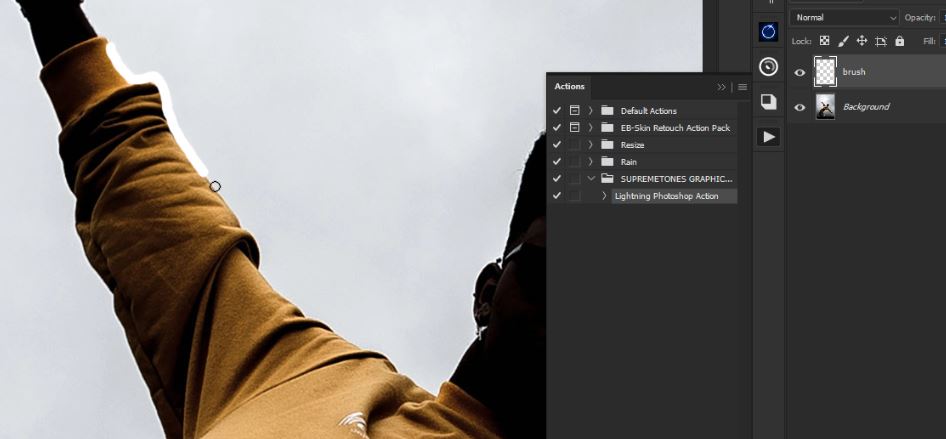
- Then, using a “soft round brush”, drag it over the area where you want lightning to appear.
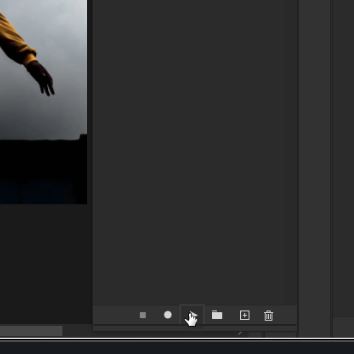
- Now press the “play button” to begin the action! and “wait” until it is finished
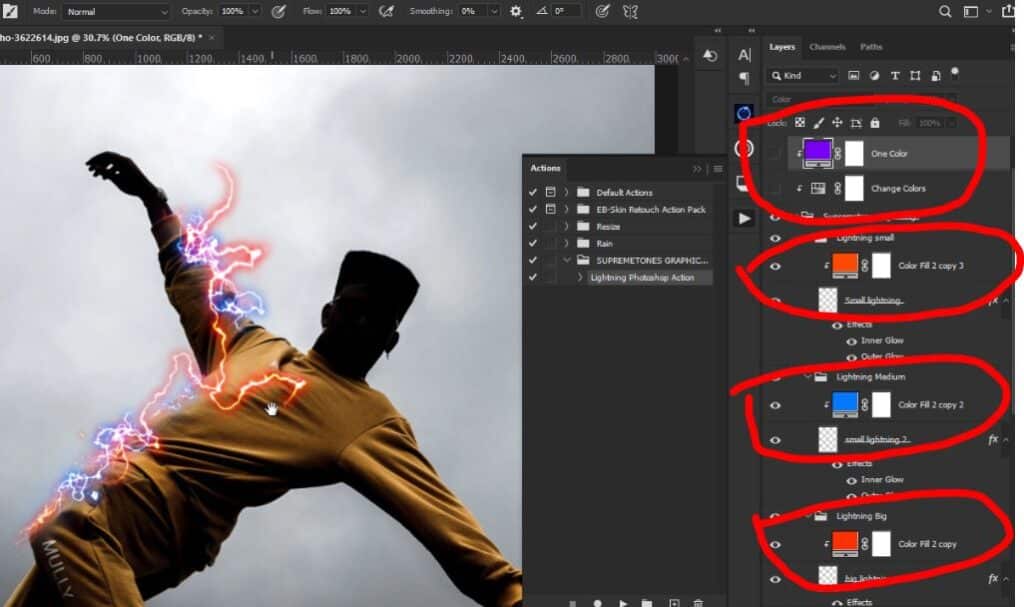
- Once the processing is complete, you can customize the lighting colours by simply changing the colours of these solid color adjustment layers.
and that’s how you can quickly add a lighting effect to your photographs. You can achieve similar effect to your images by applying this action


